Table of Contents
This practical guide explains how to Create a Vintage 3D Movie Effect in Photoshop through clear, ordered steps. It also covers useful settings, common mistakes, and checks that can improve the final result.
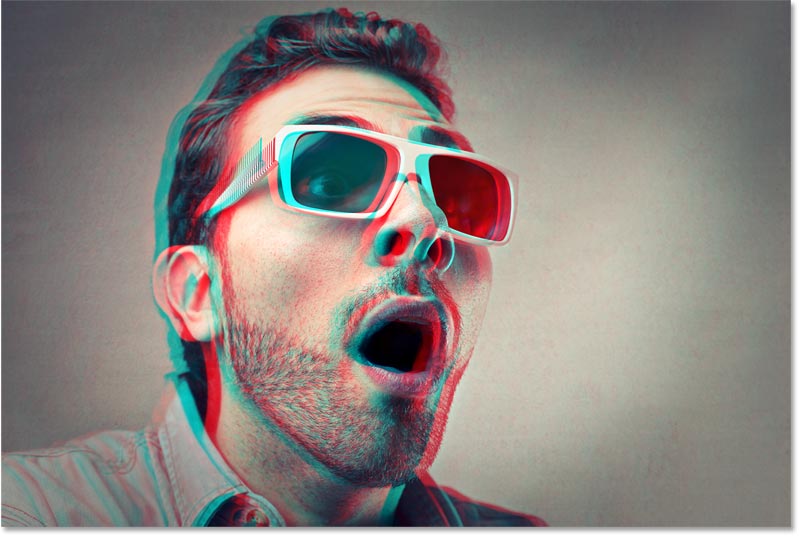
Recreate the look of classic 3D movies from the 1950s with this quick and easy Photoshop effect! The following step-by-step instructions are for Photoshop 2023 or earlier.
Of course, since Photoshop works with flat 2D images, we're limited in what we can do. But at least we can create something that looks like it came straight out of an old 3D movie. And as we'll see, the effect is so easy to create that you can do it from start to finish in 60 seconds or less.
Step 1: Make a Copy of the Background Layer
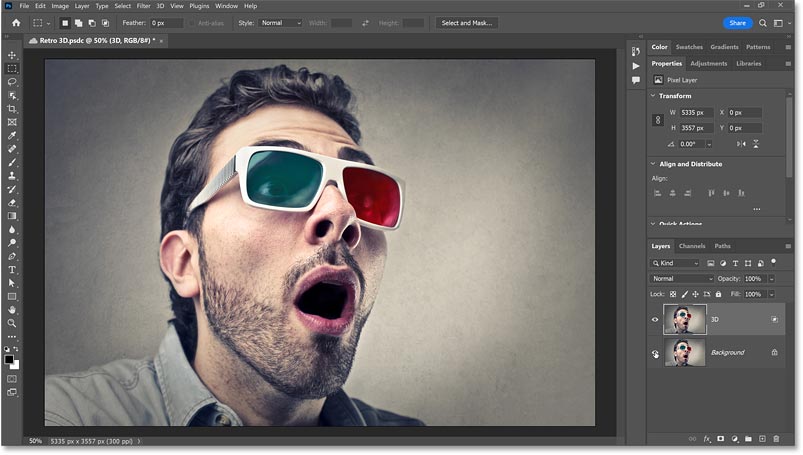
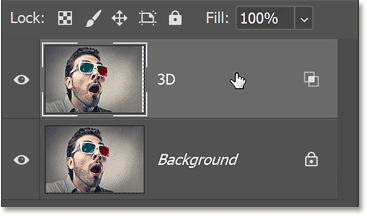
In the Layers panel, the image will appear on the Background layer:
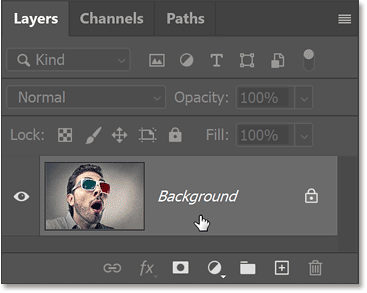
Make a copy of the Background layer by dragging it down to the New Layer Icon.
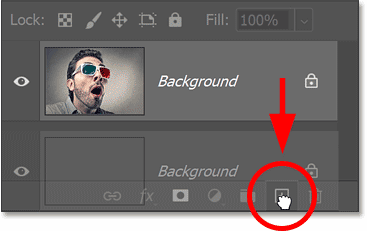
Photoshop adds a copy on top of the original.
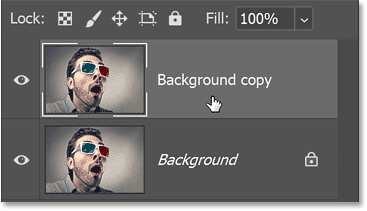
Double-click the name of the copy to highlight it.
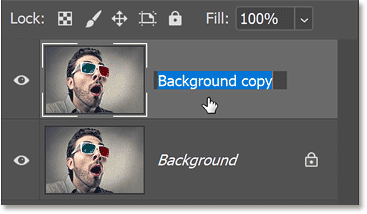
Then rename it to "3D". Press Enter On a Windows PC or Return On a Mac to accept.
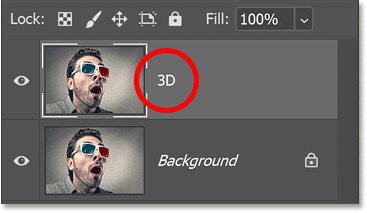
Step 2: Open Photoshop's Blending Options
Still in the Layers panel, open Photoshop's Blending Options, either by double-clicking the empty gray area of the "3D" layer or clicking the fx icon at the bottom of the Layers Panel:
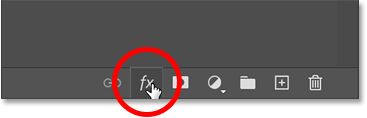
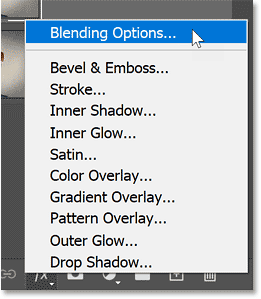
And select Blending Options from the top of the list.
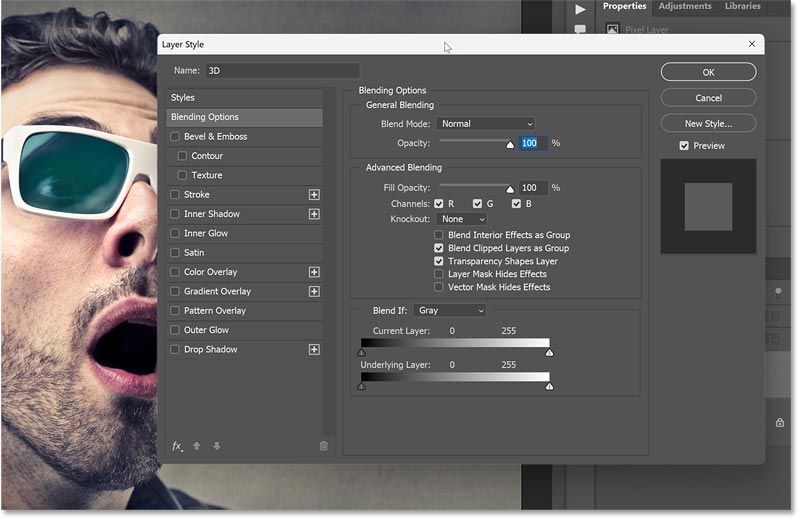
The Layer Style dialog box opens with Blending Options in the middle column.
Step 3: Turn Off the Green and Blue Color Channels
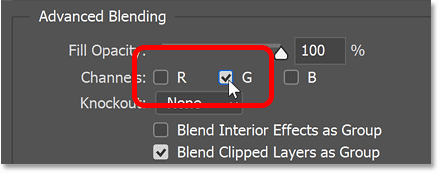
In the Advanced Blending Section, look for the R, G, and B checkboxes next to the word Channels .
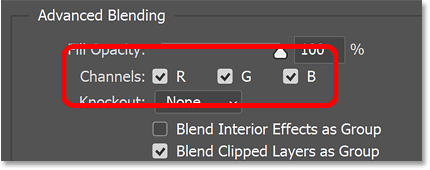
R, G, and B represent the Red, Green, and Blue color channels that Photoshop mixes together to create all the colors in the image.
Turn off the Green and Blue channels by unchecking the G and B boxes, leaving only the Red channel (R checkbox) enabled.
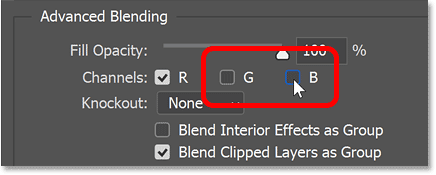
Then click OK To close the Layer Style dialog box.
Nothing will happen to the image. But if you turn off the Background layer by clicking on its visibility icon:
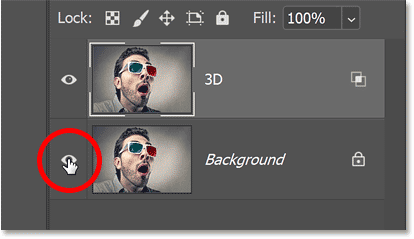
You will see that the image on the "3D" layer is now only showing red.
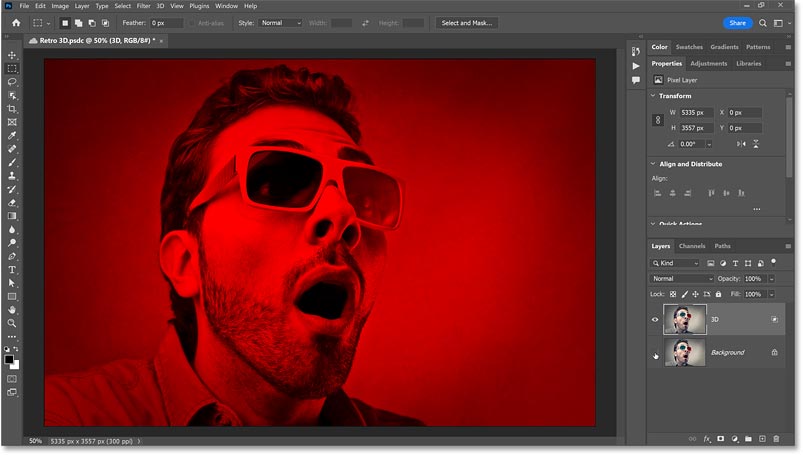
Turn the Background layer back on to return to the full color image.
Step 4: Select Move Tool
To create the red and cyan 3D effect, all we need to do now is offset the two versions of the image.
In the Layers panel, make sure the "3D" Layer is active.
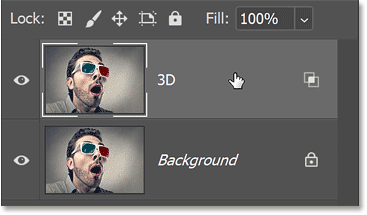
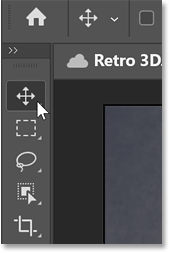
Then, in the toolbar, select The Move Tool . We won't be using the Move Tool, just make sure it works.
Step 5: Gently Push the Image to the Left
Use the left arrow key on your keyboard to nudge the image on the "3D" layer slightly to the left. Hold Shift While pressing the arrow key to nudge the image in 10 pixel increments.
As the image moves, a red border will appear along one side of each object. And since the opposite color of red is cyan, a cyan border will appear along the opposite side.
The more you offset the two images, the thicker and more pronounced the red and cyan borders will become, so keep pushing the image slightly until you're happy with the result.
Try Other Color Combinations
Along with the classic red and cyan 3D colors, you can also choose other color combinations to create various effects.
In the Layers panel, reopen Blending Options by double-clicking on the empty gray area of the "3D" layer.
Green and Magenta
Then, in the Layer Style dialog box, uncheck the R Box to turn off the Red channel and check the G Box to turn on only the Green channel.
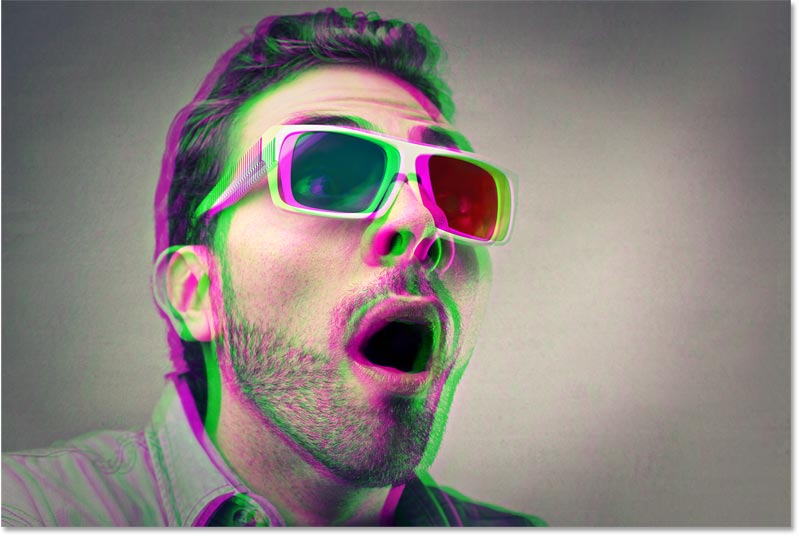
This gives you a green and magenta effect (since magenta is the opposite color of green).
Blue and Yellow
Or turn off the Green channel and only turn on the Blue channel:
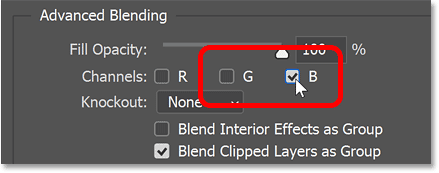
For the blue and yellow effect (yellow is the opposite of blue). To go back to the classic red and cyan, simply deselect both the Green and Blue channels, then re-enable the Red channel. Then click OK To close the Layer Style dialog box.
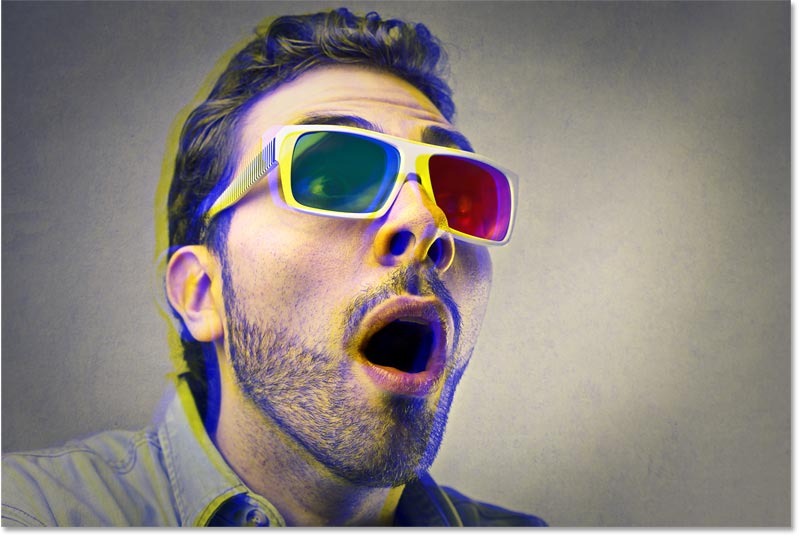
And that's it! It's easy to recreate the look of classic 3D movies in Photoshop.
FAQ
How do I Create a Vintage 3D Movie Effect in Photoshop?
Follow the steps in this guide in order, verify each setting before continuing, and check the result after every major change.
What should I prepare before I Create a Vintage 3D Movie Effect in Photoshop?
Confirm compatibility, install current updates, save important work, and back up data before changing system or application settings.
What can I do if create a Vintage 3D Movie Effect in Photoshop does not work?
Review permissions and requirements, restart the relevant device or app, repeat the steps carefully, and use official support resources when the issue continues.
Related Articles
 minutes read
 How to Create Whirlpool Effect on Photoshop: Photoshop Effects4 minutes read
 Learn How to Create a Fade Effect With Photoshop CS610 minutes read
 How to Create an Orton Effect in Photoshop4 minutes read
 How to Create Picture in Picture Effect in Photoshop13 minutes read
 How to Use Photoshop CS6 (Part 4): Create a Fading Effect9 minutes read
Reader Comments 0
Sign in with email or Google to join the discussion.