PowerPoint 2016: Working with lists in PowerPoint
To create effective PowerPoint presentations, it's important to make your slides easy to read. One of the most common ways to do this is to format your text as a bulleted or numbered list.
To create effective PowerPoint presentations, it is important to make your slides easy to read. One of the most common ways to do this is to format your text as a bulleted or numbered list. By default, when you enter text into a placeholder, a bullet is placed at the beginning of each paragraph, automatically creating a bulleted list. If you want, you can modify the list by choosing a different bullet style or by switching to a numbered list.
How to modify bullet
1. Select an existing list that you want to format.
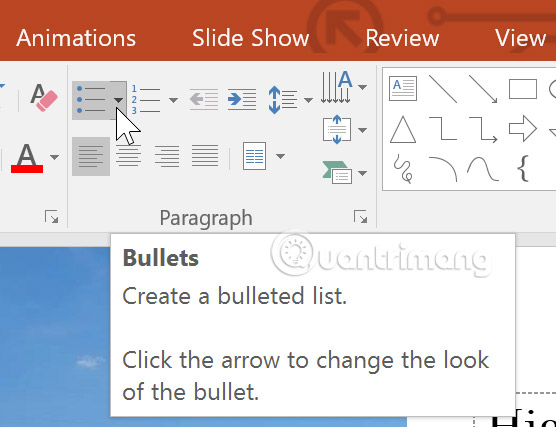
2. On the Home tab, click the Bullets drop-down arrow.

3. Select the desired bullet style from the menu that appears.

4. The selected bullet style will appear in the list.
How to modify a numbered list
1. Select an existing list that you want to format.
2. On the Home tab, click the Numbering drop-down arrow.
3. Select the desired numbering option from the menu that appears.

4. The numbering style will appear in the list.
How to change the starting number
By default, a numbered list starts at 1. However, sometimes you might want to start numbering at a different number, such as if the list is a continuation from the previous slide.
1. Select an existing numbered list.
2. On the Home tab, click the Numbering drop-down arrow.
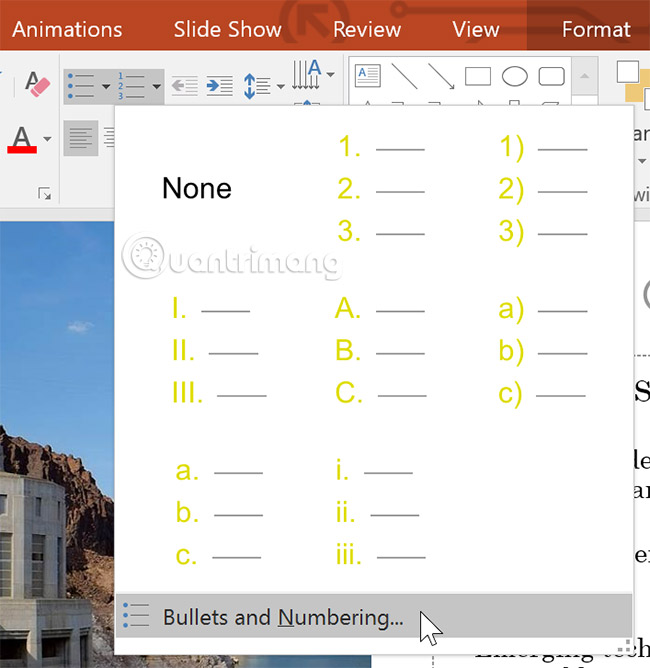
3. Select Bullets and Numbering from the menu that appears.
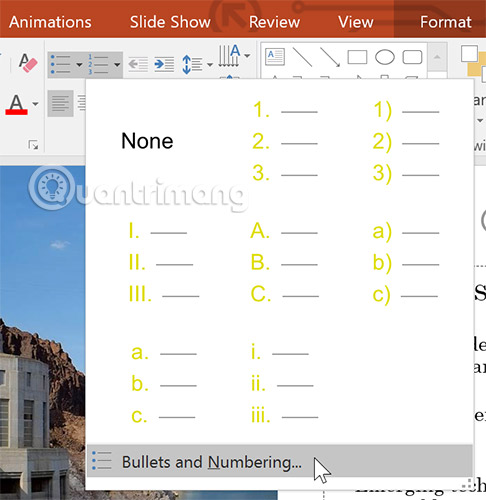
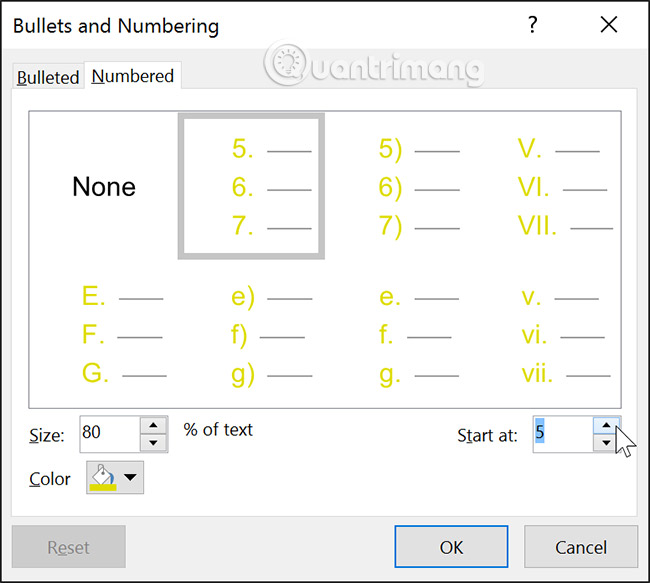
4. A dialog box will appear. In the Start At field, enter the starting number you want.
5. List numbering will change.

Change the appearance of the list
Whether you're using a bulleted or numbered list, you may want to change its appearance by adjusting the size and color of the bullets or numbers. This can make the list stand out and fit in with the look of your entire presentation.
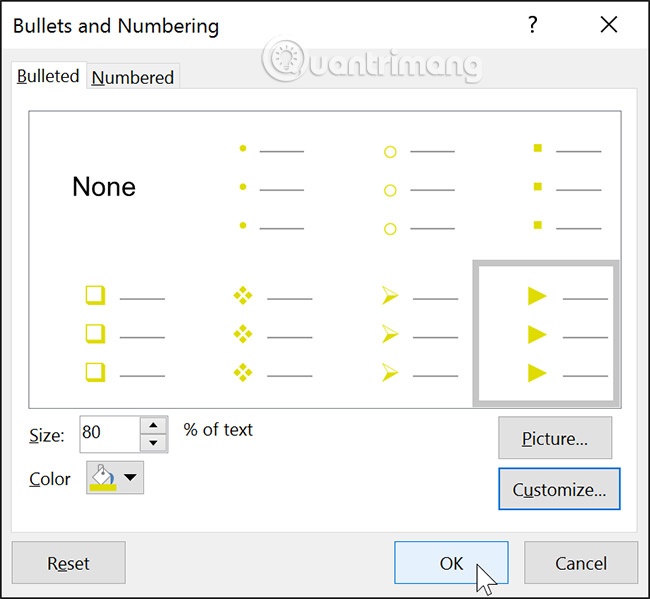
How to modify size and color
1. Select an existing bulleted list.
2. On the Home tab, click the Bullets drop-down arrow.
3. Select Bullets and Numbering from the menu that appears.

4. A dialog box will appear. In the Size field, select a size for the bullet.
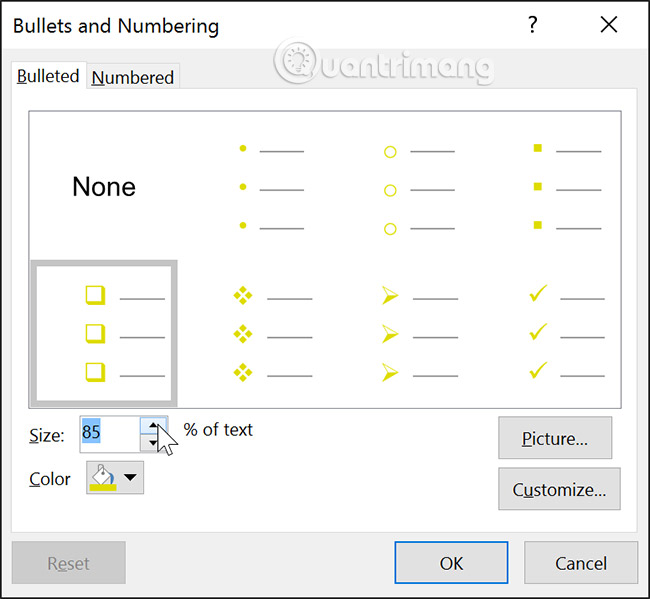
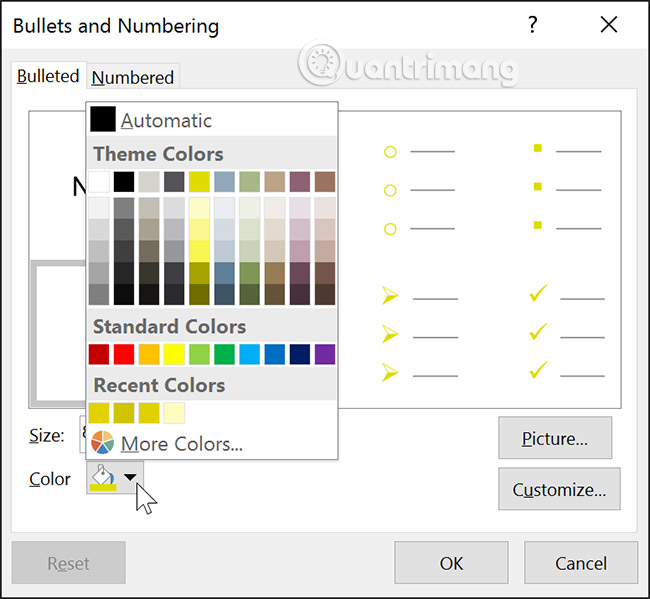
5. Click on the Color drop-down box and select your favorite color.
6. Click OK. The list will update to show the new bullet size and color.
Customize bullets
Customizing the 'look' of bullets in a list can help users emphasize certain items in a list or personalize their list design. One popular way to customize bullets is to use symbols.
How to use an icon as a bullet
1. Select an existing bulleted list.
2. On the Home tab, click the Bullets drop-down arrow.

3. Select Bullets and Numbering from the menu that appears.

4. A dialog box will appear. On the Bulleted tab, click Customize.
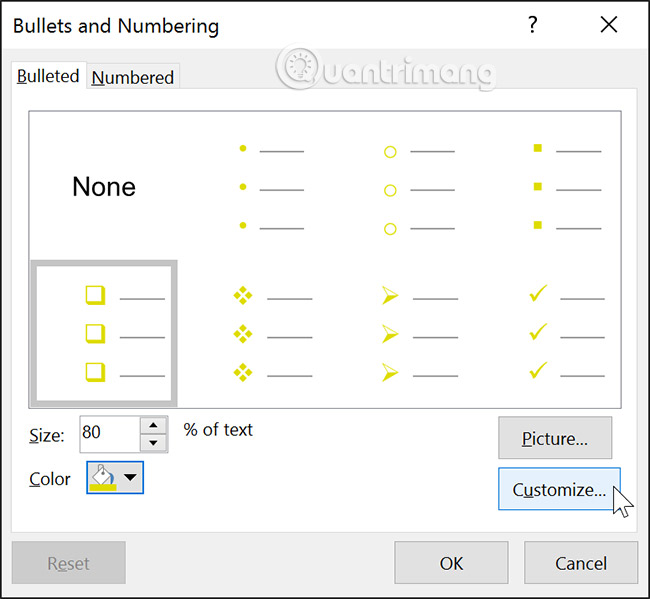
5. The Symbol dialog box will appear.
6. Click the Font drop-down box and choose a font. The Wingdings and Symbol fonts are good choices as they have a lot of useful symbols.
7. Select the desired icon.
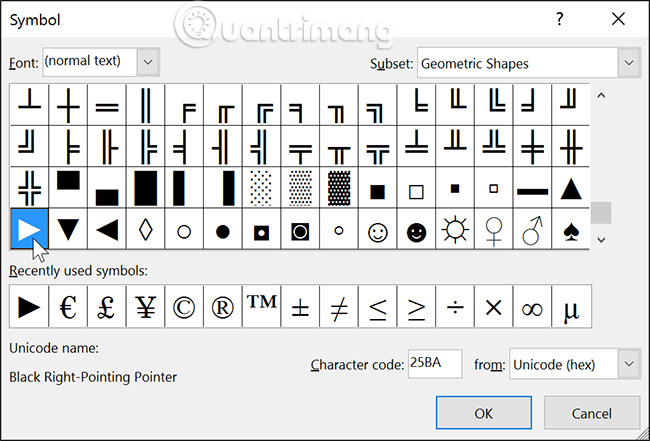
8. Click OK. The symbol will now appear as a bullet option, selectable in the Bullets and Numbering dialog box .
9. Click OK again to apply the symbol to the list in the document.
To change the spacing between bullets and text, you can move the first-line indent marker on the Ruler tool. For more information, please refer to the article: How to align and space lines in PowerPoint 2016.
Practice
1. Open the sample practice presentation.
2. On the last slide, select all the text in the bulleted list.
3. Customize the bullets with the icon of your choice.
4. Change the bullet color to Olive Green.
5. Change the bullet size to 115%.
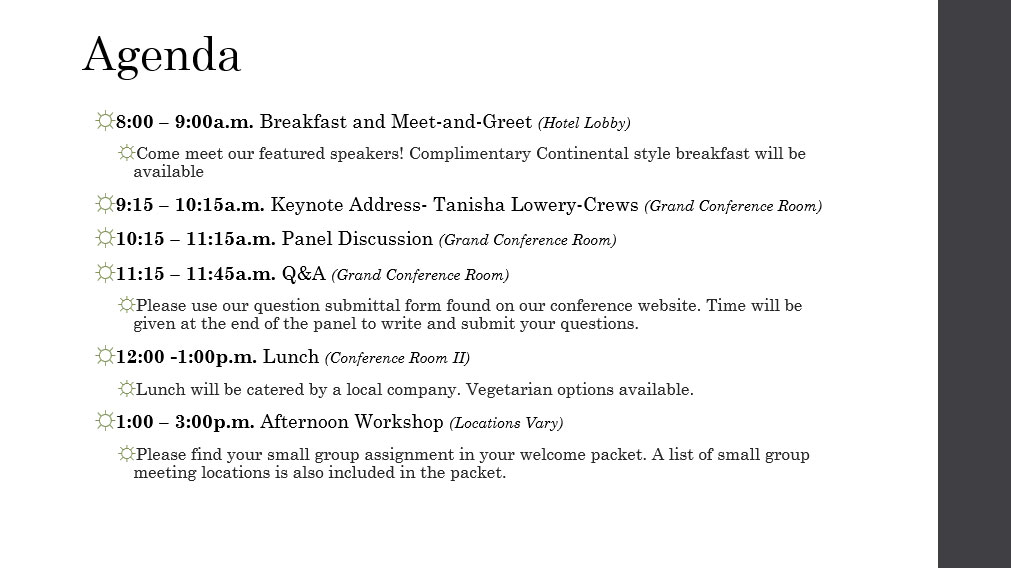
6. When you're done, your slide should look like this (your notation may vary):
See also:
- PowerPoint 2019 (Part 12): Lists
- PowerPoint 2019 (Part 5): Working with Text
- PowerPoint 2019 (Part 4): Basic Slide Concepts
- PowerPoint 2016: Basic information about slides
- Work with lists in PowerPoint 2016
- PowerPoint 2019 (Part 1): Getting Started with PowerPoint
- MS PowerPoint 2007 - Lesson 6: Add content in PowerPoint
- How to Make a Jeopardy Game on PowerPoint
- Collection of 18 Powerpoint keyboard shortcuts
- MS PowerPoint - Lesson 2: Creating a presentation slide ... Where to start?
- PowerPoint 2016: Basic information about slides
- Review presentations in PowerPoint 2016
- Check spelling and grammar in PowerPoint 2016
- Create effects for text and objects in PowerPoint 2016
- Work with charts in PowerPoint 2016
- Sort and group objects in PowerPoint 2016
- How to insert audio in PowerPoint 2016
- Work with lists in PowerPoint 2016
- Manipulate shapes in PowerPoint 2016
- How to insert videos into PowerPoint 2016
-
 How to quickly create menus and dropdown lists in Google Sheets
-
Lesson 16: List Groups in Bootstrap 5
-
How to restrict which friends on Facebook can see your posts - The Restricted list feature
-
How to share reminder lists on iPhone
-
PowerPoint 2019 (Part 12): Lists
-
Microsoft updates Windows 11 supported CPU list and… makes things more confusing
 How to quickly create menus and dropdown lists in Google Sheets
 Lesson 16: List Groups in Bootstrap 5
 How to restrict which friends on Facebook can see your posts - The Restricted list feature
 How to share reminder lists on iPhone
 PowerPoint 2019 (Part 12): Lists
 Microsoft updates Windows 11 supported CPU list and… makes things more confusing