How to use Photoshop CS6 (Part 3) - Create Manipulation artwork with exposure effect
This article is in the series of tutorials using Photoshop CS6. Today we will continue to use Photoshop CS6 to create a Manipulation artwork using exposure effects.
In this tutorial we will create a Manipulation artwork using two images and a few brushes in Photoshop CC / Photoshop 2014 to create the exposure effect (long exposure) in Photoshop. These steps also apply to Photoshop Elements.
The following images and tools are needed:
- Picture of the boat
- Brush flock of flying birds
- Blue sky
You should download all the photos and brushes needed for the project to your computer before you start so you can easily follow the instructions.
- 10 common problems in Photoshop and basic remedies
- Instructions for creating animated images and GIF images in Adobe Photoshop CS6
Begin
Step 1: Open the sky image in Photoshop.
Step 2: In the Layers tab, double-click Background to make it a regular layer.
Step 3: Click OK .

Step 4: Click on the Image menu and select Canvas Size .
Step 5: Create a square (in this case 4256 pixels) and click OK .

Step 6: With layer 0 (sky) selected, use the Move tool to move the sky to the top of the image.
Step 7: Now we have set the square format and can start working on the sky image.

Create an exposure effect for the sky
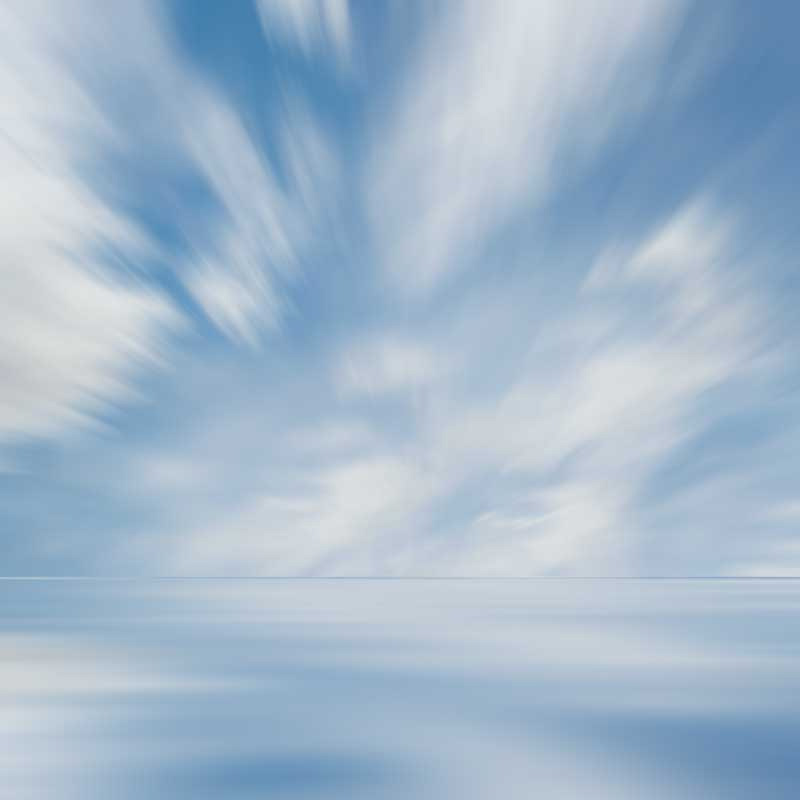
Perform exposure effects for the sky with Photoshop extremely easily. All we need to do is create the sky with clouds that apply Photoshop's Radial Blur filter in a suitable amount. Of course you can change this quantity depending on the number of fuzzy points you want to create.
Step 1: With the selected layer 0, press Ctrl + J to duplicate the sky layer so you can use it later if needed.
Step 2: Hide the original layer 0 and rename the copied layer 0 to Sky (double click directly on the copy layer text 0).
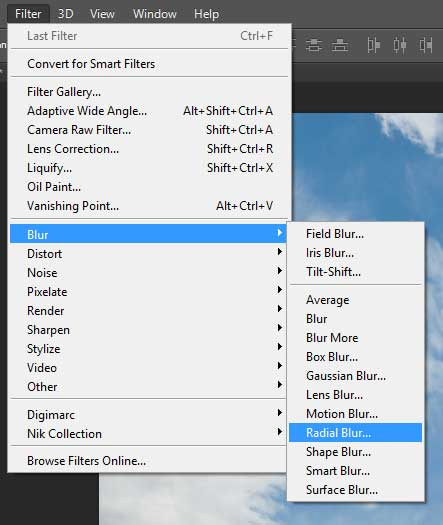
Step 3: With the Sky layer selected, click Filter> Blur> Radial Blur .
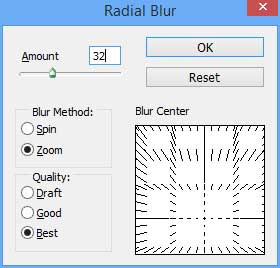
Step 4: Change the Blur Method to Zoom and Quality to Best .
Step 5: If you want the blue to appear as if the clouds are moving over the head, in the Blur Center box , move the center point to the 5th point at the bottom of the box but leave it in the middle horizontally.
Step 6: Change the Amount to 32 and click OK .
Create exposure effects for water
Step 1: Create a water exposure effect to reflect the sky above by pressing Ctrl + J in the Sky layer selected to copy this layer and save it as Water .
Step 2: Select a new layer and access Transform Mode by pressing Ctrl + T or selecting Image> Free Transform from the menu.
Step 3: Take the center of the top layer of the created layer and drag the whole image to the bottom of the image in white space. This operation not only covers the water area but also overturns the image.
Step 4 : Create a vertical mirror effect.
Step 5: Press Enter to exit the conversion mode.
Step 6: If you see a gap between the Sky layer and Water, simply select the Water layer, use the Move tool, press a few times to make the two layers overlap. Then access Transform Mode again and drag the bottom point down.

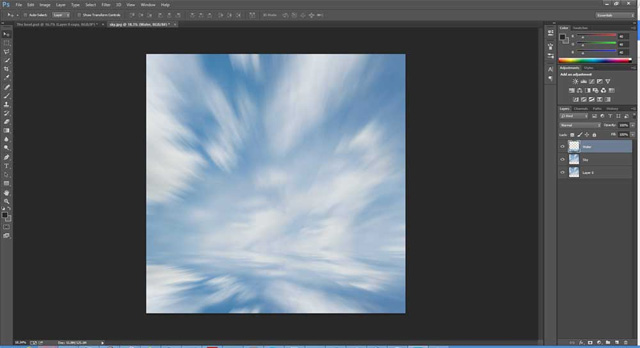
Now we need to create movement for water but don't move at the same speed as the sky. In fact, it usually moves much faster so we will create a blur effect when moving (motion blur) for water.
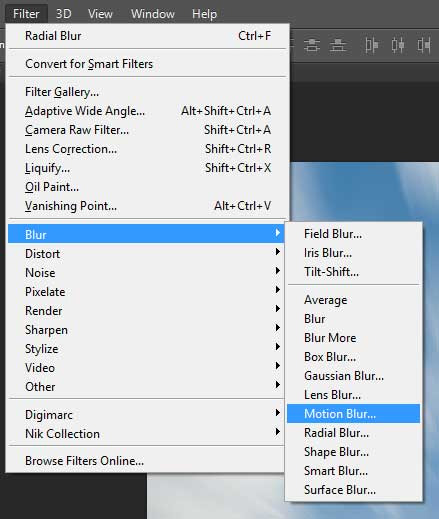
Step 7: With the Water layer selected, click the Filter menu and select Blur> Motion Blur .
Step 8: Select the Preview box to preview the filter effect.
Step 9 : Set the Angle to 0 so that the water moves horizontally without adding any diagonal lines.
Step 10: Now set the Distance to 1000 pixels and press Enter.
Create a mix of sky and water
To create a more realistic blend of sky and water, we will add a very thin horizontal line, where the sky and water meet. To do this, copy the Water layer, squeeze it small and move to the point where the two layers match.
Step 1: With the Water layer selected press Ctrl + J to copy and rename the new layer to Horizontal.
Step 2: Visit Scale Mode (Edit> Transform> Scale from menu).
Step 3: Zoom in on the image to be able to control the change well and drag the bottom line up to near the top, compress the Horizontal layer with a height of about 18 pixels.
Step 4: Select Edit> Transform> Flip Vertically from the menu.
Step 5: In the Layers panel, set the Opacity of Horizontal layer to 50% to reduce the impact of the new layer
Step 6: Then save it by pressing File> Save / Ctrl + S.
Add boat to picture
Step 1: Find the image and drag it into the Photoshop Sky / Water image to insert the image into the document.
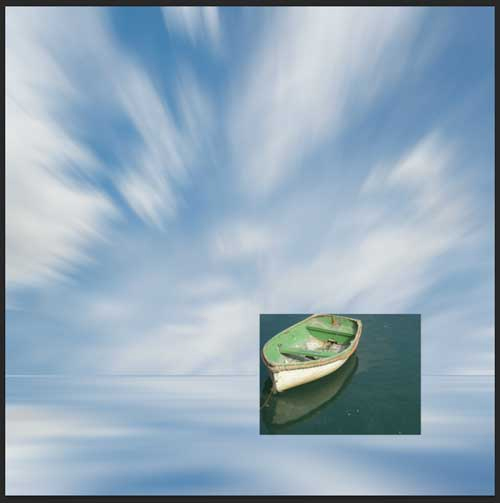
Step 2: When Photoshop uploads the image, it will insert into the document in Transform mode, allowing to resize the image.
Step 3: Hold down Shift to lock the size ratio, click and hold the right end of the boat image to zoom out to the appropriate size and press Enter . Don't worry if the size is not correct, we can edit later.
Step 4: Rename the new layer to Boat .
Step 5: With the Boat layer selected, select the Polygonal Lasso Tool from the toolbox.
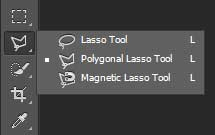
Step 6: Zoom in on the image and carefully click on each point around the boat. Remember to include ropes as we will need it later. This is the most time consuming part of the whole process.
Step 7: After selecting the area, click the Add Layer mask icon at the bottom of the Layers tab. You will see all the water disappear.
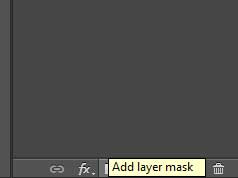
Step 8: We used a mask to remove the water because it allows to edit the mask by adding or deleting a boat without actually deleting any pixels.
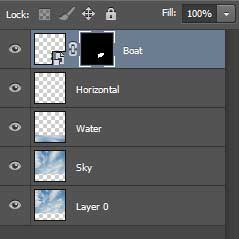
Fixed boat position
Do some manipulation to resize and rotate so that it floats above the water.
Step 1: With the Boat layer selected, press Ctrl + T or select Edit> Free Transform from the menu.
Step 2: Hold Shift and press, drag the bottom left and layer to make any desired size adjustments, press Enter .
Step 3: From the Edit menu, select Transform> Rotate .
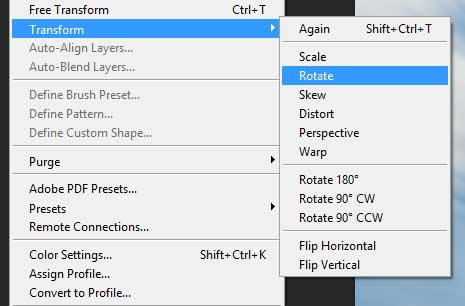
Step 4: Leave the mouse outside of the layer selection box, click and drag down a bit to locate the boat on the water. When done press Enter .
Step 5: Don't worry if it's not perfect because we can adjust later.
Step 6: Use Move tool to drag the boat to a nice position on the gap.
Blend boat with water
To make the image more genuine, we need to make the boat float in the water. Delete part of the boat bottom, where it meets with water using a low transparency brush to reveal water.
Step 1: With the Boat layer selected, click the Mask layer in the Layers panel (the black box is usually on the right).
Step 2: Zoom in on the boat and press B to select the brush.
Step 3: Right click on the boat to appear the Brush editor.
Step 4: Choose a standard round brush with 0% hardness and 80px size.
Step 5: In the brush tool bar, set the opacity of the brush to 15% and flow to 100%.
Step 6 : Choose black color to start painting where the boat meets the water to reveal the water.
Step 7: Perform several times on the bottom of the boat to hide the boat layer and expose the water, change the transparency and brush size by right-clicking to achieve the desired effect.
Step 8: If you've deleted too much, change the brush to white and paint that area again to have the opposite effect, show the boat and hide the water.
Step 9: Repeat the process until you feel satisfied and don't forget the rope.
Blend boat with sky
To make the boat blend better with water, we will add a light-colored coating on the top of the boat, combining its color with the sky, this will help viewers feel more authentic.
Step 1: With the Boat layer, click the Fx icon at the bottom of the Layers panel and click Color Overlay .
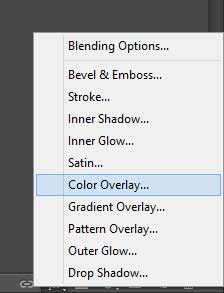
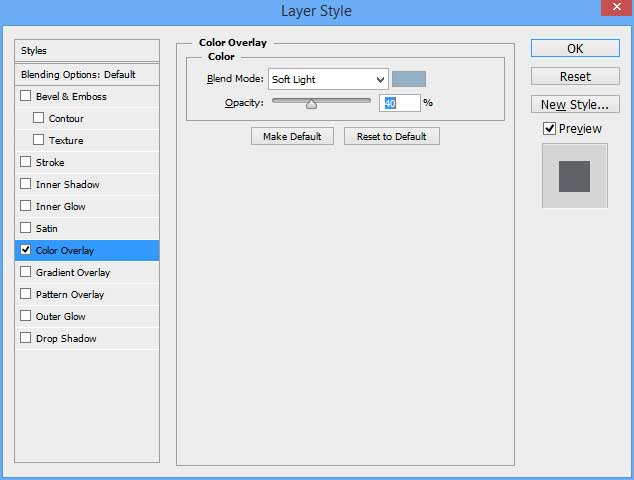
Step 2: Change the Blend Mode of the overlay to Soft Light and set the Opacity to about 40%.
Step 3: Click on the default color (probably red) to open the color picker.
Step 4: Click on the sky in the image in a few locations to select the colors that match the boat, perhaps one of the blue ones.
Step 5: Once satisfied with the effect, you can adjust the transparency if necessary and click OK .
Create water flow
Because the boat is on the water surface, it will create a flow of water around, causing a slight disturbance on the surface of the water.
Step 1: Select Layer> New Layer from the menu and enter the name for the new layer Water Water and click OK .
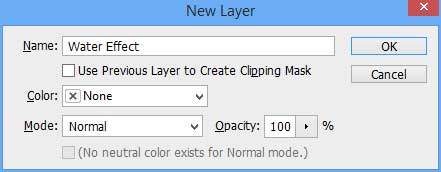
Step 2: Click and drag this new layer below the Boat layer, this will ensure that the new layer will not appear on Boat class.
Step 3: Select the Brush tool with a brush size of about 300px and a hardness of 0%.
Step 4 : Choose white from the color picker.
Step 5: Select Opacity to 100%.
Step 6 : Start painting the layer around the boat.
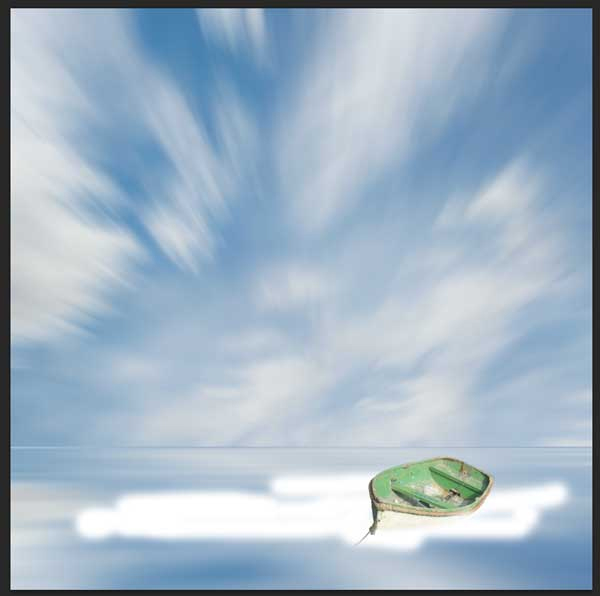
Step 7: Once done, we'll change the Blending mode of the Water Effect layer by double-clicking on this layer and opening the Layer Style window.

Step 8: From the Blend Mode drop-down menu, select Soft Light and click OK .
Step 9: From the Filter menu select Blur> Gaussian Blur .
Step 10: Enter Radius about 25px and click OK .
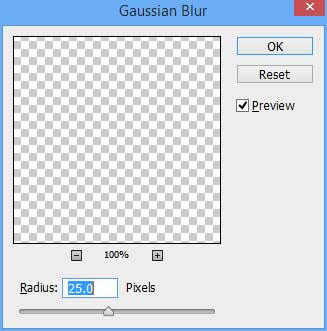
Step 11: Double-click this layer in the Layers panel again to open the Layer Style window.
Step 12: Change the Opacity to 80% to reduce the effect of water displacement.
Add flock of birds
Step 1: Select Layer> New Layer from the menu and enter this new layer name as Birds and click OK .
Step 2: Select the Brush tool by pressing the B key.
Step 3: Open the brush editor and click the settings drop-down menu (looks like the wheel on the right side of the screen).
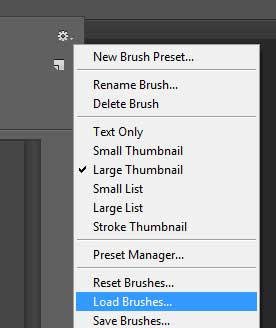
Step 4: Select brush Load and browse to the downloaded Flock_of_Birds_by_Ubershinysheep.abr folder.
Step 5: You will see a bird added to the brush table.
Step 6: Select a group of birds and adjust the size of the brush as desired.
Step 7: Set the brush color to black and Opacity to 100%.
Step 8: With a single click, paint the birds in the Birds layer.
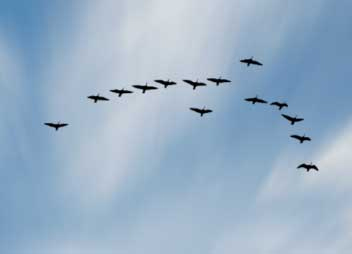
Step 9: Double click on the Birds layer to open the Layer Styles window.
Step 10: Set the Opacity to 20%, to look like a flock of birds in the distance, through clouds and then press OK .
Step 11: From the Filter menu select Blur> Gaussian Blur .
Step 12: Enter Radius of 2px and click OK to make the bird look like it is from a distance.
Add Vignette effect
Step 1: Select Layer> New Layer from the menu and enter this layer name as Vignette and click OK .
Step 2: Select the Brush tool by pressing the B key and open the Brush tool box.
Step 3: Choose a normal round brush with 0% hardness and 1500px size.
Step 4: Select the black color for this brush.
Step 5 : Set the Opacity to 20%
Step 6: Draw around the edges of the image in black to darken the edges.
Step 7: In the Layers panel, double-click the Vignette layer to open the Layer Styles window.
Step 8: Set the Blend Mode to Soft Light.
At this point, you can spend some time adding some contrast to an adjustment layer or moving some elements around to make the work more complete.
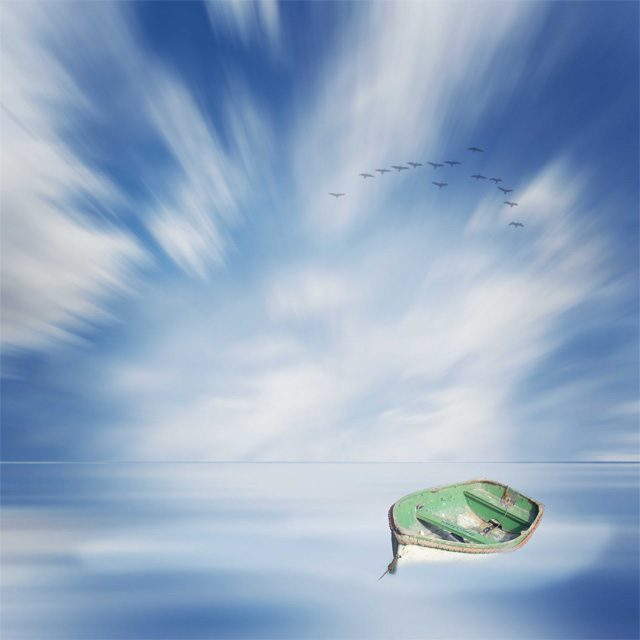
This is the final image:
- How to use Photoshop CS6 (Part 1): Create digital photos
- How to use Photoshop CS6 (Part 2): Create fashion collage images
- How to create whirlpool effect on Photoshop
- How to use Photoshop CS5 - Part 21: Create water ripple effect in photos
- How to use Photoshop CS5 - Part 29: Create a zoom effect in a photo
- How to use Photoshop CS5 - Part 23: Create artwork
- Tutorial to create a sparkling snow effect using Photoshop Brush
- How to use Photoshop CS5 - Part 13: Create a reflection effect from the water


 Steps to change Taskbar position on Windows 11
  Instructions to block ads on Smart TV
  How to change the image background color with the Paint 3D application
  How to install Bliss OS X86 on PC and VirtualBox
  Steps to fix printer not showing up in Windows Remote Desktop session
  How to install Nextcloud server on Windows 10