Table of Contents
This guide provides a clear, practical overview of steps to make rain in photoshop look lifelike with just a, with useful context, important details, and straightforward takeaways for everyday readers.
1. How to make rain in Photoshop with the Noise filter
Step 1: Go to File> Open and open the image you want to edit.
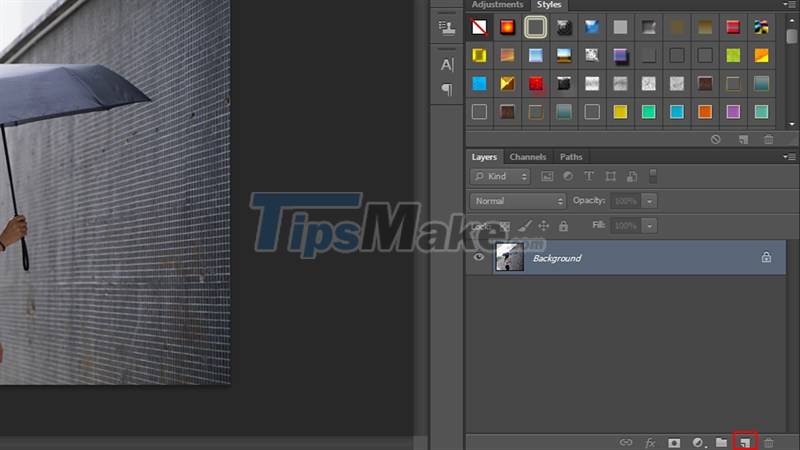
Step 2: Then, you create another layer by clicking on the Create a new layer icon or pressing Ctrl + J .
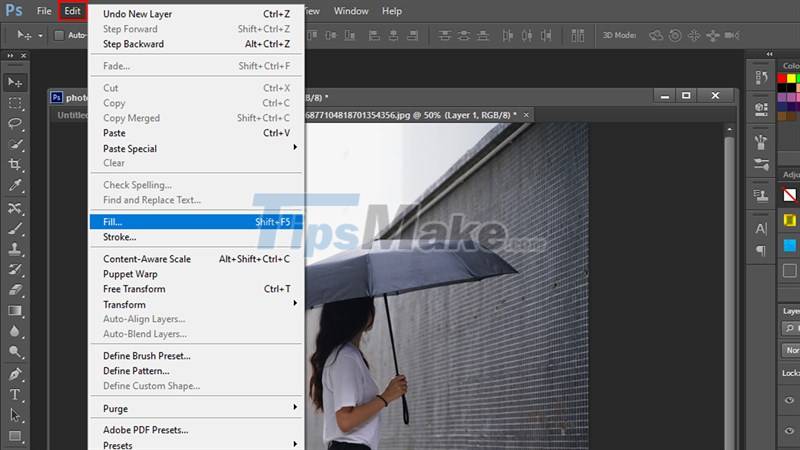
Step 3: Next, go to Edit > Fill or press the keyboard shortcut Shift + F5 to open the Fill dialog box .
Step 4: After displaying the Fill dialog box , adjust the modes as below:
- Use: Color (Choose black)
- Blending Mode: Normal
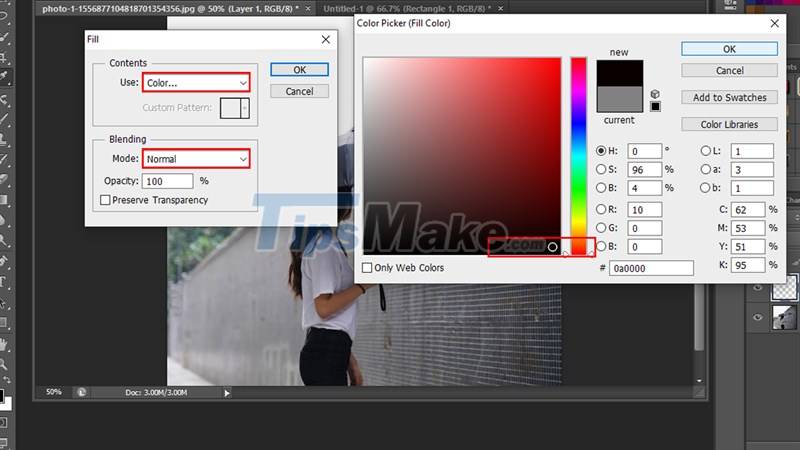
Click OK to complete.
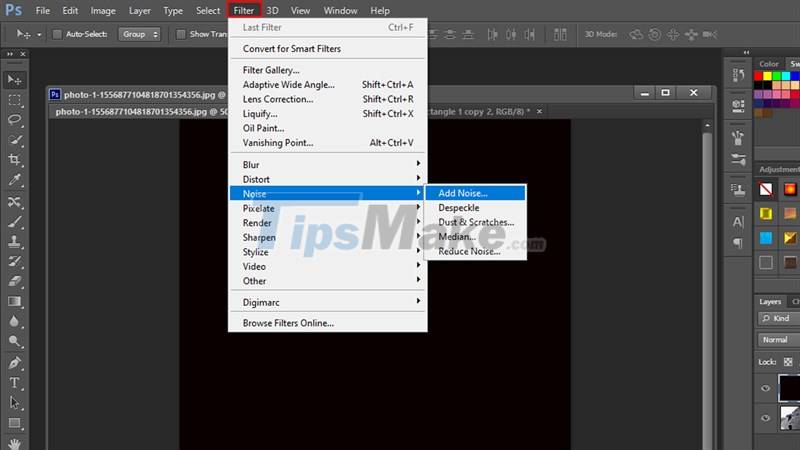
Step 5: Next, go to Filter > Noise > Add Noise .
Step 6: The Add noise window will automatically display, please adjust the Amount parameter from 25% to 30%, then click to select Gaussian and Monochromatic . Click OK to complete.
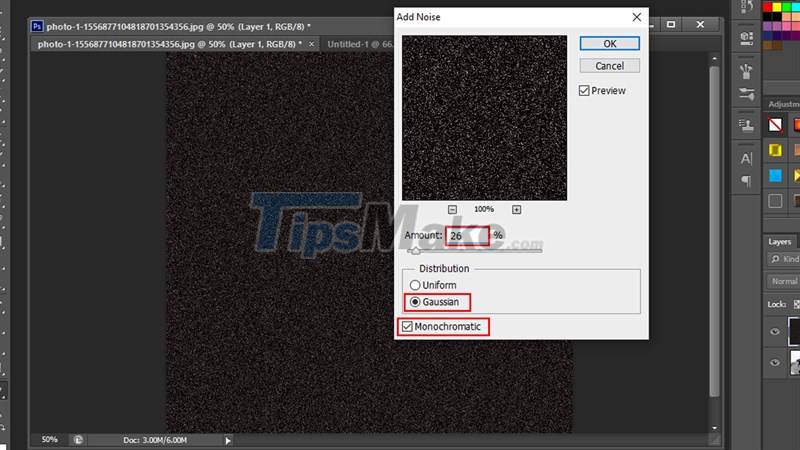
Step 7: Next, Noise is still not very similar to the shape of rain. No worries, please continue to menu Filter > Blur > Motion Blur .
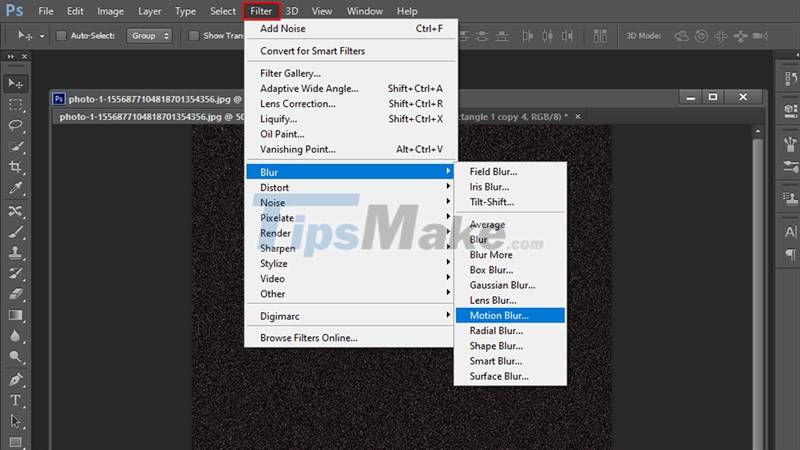
Step 8: After the Motion Blur window appears, adjust the tilt of the Noise particles to look like real rain by adjusting the following parameters:
- Angle: -60
- Distance: 16
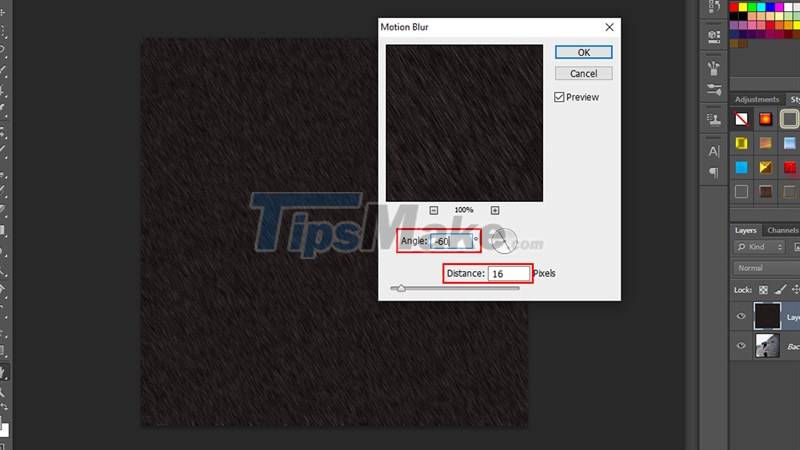
This is a suggestion for my parameters, you can adjust as you like as long as you feel like real raindrops.
Click OK to complete.
Step 9: Adjust the blend mode of the Noise layer in the Layers panel to Screen .
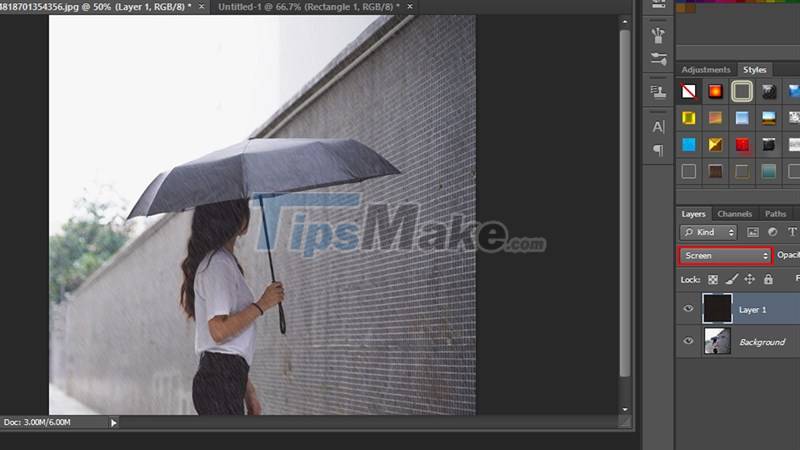
To make more adjustments to make our rain effect look more realistic, you can adjust the Opacity of the Noise layer.
Step 10: Finally, press Ctrl + E to merge layers.
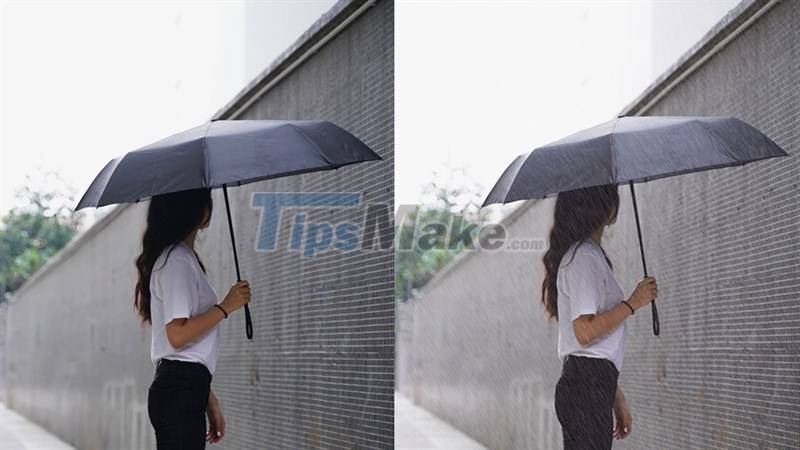
Take a closer look at the results:
2. How to create rain in Photoshop using available textures
Another simpler way that you can apply to create a falling rain effect in Photoshop is to use the available rain textures. You can proceed with the following steps:
Step 1: Go to Google, search for the keyword rain texture, select an image to download (Note that you should choose textures that look realistic and have a monochrome black background to make it easier to apply to the image), or you can also click Download photos below:

Step 2: Go to Photoshop, go to File > Open to open the image file you want to edit and the rain texture image file you just saved to your computer.
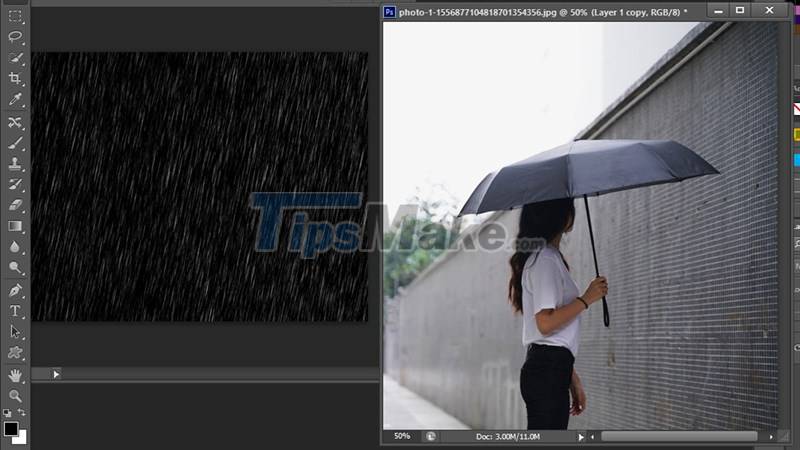
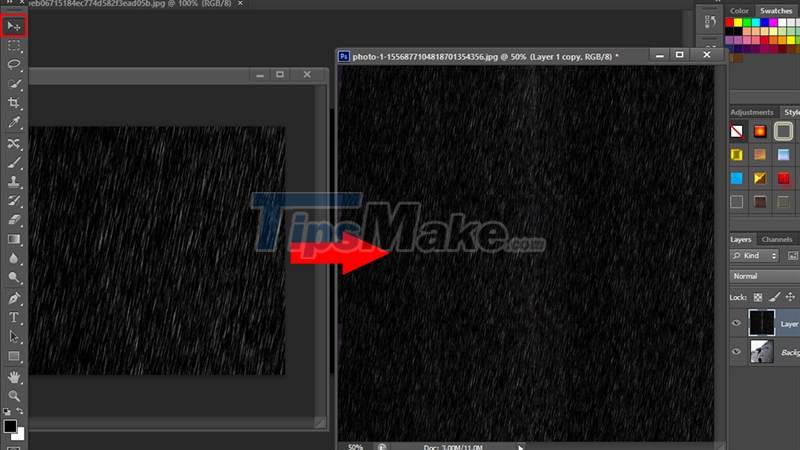
Step 3: Move the inserted texture layer above the image layer you want to edit by dragging and dropping that texture layer over the image layer, then press Ctrl + T to align the texture size so that the texture is covered. complete photo.
Step 4: Next, adjust the blending mode of the rain layer from Normal to Screen, you can adjust the Opacity to make the effect look more realistic.
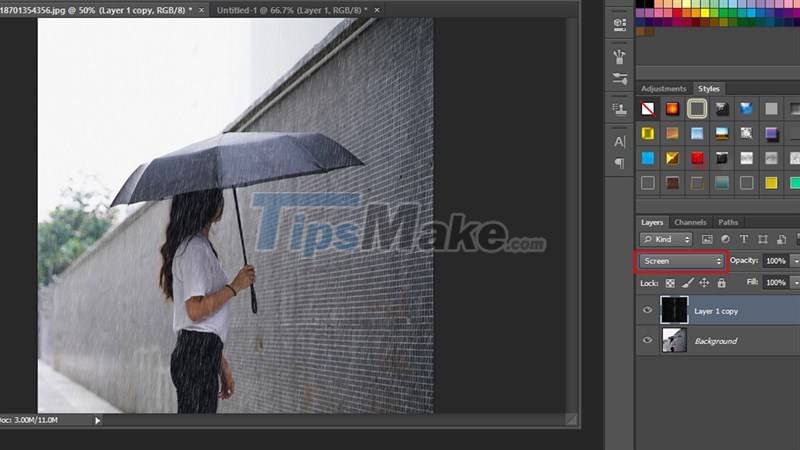
Step 5: After finishing editing, press Ctrl + E to merge layers.
Take a closer look at the results:
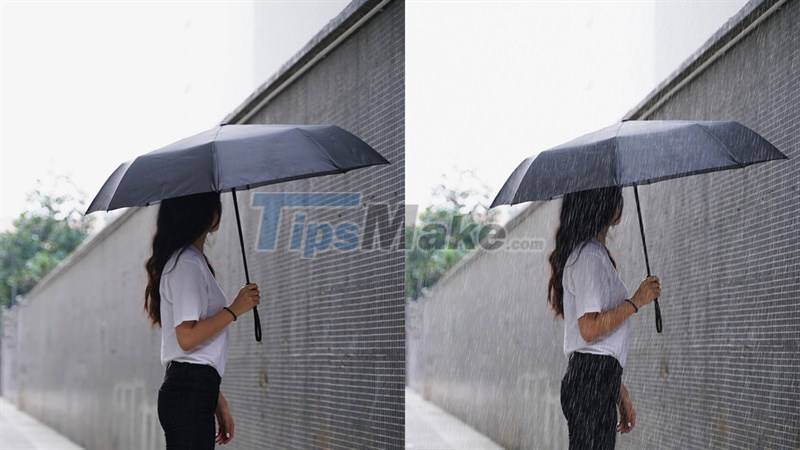
So through this article, I have shown you two straightforward ways to create rain in Photoshop. You can open Photoshop and try it right away to create a very beautiful and romantic photo. Thank you for reading the article and wish you success.
Key Takeaways
Use the information above as a practical reference for steps to make rain in photoshop look lifelike with just a. Review each step carefully, confirm any requirements, and choose the option that best fits your situation.
FAQ
What does this guide explain about Steps to Make Rain in Photoshop Look Lifelike with Just a?
It explains the main concepts, practical considerations, and useful steps related to steps to make rain in photoshop look lifelike with just a without requiring advanced knowledge.
Who can benefit from learning about Steps to Make Rain in Photoshop Look Lifelike with Just a?
This information is useful for readers who want a clear overview, practical guidance, and reliable steps related to steps to make rain in photoshop look lifelike with just a.
What should I check before applying this information?
Review the requirements, confirm that your device, software, or situation matches the instructions, and back up important data before making major changes.
Related Articles
 Summarize the Best Moods About Rain: Mood When Rain10 minutes read
 Full Hd Rain Wallpaper for Those You Are Sad3 minutes read
 When It Comes to Rain, Running or Walking Is the Least Wet4 minutes read
 Harm When Leaving the Car Outside in the Rain4 minutes read
 Do You Know the Rain That Releases 800,000 Trillion Ground Bacteria3 minutes read
 Please Try Epic Games'' Extremely Realistic Human Face Creation Tool4 minutes read
Reader Comments 0
Sign in with email or Google to join the discussion.