Tutorial to create a sparkling snow effect using Photoshop Brush
If you want your photos to be more vivid, bold in the winter by adding snowflakes to the photo. However, creating snow in Photoshop is not easy.
Table of Contents
You want your photos to be more vivid, winter-oriented by creating more snow effects in your photos. However, creating effects in Photoshop is not as simple as you think. The following article Admin network will introduce and guide you how to create more snow effect is very simple by Photoshop Brush.
Step 1:
The first step is to choose the snowflake shape you like adding to your photo. If you want, you can change the snowflake color to black and choose the Background color to be white.
Then proceed to the backup for use in the following steps.
Step 2:
Click on Edit> Define Brush Preset . A dialog box appears, your task is to enter the name of the Brush into the dialog box and click OK.

See also: 14 simple steps to create a snowfall effect for photos
Step 3:
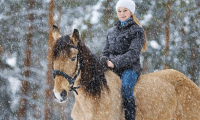
Open the photo you want to add the snow effect. In the Brushes Panel , select Snowflake Brush (the snowflake brush) that you just created in step 2.

Step 4:
On the Brush Panel ( Brush panel ), open Shape Dynamics, set the Size Size Jilter and Angle Jilter to 100%.
See also: How to create snowflakes in Photoshop
Step 5:
On the Brush Panel ( Brush panel ), continue to open Scattering . Set the Scatter value to 250% and select Both Axes on the checkbox.
Additional reference: Make sharp photos in 2 ways in Photoshop
Step 6:
Continue on the Brush Panel (open the Brush panel), open Transfer and set the 50% Flow Filter value.
Step 7:
On the Brush Panel , click on Brush Tip Shape at the top of the effect settings section. Adjust the Spacing value to 100% or if you want to manually adjust the snowflake distance, you can turn off the Spacing adjustment .
And this is the final result:
Good luck!
Was this article helpful?
Your feedback helps us improve.
Related Articles
 14 simple steps to create a snow effect for the photo11 minutes read
 How to rotate 'brushes' in Photoshop in just 5 seconds with this tip3 minutes read
 Learn how to create a fade effect with Photoshop CS69 minutes read
 How to use Photoshop CS6 (Part 4): Create a fading effect9 minutes read
 How to Add Falling Snow to Photos Using Photoshop9 minutes read
 Macromedia Flash - Create a snow effect2 minutes read
Reader Comments 0
Sign in with email or Google to join the discussion.