Free up hard drive space automatically on Windows 10 with Disk Cleanup
Disk Cleanup is one of the 'maintenance' tools built into Windows for a long time. This tool allows users to free up more space on the computer by "cleaning up" the temporary files and the file system is almost no longer usable but takes up quite a bit of space, like files to install and update previous Windows versions.
The drawback of this tool is that users must run manually. However, on Windows 10 users can set up an automatic run tool to delete specific files on the user's computer.
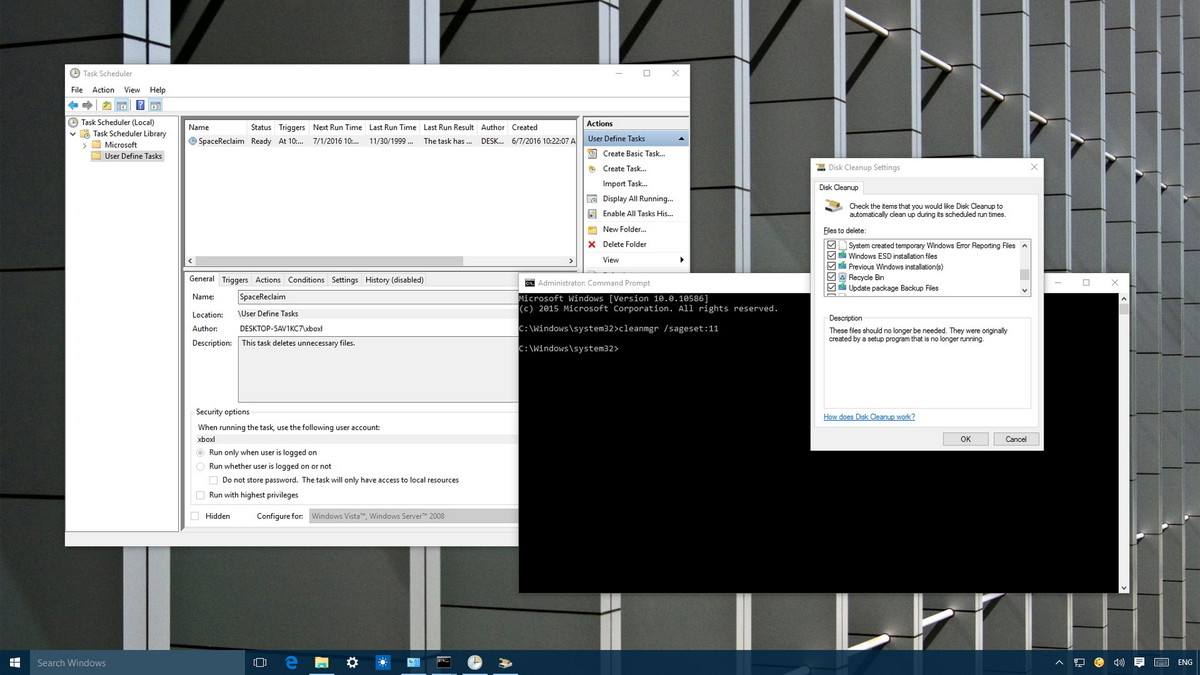
1. The Disk Cleanup setting automatically runs on your computer
1. Press Windows + X key combination to open the Power User Menu, where you select the Command Prompt (Admin) option .
2. Enter the command below into the Command Prompt window and press Enter:
cleanmgr / sageset: 11

In the above command, use / sagest: n to open the Disk Cleanup installation and create a Registry key to store the settings you choose. The number n is stored on the Registry displayed for the settings you want to use with this tool.
The number n can be any number from 0 to 65535, and it's basically like a file name that displays all the specific settings you want to use. This way you can set different times to run the tool with different settings at different times.
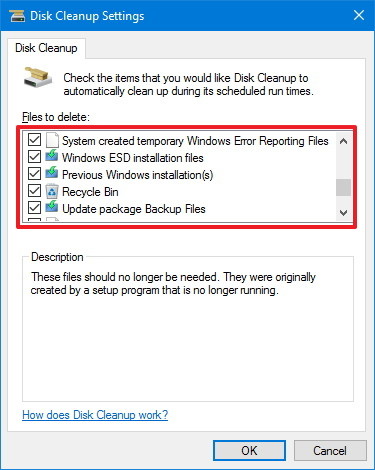
3. After the screen appears Disk Cleanup Settings window, here check the items you want the tool to automatically delete from your system in the list of options. Some files you can delete:
- Windows Update Cleanup: Clean up Windows update files.
- Downloaded Program Files : Programs are downloaded and installed directly from the Internet.
- Temporary Internet Files: Files are temporarily stored during Web access.
- Temporary files: Temporary files .
- System error memory dump files: Files are removed during system memory failure.
- Files discarded by Windows upgrade: Files removed during Windows upgrade.
- Windows ESD installation files: Windows ESD installation files .
- Previous Windows installations: Previous Windows installation files.
- Recycle Bin: Files in the trash.
- Temporary Windows installation files: Temporary Windows installation files .
4. Click OK to save the changes in the Registry settings.
5. Next, click on Start , and then enter Search box from Task Scheduler to open the Task Scheduler utility.
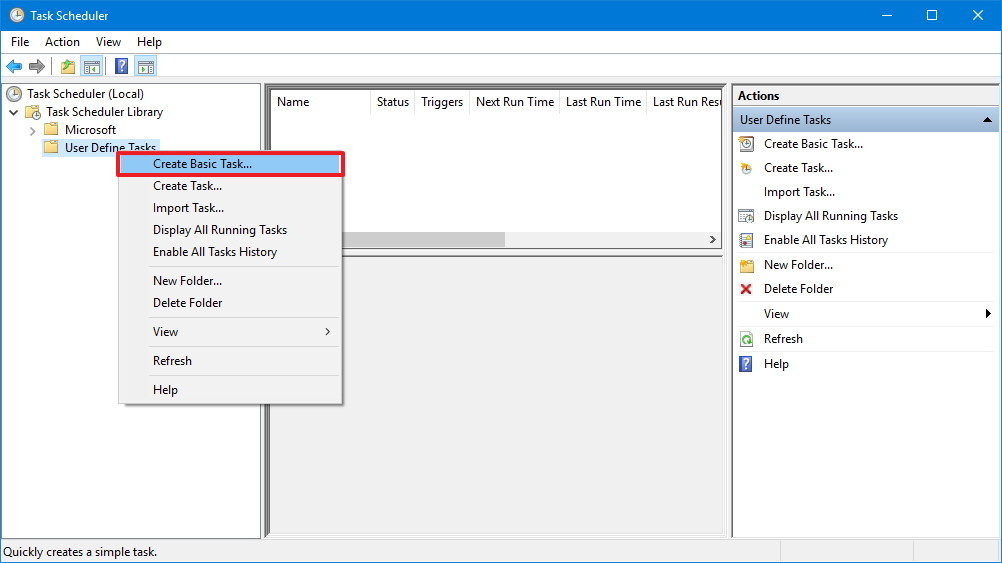
6. Right-click Task Scheduler Library , then click New Folder and name this folder, such as User Defined Tasks .
7. Right-click the newly created folder and click Create Basic Task .
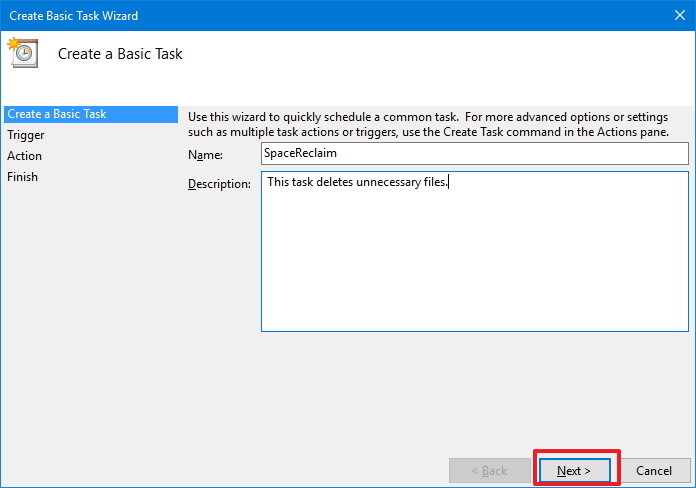
8. Name the Task, then add the description if you want and click Next .
9. Select the time period in which you want the Task to run and click Next .
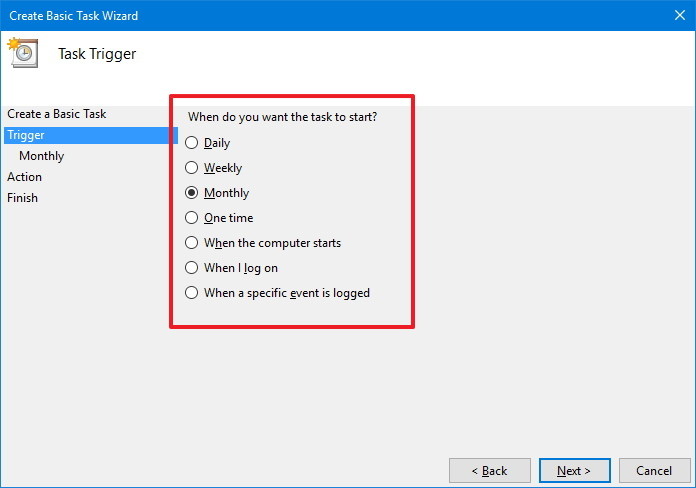
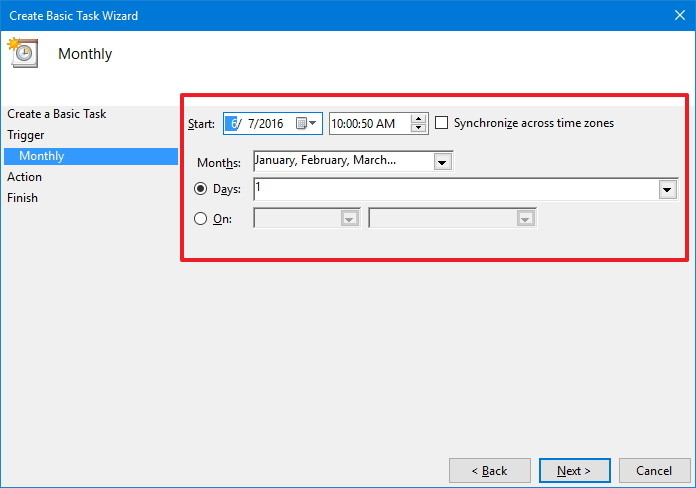
10. Select the date and time and click Next .
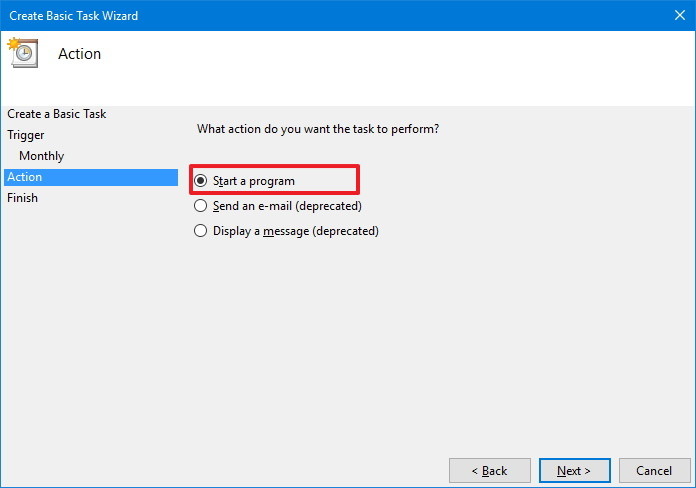
11. At the Action section, select Start a program and then click Next .
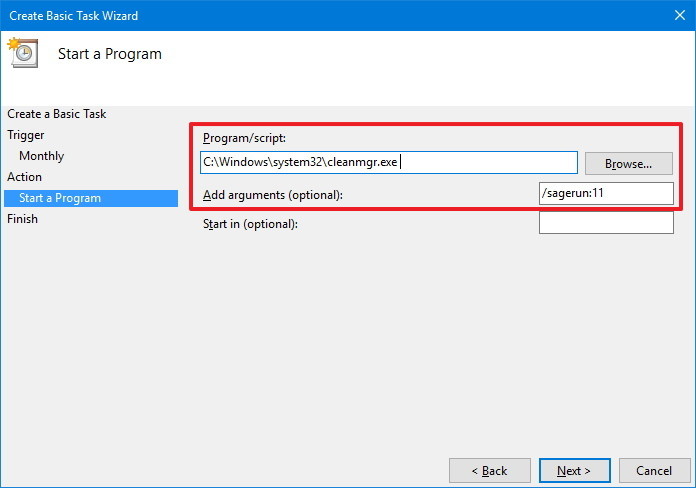
12. Enter the path to open the Disk Cleanup tool : C: Windowssystem32cleanmgr.exe , including the / sagerun parameter : 11 (note changing the 11-digit number you selected in step 2).
13. Click Next.
14. On the Summary page, click Finish to complete the process.
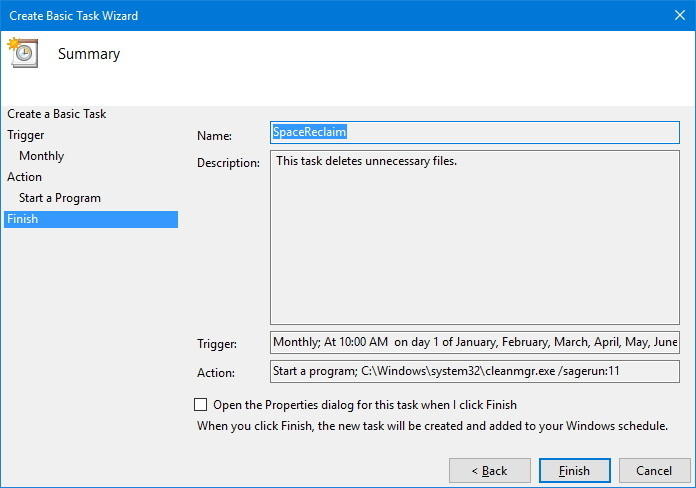
From now Disk Cleanup will automatically run at the specific time you choose, delete all unnecessary files on your computer.
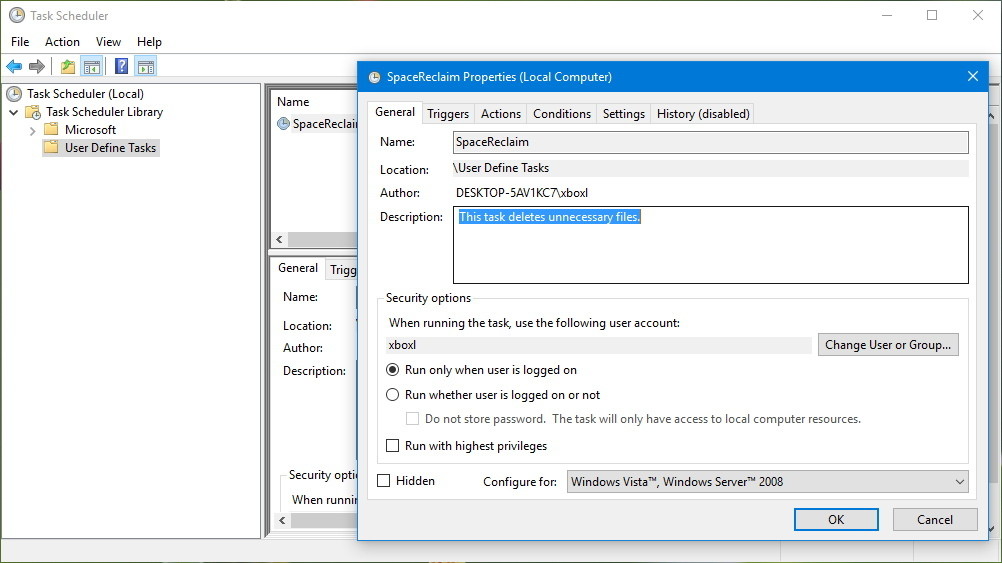
If you want to change the current settings, just open Task Scheduler, open the folder you created, double-click Task and update the configuration.
2. How to run Disk Cleanup "deviation" schedule?
If you want to run Disk Cleanup before the specific time you choose, follow the steps below:
1. Press Windows + X key combination to open the Power User Menu, here you select Command Prompt (Admin) .
2. Enter the command below and the Command Prompt window and press Enter:
C: Windowssystem32cleanmgr.exe / sagerun: 11
Note:
Change the 11 numbers you have selected to set.
After running the command, Disk Cleanup will open and run immediately and delete all the files you set up on the tool.
3. How to edit Disk Cleanup settings?
If you want to add or remove any item in the list of items that you want Disk Cleanup to automatically delete, follow the steps below:
1. Press Windows + X key combination to open the Power User Menu, here you select Command Prompt (Admin).
2. Enter the command below into the Command Prompt window and press Enter:
cleanmgr / sageset: 11
Note:
Change number 11 by the number you choose to save the setting.
3. After the command is executed, the screen will display the Disk Cleanup tool with the settings you previously configured.
Just check the new items you want to add and remove items that you don't want Disk Cleaup to delete.
4. Finally click OK.
Refer to some of the following articles:
- Instructions to mount the hard drive into a folder on Windows 10
- If you want to master Windows, master these shortcuts
- Steps to disable or completely remove the Onedrive application on Windows 10
Good luck!
You should read it
- ★ Error missing Disk Cleanup on Windows 10/8/7, this is a fix
- ★ How to turn on auto-release memory mode Windows 10 Creators Update
- ★ How to Free up Hard Disk Space on Windows Vista
- ★ Instructions to delete Windows.old folder on Windows 7/8 / 8.1?
- ★ Which system cleanup utility should be used for Windows?