Instructions to change DNS Server on Windows 11
How to change DNS on Windows 11? Instructions for 2 ways to change DNS Server on Windows 11 computers (with specific images)
Table of Contents
Basically, when operating, the computer will automatically get DNS (Automatic DNS) information from the network operator (ISP). And with this network-provided DNS, you can access the Internet normally but will be under a lot of management from the network operator.
For example, restricting or blocking access to certain websites. For example, Facebook, there was a time when the network operators blocked access to Facebook, or some foreign websites also load quite slowly, or even fail to load.
Moreover, the DNS provided by the network operator is not really good compared to other technology giants like Google or Cloudflare.
Therefore, changing the default DNS will help you improve the speed of accessing some websites, the response time between the computer and the DNS Server is improved, and the computer security is better.
Actually, changing DNS on all versions of Windows is relatively simple, however, on Windows 11 operating system it is a bit different if you use Windows Settings to set it up.
So in this article, I will share with you in detail how to change DNS on Windows 11 with Windows Settings. Surely you will do it yourself easily!
How to change DNS on Windows 11
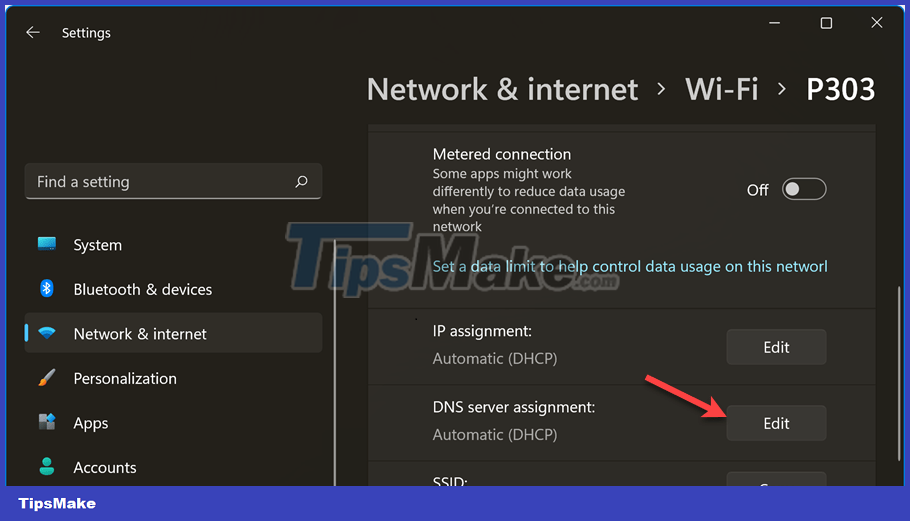
+ Step 1: Click Windows + Ito open Windows Settings => then select Network & interent=> click Propertiesto quickly access the network in use.
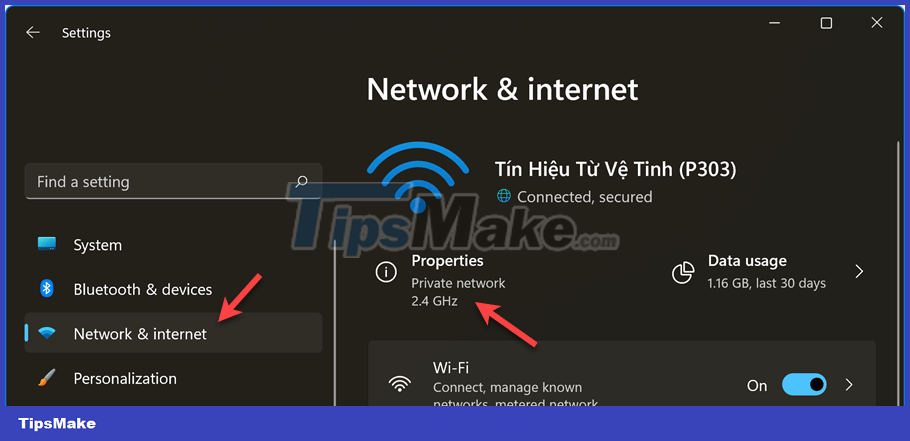
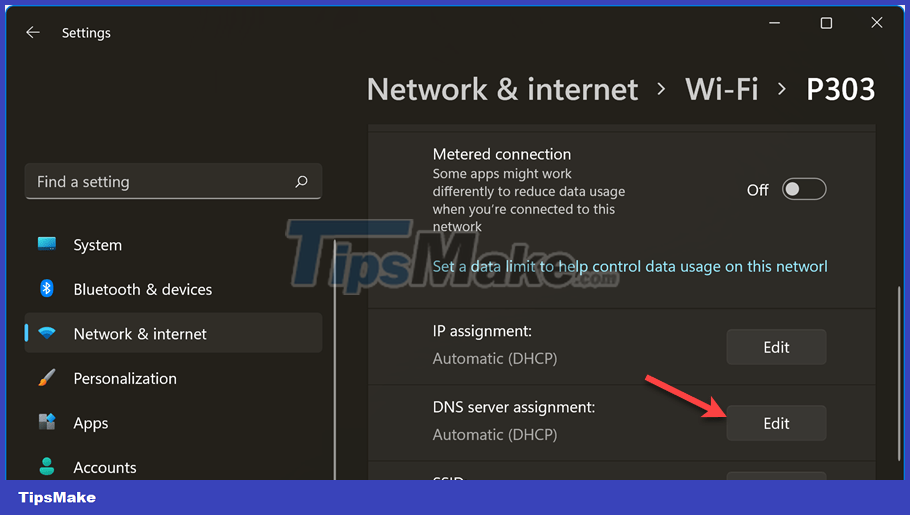
Then you select Editat the line DNS server assignment.
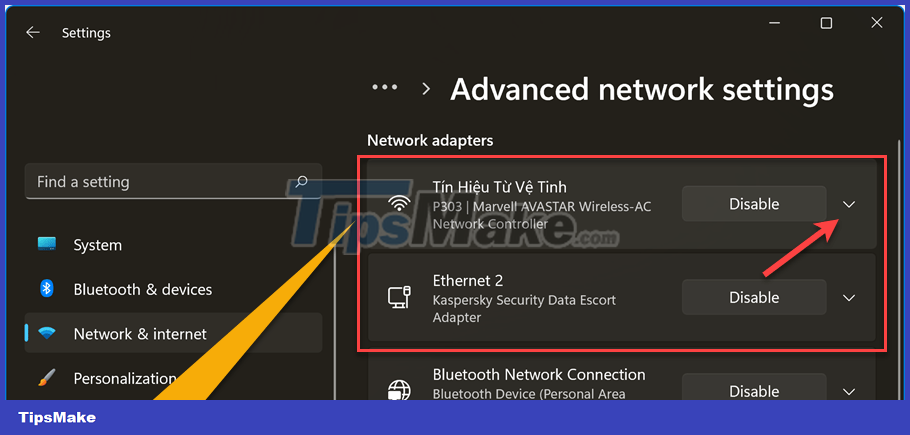
In addition to the quick access method above, you can do the following steps in turn: Click Network & interent=> and selectAdvanced network settings

Here you will select the network you are using (WiFi or Wired). Since I'm using a WiFi network here, I will choose the arrow to expand the WiFi section.
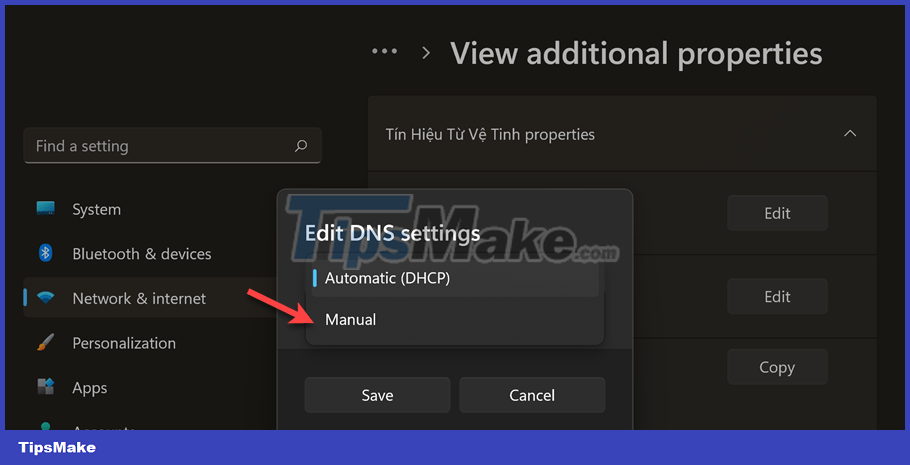
Continue to scroll down => and selectView additional properties
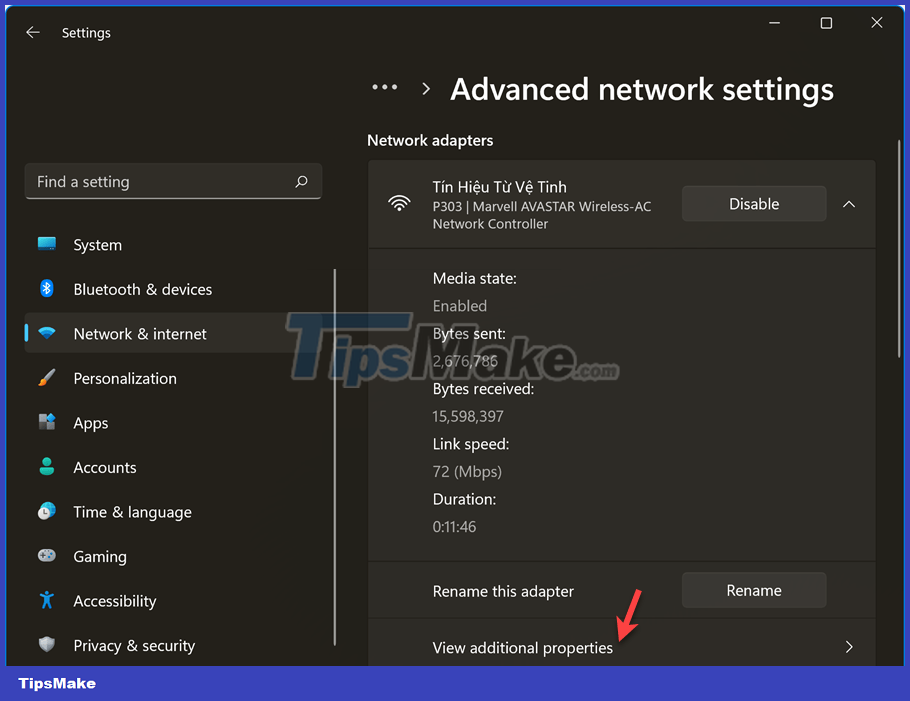
=> Now you will be taken to the DNS editing section as shown below.
+ Step 2: In the window Edit DNS settings=> you choose the mode Manual(manually)
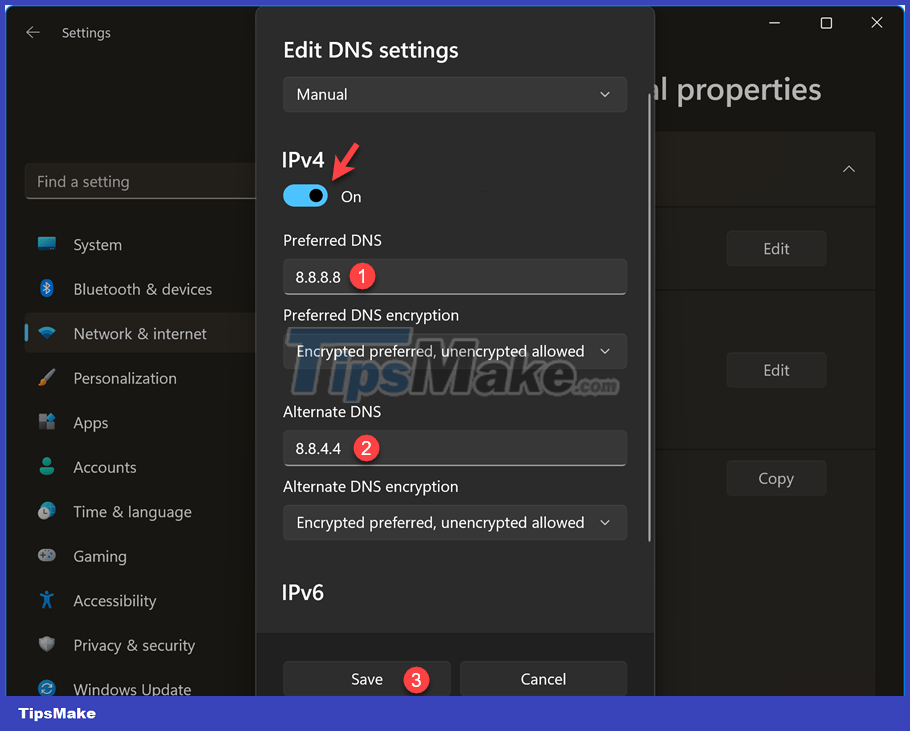
+ Step 3: Here I will choose IPv4, then you set as shown below:
- Preferred DNS: Primary DNS server address
- Alternate DNS: Secondary DNS server address
Sharing with you some popular and best DNS ranges:
IPv4
Google DNS: 8.8.8.8 / 8.8.4.4 (Google's DNS range, very commonly used)
Cloudflare DNS : 1.1.1.1 / 1.0.0.1 (Cloudflare's first quarter DNS range)
Quad9: 9.9.9.9 / 149.12 .112.112
OpenDNS: 208.67.222.222 / 208.67.220.220
IPv6
Google DNS: 2001:4860:4860::8888 / 2001:4860:4860::8844
Cloudflare DNS: 2606:4700:4700::1111 / 2606:4700:4700::1001
Quad9: 2620:fe::fe / 2620 :fe::fe:9
In the Preferred DNS Encryption and Alternate DNS Encryption sections, there will be 3 options that are:
- Encrypted Only
- Encrypted Only (DNS over HTTPS) – Uses DNS over HTTPS, which encrypts DNS requests for privacy. Read this article to understand what DNS over HTTPS is.
- Encrypted preferred, unencrypted allowed
=> Here I will choose the style Encrypted preferred, unencrypted allowed. Then tap Saveto complete the setup.
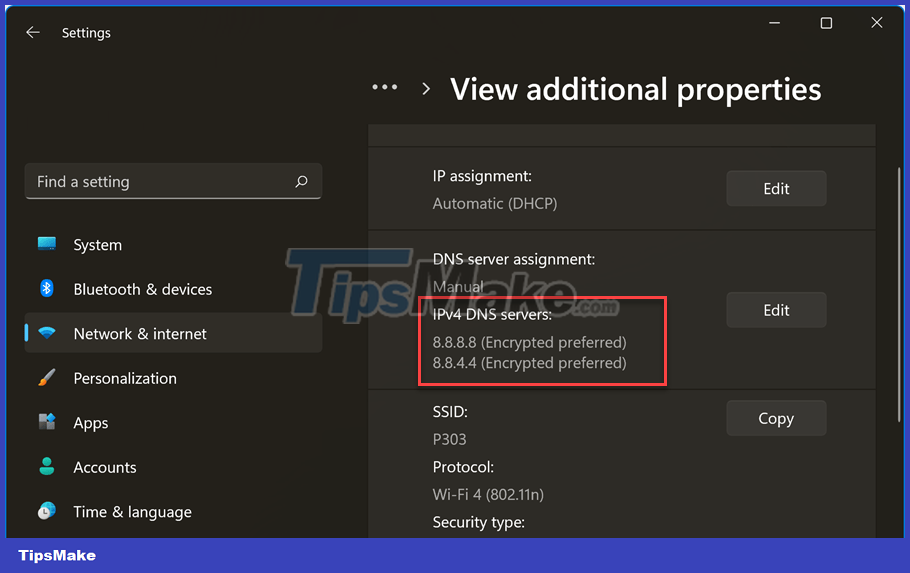
That's it, when you go out, you will see that the DNS server has been updated by the computer. If you want to use the default DNS mode again, click again Edit=> and change the word Manualto Automaticit.
Another way to do it, applicable to all versions of Windows, from Windows XP to the latest Windows 11 is still able to do that is to use the Control Panel.
Epilogue
Okay, so I have finished showing you how to change DNS on Windows 11 . Basically, it's not difficult at all, right?
Was this article helpful?
Your feedback helps us improve.
Related Articles
 Instructions to change DNS Server on Windows, Mac, iOS and Android9 minutes read
 How to change DNS server on the most popular routers15 minutes read
 3 'legitimate' reasons to change DNS Server13 minutes read
 Change League of Legends VNG server, switch LOL VNG server5 minutes read
 Instructions for setting up and managing FTP Server on Windows 108 minutes read
 How to change DNS Server on Windows 114 minutes read
Reader Comments 0
Sign in with email or Google to join the discussion.