Table of Contents
Create VPN Server on Windows 8 is easier to understand when the core ideas are paired with practical examples. The sections below explain the topic clearly, highlight useful steps, and point out details that can prevent common errors.
No need to install any additional applications, you can easily 'turn' your computer into a VPN server if you're using Windows 8.
Create VPN Server on Windows 8
Step 1
On Windows 8's Modern UI, press the Windows + Q key combination to open the search sidebar . Then enter "ncpa.cpl". The results appear, click ncpa.cpl to activate Network Connections . In addition, you can also open the Network Connections window from the Desktop interface.

Step 2
Press Alt will see an additional menu bar on the Network Connections window, go to File , select New Incoming Connection.

Step 3
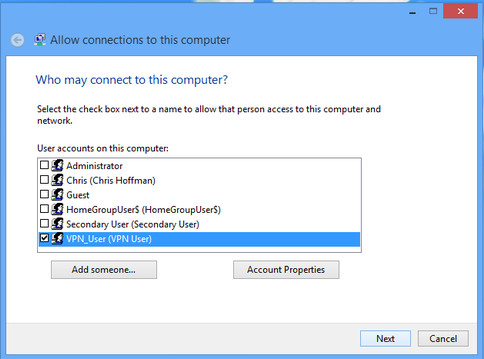
Normally, Windows already has a number of user accounts, which users can use to make a remote VPN login account, but better yet, you should create a new VPN-specific account. Simply click Add someone, enter your username ( User name ), your full name ( Full name ), password ( Password ) and confirm your password ( Confirm password ). Done, click OK . In turn, you can create multiple accounts like that.

Step 4
Check the box before the names of the accounts you want to use, in the User accounts on this computer list , click Next.
Step 5
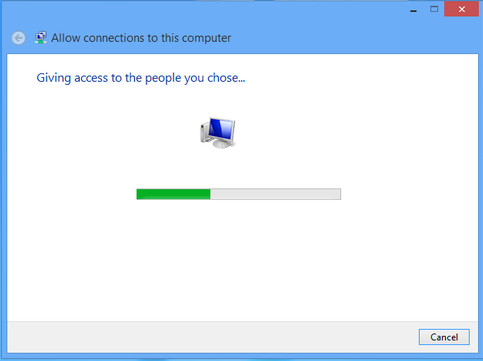
So, having completed the main setup steps, you continue to click Next, Allow access , and then wait for the application to handle some necessary tasks. Done, click Close.
Create VPN Client using Windows 7/8
After completing creating a VPN Server on Windows 8, you can log in remotely with another computer using Windows 8 , or Windows 7 .
With Windows 8
Step 1
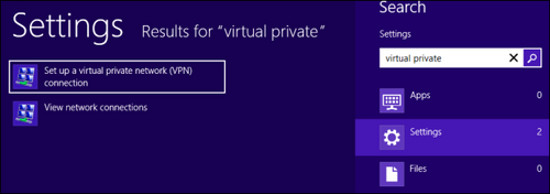
On the Modern UI interface, press Windows + Q , enter " virtual private" in the search box, select Set up a virtual private network (VPN) connnection in the results that appear.
Step 2
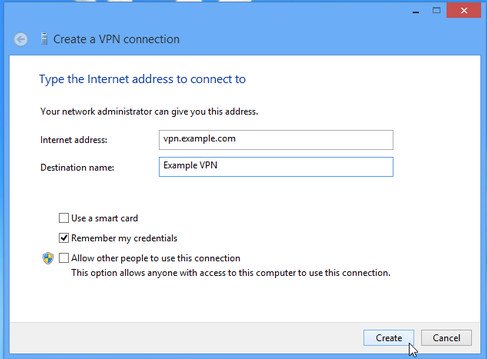
A window to create a VPN connection appears, enter the IP address of the VPN Server into the Internet address box , give any name for the VPN connection in the Destination name box .
Step 3
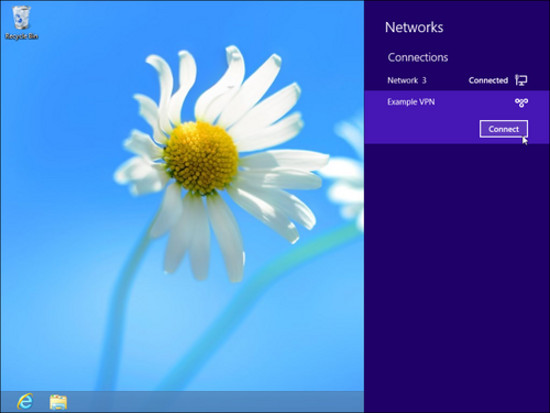
In the list of current connections, the VPN connection name has just been initialized, click Connect at this connection.
Step 4
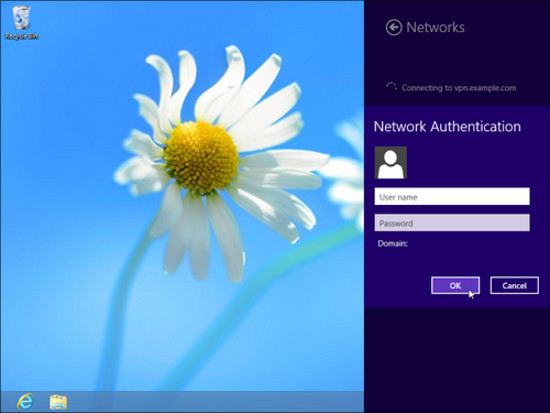
Declare User name and Password of the selected account while creating the VPN Server, click OK.
With Windows 7
Step 1
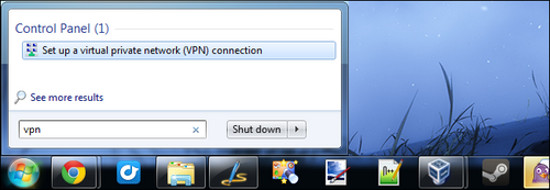
Press Windows, enter vpn in the search box, select Set up a virtual private network (VPN) connnection.
Step 2
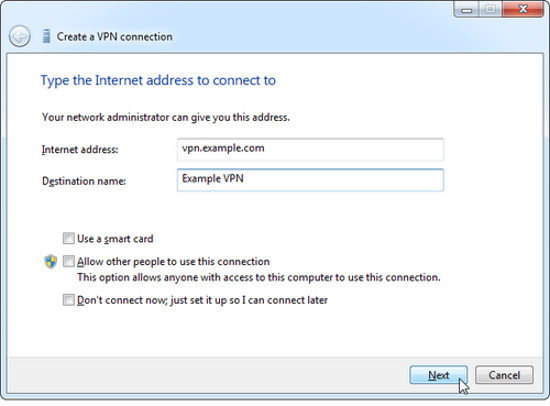
Declare the IP address of the VPN Server and name the VPN connection you are creating, click Next.
Step 3
Provide the VPN account information you created, click Connect. Done, click Close.

Step 4
In the connection list, the name of the VPN connection is added, click here, select Connect.
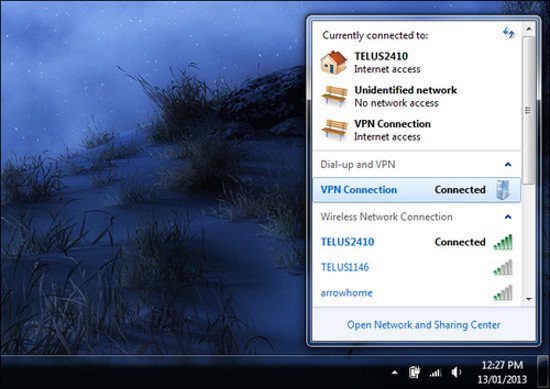
Note
If you have declared the correct account information, but still cannot log in to the VPN Server, you can re-enter the Network Connections window (ncpa.cpl) of the computer you are using as the VPN Server (Windows 8), click Right click on the created connection, select Properties , the User tab, uncheck the line before Require all users to secure their passwords and data, OK .
After successfully connecting to the VPN Server, to access the data sharing folder of the VPN Server from the current client, type in the address_IP syntax . For instance,: 192.168.120.128.
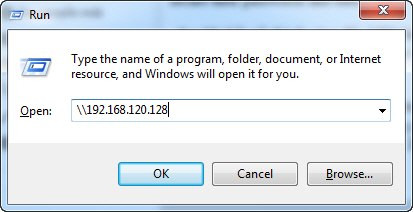
In this way, you can share data from computers within a simple LAN system in the form of Remote Access. If you want to expand the scope of use, you need to perform configuration forwarding (Forward Ports), DNS from Modem / Router is quite complicated.
FAQ
What should you know about create VPN Server on Windows 8 Step 1?
On Windows 8's Modern UI, press the Windows + Q key combination to open the search sidebar. Then enter "ncpa.cpl". The results appear, click ncpa.cpl to activate Network Connections. In addition, you can also open the Network Connections window from the.
What should you know about step 2?
Press Alt will see an additional menu bar on the Network Connections window, go to File, select New Incoming Connection.
What should you know about step 3?
Normally, Windows already has a number of user accounts, which users can use to make a remote VPN login account, but better yet, you should create a new VPN-specific account. Simply click Add someone, enter your username ( User name ), your full name ( Full.
Related Articles
 Instructions for Setting Up and Managing FTP Server on Windows 109 minutes read
 Install Windows Server 2003 and Create a Backup Server1 minutes read
 How to Create a VPN Server on Windows Without Using Software?4 minutes read
 Learn About Firewalls, Windows Firewall on Windows Server 20124 minutes read
 How to Creating a Domain Controller -- Dc on Windows Server 20125 minutes read
 How to Connect to an FTP Server from Windows Explorer?4 minutes read
Reader Comments 0
Sign in with email or Google to join the discussion.