Table of Contents
This practical guide explains how to set a static ip address for a windows 11 computer with clear steps and useful context. It also covers common requirements, potential problems, and the details that can help you get better results.
Moreover, knowing how to change the computer's IP address will help you fix some Internet-related errors during use. For example, error of IP address, yellow exclamation error.
How to change the computer IP address, I have been guided quite a lot in related articles already. And today is another related post, which is changing the IP address on a Windows 11 computer.
Windows 11 has a much different interface than previous versions of Windows, so many of you will have trouble in the process of manipulation, especially using Windows Settings to set up.
#first. Instructions for Setting a Static IP Address for Windows 11
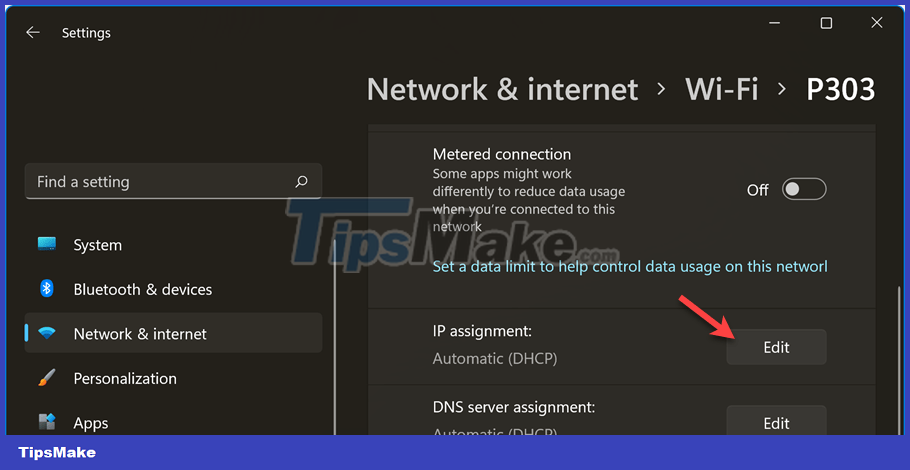
+ Step 1: Click Windows + I to open Windows Settings => then select Network & interent => click Properties to quickly access the network in use.

You will then be taken to a detailed window about the Internet network you are using. Here, please click Edit on the line IP assignment
In addition to the quick access method above, you can do the following steps in turn: Click Network & interent => and select Advanced network settings
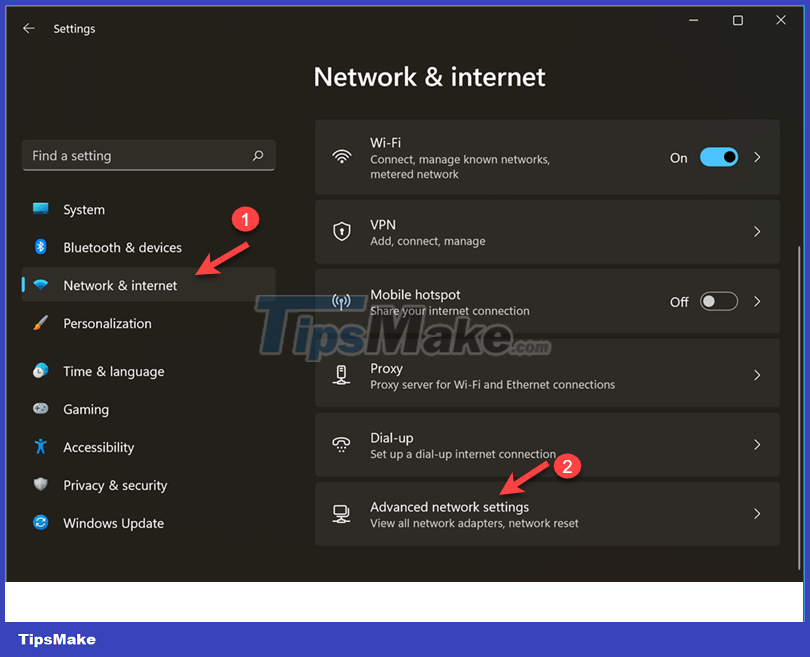
Here you will select the network you are using (WiFi or Wired). Since I'm using a WiFi network here, I will choose the arrow to expand the WiFi section.

Continue to scroll down => and select View additional properties
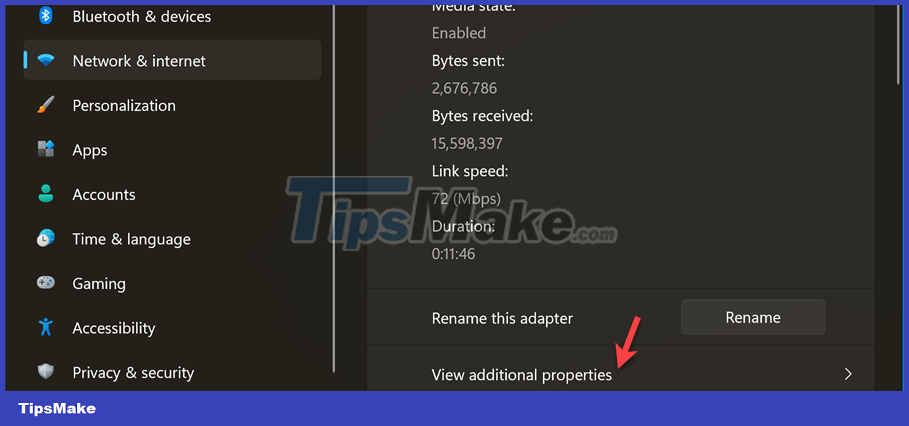
=> Now you will be taken to the IP address editing section as shown below.

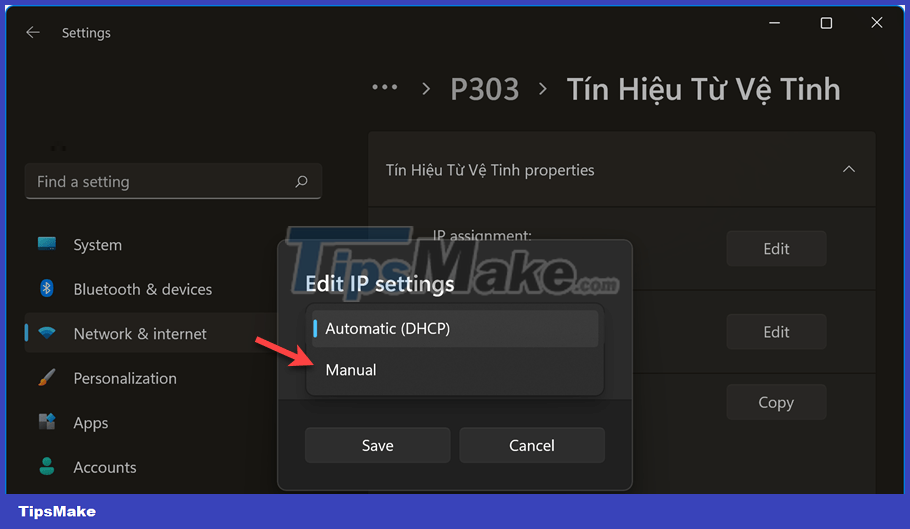
+ Step 2: A window Edit IP settings appears, choose Manual as shown below.
+ Step 3: Enter the static IP address you want to set, here we will use IPv4. But how to enter the correct IP address and work?
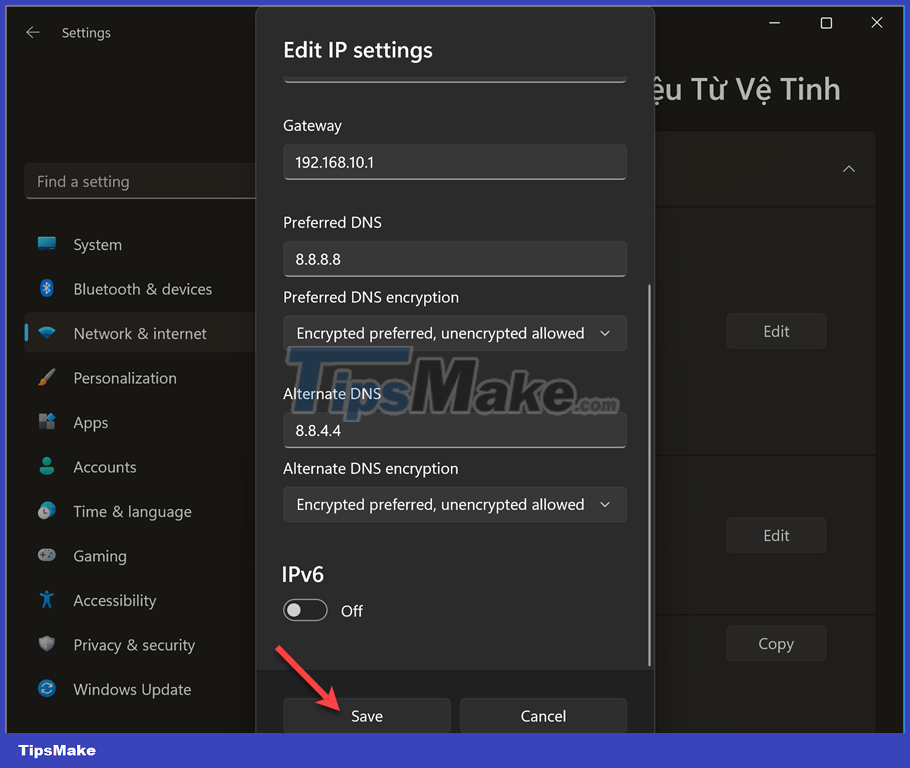
As shown below, I have filled in the information of the IP address as well as the DNS server. But of course it will not apply to your computer, because each machine will have a different IP address.
The information that we need to enter there is:
- IP address: Static IP address that you want to set up (must specify the standard otherwise the computer will lose network connection, how to determine it, see the section below)
- Subnet mask: Default is 255.255.255.0 (you enter the same)
- Gateway: It is closely related to the IP address, how to determine it, see the section below.
Regarding DNS settings, you can see the details in this article to better understand, or use the information below to enter.
- Preferred DNS / Alternate DNS: You can use DNS ranges of 8.8.8.8 / 8.8.4.4 or 1.1.1.1 / 1.0.0.1
- Preferred DNS Encryption and Alternate DNS Encryption: I choose Encrypted preferred, unencrypted allowed

How to correctly identify the Gateway:
You open the Run dialog box ( Windows + R) => enter the command cmd=> press Enter=> CMD window appears, enter the command below => and press Enter.
ipconfig/all
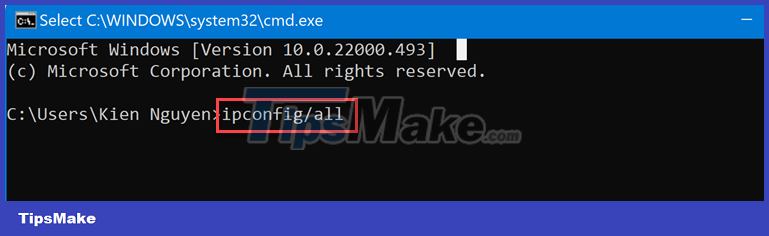
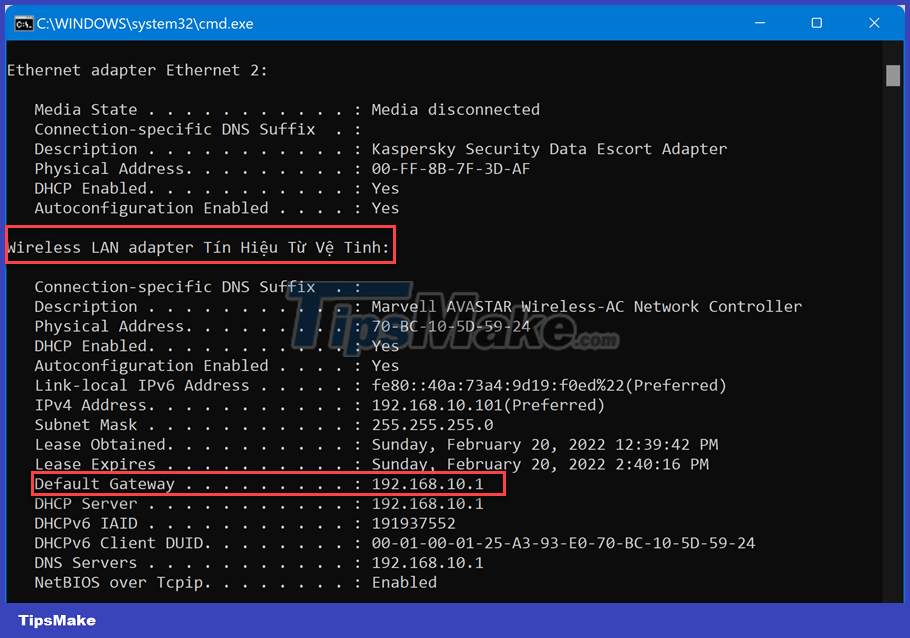
The computer will now scan and list all the networks on the computer. Scroll down and find the name of the network your computer is using.
If you are using WiFi , the name will start with Wireless LAN . if you are using a wired network , it will start with Ethernet adapter.
For example, if you are using a WiFi network, your Network Name is Satellite Signal. Find the line Default Geteway=> this is the address range that you will enter in the box Geteway above.
How to determine the exact IP address:
Once you have it Default Geteway, it's easy to get IP address it. For example Default Geteway, 192.168.10.1, then the IP address will be:
Keep the first 3 numbers the same , and the 4th number will fluctuate between 0 and 255 . But usually it should not be set as 0, 1. Because it is usually the IP address of the modem or router.
Specifically, the IP address you can set is 192.169.19.100, 192.168.10.120. And please change to a new IP address if the IP you just entered does not work.
+ Step 4: After getting the IP information, you enter it in the corresponding box, and after saving, the IP address will be updated immediately as shown below.

Bonus: In addition to setting a static IP address on Windows 11 through Windows Settings above, there is also a traditional way, applicable to all versions of Windows, which is to use the Control Panel. For details on how to do this, see the article on how to change the computer's IP address!
Conclusion
So I have detailed instructions for you how to set up a static IP address on Windows 11 already. This is a basic knowledge that you must know when using a computer, so try to remember how
Conclusion
Understanding Static IP Address Setting makes it easier to compare options, avoid common mistakes, and apply the information in this guide more effectively. Review the relevant requirements before making changes or choosing a solution.
FAQ
How do you set a static ip address for a windows 11 computer?
Follow the steps in this guide in order, confirm the required settings or tools, and verify the result before making additional changes.
Is it safe to set a static ip address for a windows 11 computer?
It is generally safe when you follow the recommended instructions, use trusted tools, and avoid changing settings you do not understand.
What should you do if the process does not work?
Recheck the requirements, restart the device or application when appropriate, and review each step for missed settings or compatibility issues.
Related Articles
 What Is IP Address: What Is a Static IP Address?11 minutes read
 How to Assign Static IP Addresses in Windows 7, 8, 10, Xp or7 minutes read
 How to Configure a Static Internet Protocol (IP) Address on6 minutes read
 Set up the Linksys Router with a Static IP Address4 minutes read
 How to Assign a Static IP Address in Windows 11, 10, 8, 7, XP or Vista: Complete16 minutes read
 Set Static IP Settings for Windows XP, 7, 8, and 8.17 minutes read
Reader Comments 0
Sign in with email or Google to join the discussion.