Instructions to change DNS Server on Windows, Mac, iOS and Android
By default, your computer will automatically obtain DNS information from your ISP (ISP). Sometimes, DNS Servers are unstable and you are blocked from accessing certain websites. Or the default DNS Server is blocked by some websites for a number of reasons. In this case you should change the DNS Server with the free Public DNS Server.
Table of Contents
When you change the DNS server that the Internet-connected router, computer, or other device is using, that is, you are changing the server, usually designated by the ISP, which the computer or device uses to convert the hostname. master into IP address.
In other words, you are changing the service provider to turn www.facebook.com into 173.252.110.27.
Changing the DNS server can be an effective troubleshooting step if there are certain problems with your Internet connection, which can help keep your web browsing more private (assuming you choose the service write data) and can even allow you to access the websites that your ISP has blocked.
By default, your computer will automatically obtain DNS information from your ISP (ISP). Sometimes, DNS Servers are unstable and you are blocked from accessing certain websites. Or the default DNS Server is blocked by some websites for a number of reasons. In this case you should change the DNS Server with the free Public DNS Server.
Fortunately, there are some Public DNS Servers that you can choose to use instead of automatically assigned servers that you might be using at the present time. Please refer to the article: The best, fastest DNS list of Google, VNPT, FPT, Viettel, Singapore for detailed information.
1. Why should I change my DNS Server?
By default, your computer will automatically obtain DNS information from your ISP (ISP). Sometimes, DNS Servers are unstable and block you from accessing websites. Or the default DNS Server is blocked by some websites for a number of reasons.
Using a 3rd DNS server like Google Public DNS will help you:
- Fix DNS error.
- Increase response time between computer and DNS Server.
- Ability to access blocked Web sites.
- Protect your information more safely and protect your computer from phishing attacks and other attackers.
2. How to change DNS server settings: Router and device
Enter the new DNS servers you want to start using in the DNS settings area, usually next to other network configuration options in the device or computer you are using.
However, before you change the DNS server, you will need to decide whether it is a better choice in your particular case, to change the DNS server on the router or on the computer or device. personal:
Change the DNS servers on your router if you want all computers and devices connected to the Internet through that router to use the new DNS servers. This only works if your computer and device are set up for DHCP, which means they look to the router because of DNS server, among many other information. This is very common.
Change the DNS server on your personal device if you only want that single device to use these different DNS servers. This is a good idea when troubleshooting Internet with a computer / device that you suspect might be related to DNS or if you don't have a router. This is also the case, if you encounter a less common situation like not using DHCP to get network information for the computer (s) or another Internet-connected device (s).
Here are some more specific help with the following two situations:
Change the DNS server on the router
To change the DNS server on the router, look for DNS- labeled text fields , usually in the DNS Address section , most likely in the Setup or Basic Settings area in the router's web-based management interface and enter the new address.
Please refer to the article: How to change the DNS server on the most popular routers for more details. This article will explain how to make details for most existing routers.
If you still have problems even after looking through that tutorial, you can always download the manual for the specific router model from the production company's support website.
Finding online about a specific router model is a good idea, if your router is not one of the popular types.
Change DNS server on computers and other devices
To change the DNS server on a Windows computer, locate the DNS zone in the Internet Protocol properties, accessible from the Network settings and enter the new DNS server .
Microsoft has changed the wording and location of network-related settings for each new Windows release, but you can find all the necessary steps in the next section.
a. Change DNS Server on Windows
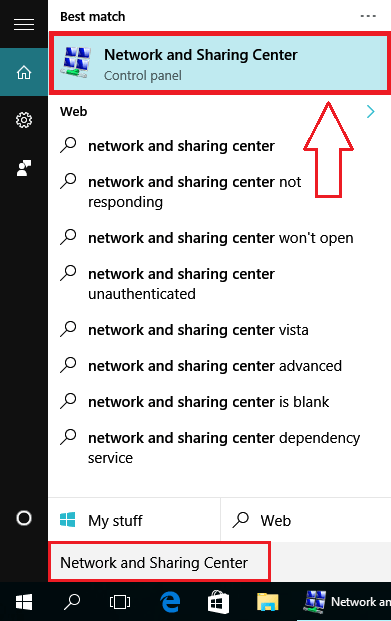
To change the DNS Server on your Windows computer, first press the Windows key, then enter the Network and Sharing Center keyword into the Search box, then select the Network and Sharing Center option on the results list.
Alternatively, you can open the Network and Sharing Center by opening Control Panel => Network and Internet => Network and Sharing Center.
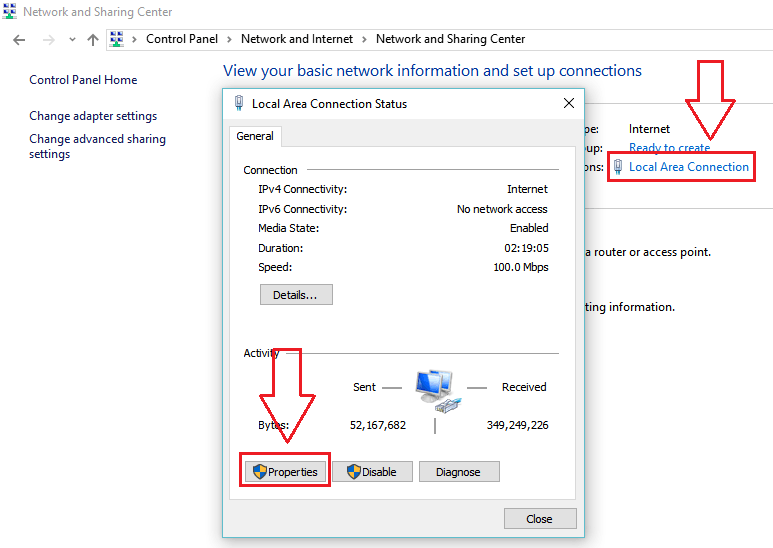
Click on the current Internet connection you are using and then select Properties .
Double-click Internet Protocol Version 4 (TCP / IPv4) . Select Use the following DNS server addresses , then enter Preferred and Alternate DNS Server.
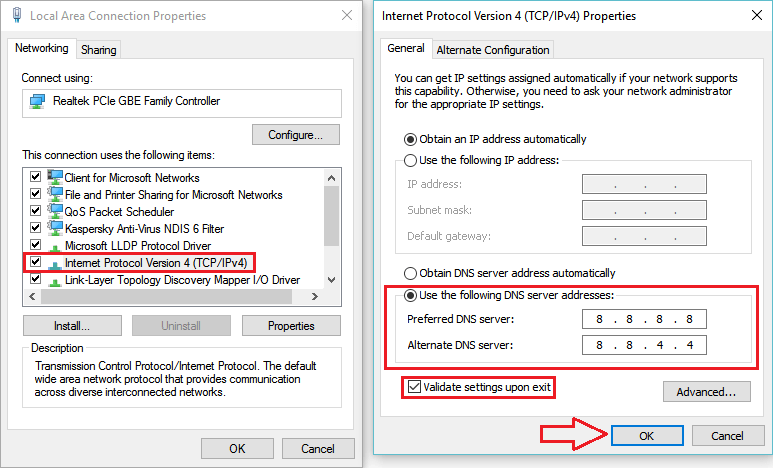
Check the option Validate settings upon exit and then click OK .
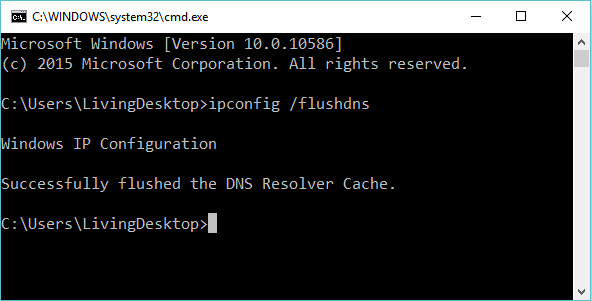
Finally open the Command Prompt and enter ipconfig / flushdns into the Command Prompt window to clear all current DNS cache.
b. Instructions for changing DNS Server on Mac OS X
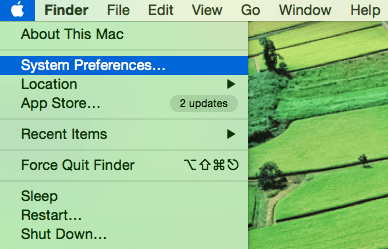
To change the DNS Server on Mac OS X, first click on the Apple logo and select System Preferences .
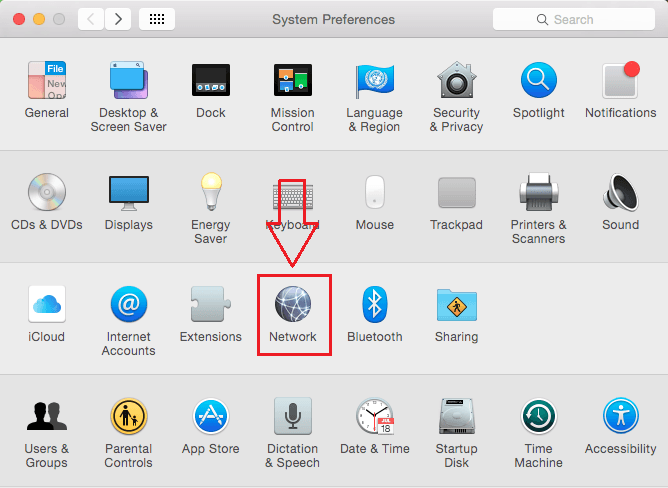
Next select Network.
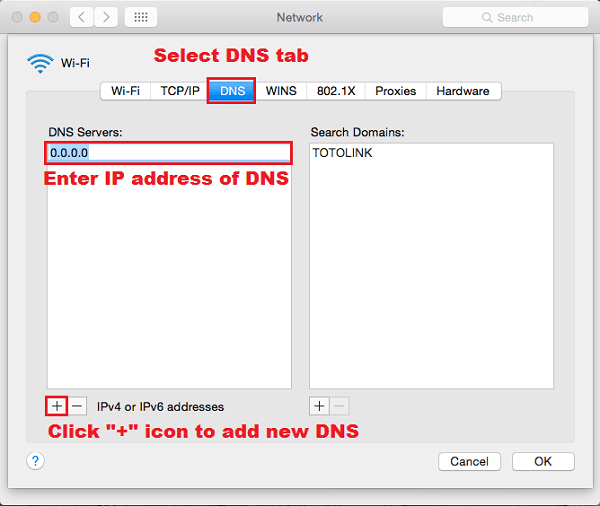
On the Network interface you switch to the DNS card. Here click the + symbol to replace / add Preferred DNS Server to the new IP address.
Click to select the + symbol again to replace / add Alternate DNS Server to the new IP address.
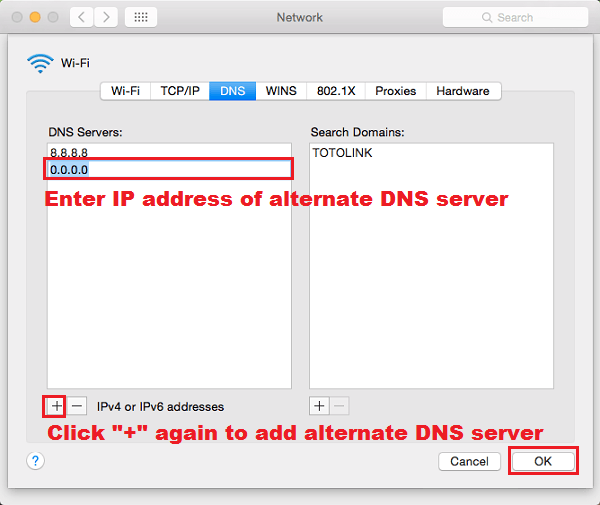
Finally click OK and select Apply to save the changes.
c. Change DNS Server on iOS device
To change DNS Server on iOS device, go to Settings and choose Wifi .
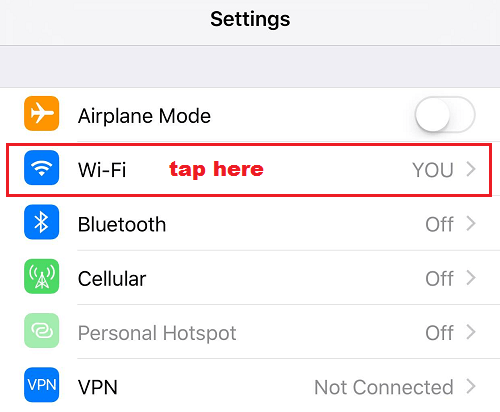
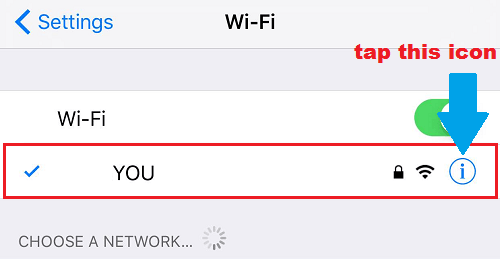
Next click on the current Wifi connection you are using.
Click on the DNS entry then replace the existing DNS Server with the new DNS Server.
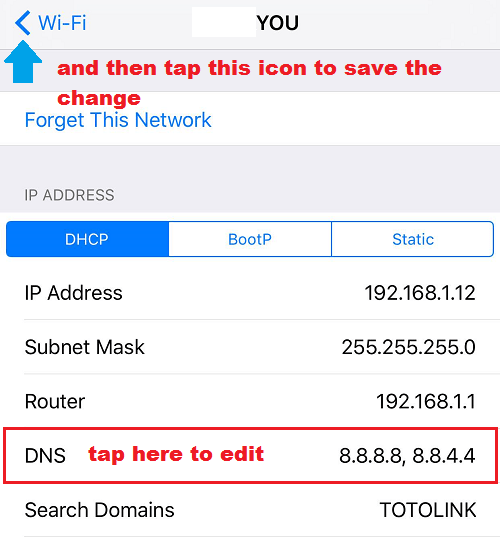
Finally click on the reverse icon to save the changes.
d. Change DNS Server on Android device
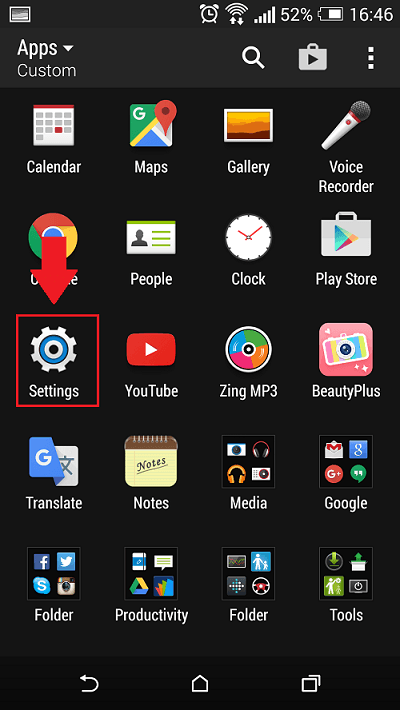
To change the DNS Server on the Android device, first click the Settings icon.
Next choose Wifi .

Click and hold on the current Wifi connection until a small popup window appears on the device screen.
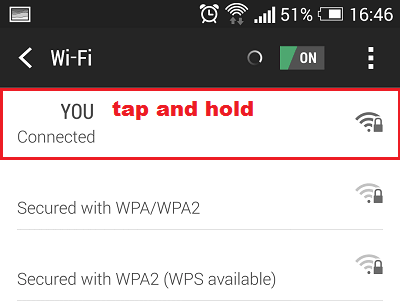
Select the Modify network next.
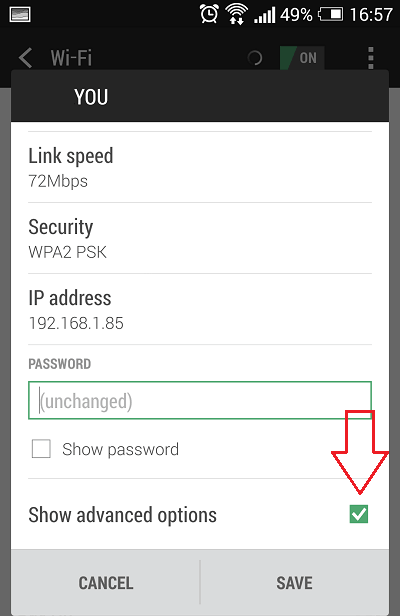
Then check the option box Show advanced options and scroll down to see more options.
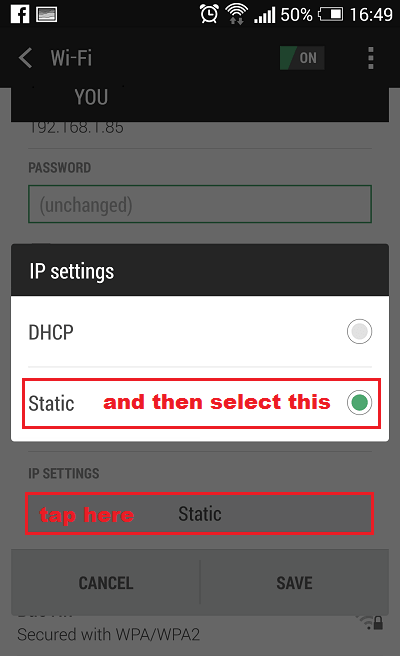
Click IP Settings to change from DHCP to Static .
Enter Preferred DNS Sercer in the frame DNS 1 and Alternate DNS Server into DNS frame 2.
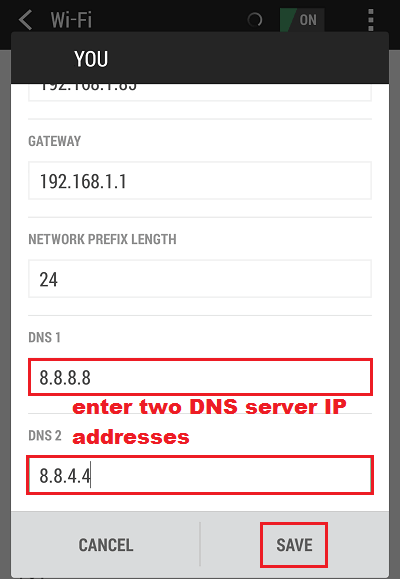
Then select Save to save the changes.
Refer to some of the following articles:
- Instructions for removing DNS Unlocker adware
- Learn about DNS? What is DNS Lookup?
- Some common informatics terms
- How to change DNS to access Facebook faster
Good luck!
Was this article helpful?
Your feedback helps us improve.
Related Articles
 How to change DNS server on the most popular routers15 minutes read
 Instructions to change DNS Server on Windows 114 minutes read
 3 'legitimate' reasons to change DNS Server13 minutes read
 Change League of Legends VNG server, switch LOL VNG server5 minutes read
 Instructions for setting up and managing FTP Server on Windows 108 minutes read
 How to change DNS Server on Windows 114 minutes read
Reader Comments 0
Sign in with email or Google to join the discussion.