How to connect to an FTP Server from Windows Explorer?
Windows allows users to easily connect to an FTP Server and the Shared FTP folder using Add Network Location wizard . After running the wizard, you can easily manage (copy, move, delete, create or rename .) all content on FTP server from Windows Explorer.

Add Network Location wizard helps you create an FTP Share shortcut in Windows Explorer without having to install any third FTP Client program to access and manage files in the Shared Server folder of the FTP Server.
1. Steps to connect / access FTP using Windows Explorer
Before connecting to an FTP server, you first need to know the Hostname (URL or IP address) and login credentials (if any) to access the shared FTP content.
To access shared content on FTP server via Windows Explorer (or File Explorer), enter the address bar:
ftp: // include the hostname (URL or IP address) of the FTP Server.
For example, if the IP address of FTP Server is "192.168.1.200" and the FTP port number is 54557, you enter:
ftp://192.168.1.200:54557

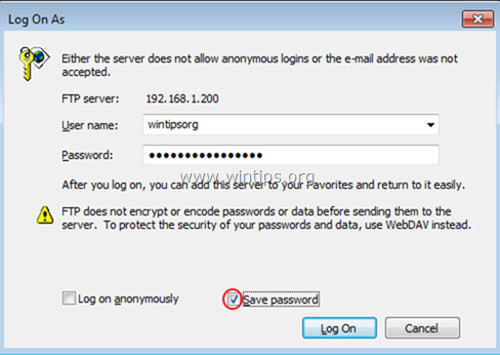
When required, enter the information (FTP username and password) to connect to the FTP server.

Once completed, you can work with content on FTP if it is stored on your local computer.
Once you have completed the process, you can close the Windows Explorer window to disconnect the FTP Server.
However, in order not to manipulate it manually, you can create a shortcut.
2. Create an FTP Share shortcut on Windows Explorer
To create an FTP Share shortcut in Windows Explorer, follow the steps below:
1. Open Windows Explorer .
2. On the Windows Explorer window, right-click any space and select Add network location .

3. Click Next 2 times , then on the next window enter the IP address and port number of the FTP Server. Once completed, click Next .

4. Uncheck Log on anonymously , then enter the FTP user name and then click Next .

5. You can keep the default name (or enter another name) for the new connection and click Next.

6. Next, click Finish to close the wizard window.

7. Finally you will be asked to enter the login information.

8. After entering the login information, a new FTP shortcut will appear on Windows Explorer.

Refer to some of the following articles:
- Use IIS to set up FTP Server on Windows
- How to create and manage FTP Server using IIS on Windows XP
- Instructions for activating TFTP and Telnet Client on Windows 10
Good luck!