Instructions on how to create, delete user accounts on Windows
Sometimes at work you use the same computer with a lot of people, to protect your personal information, create yourself a personal account. The following article shows how to create / delete new users on Windows 7.
1. Create new users on Windows 7
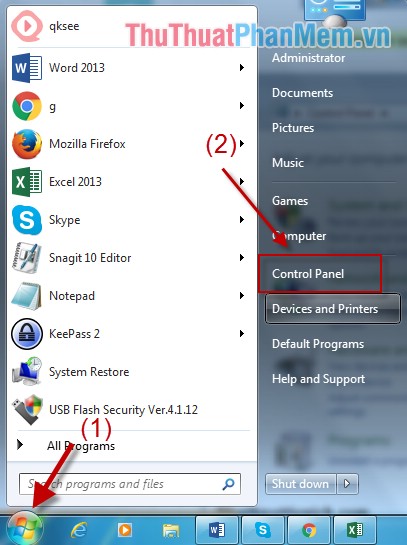
Step 1: Go to Start -> Control Panel .
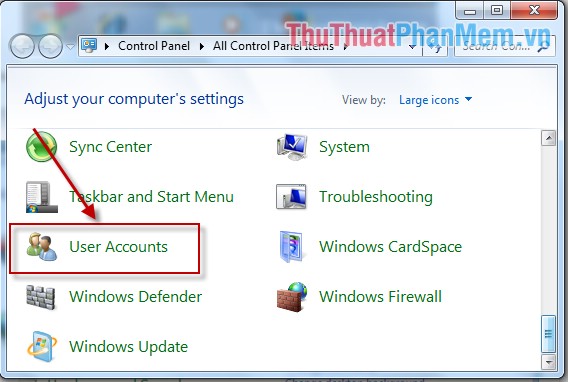
Step 2: A dialog box appears and click User Accounts .
Step 3: Click Manage another account .

Step 4: Click Create a new account .

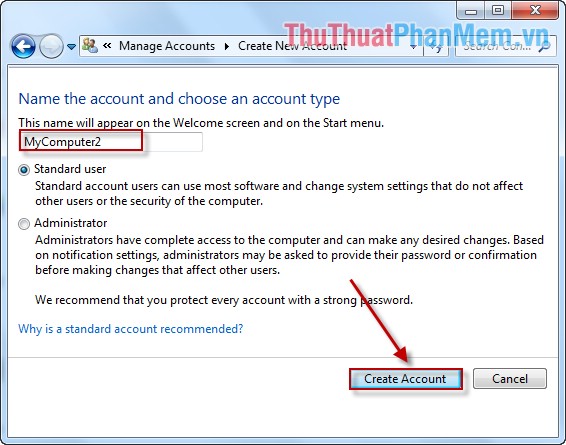
Step 5: Enter the name of the user you want to create, for example, here enter the name Mycomputer2 . There are 2 access options for the account:
- Standar user : Account allows users to access, use and manipulate software, but it does not have any operations on users.
- Administractor : Is the highest account in the computer, allowing to set up, install software or any other operations on the computer. Special permission to change and be allowed to manage all activities of other users.
Finally, click Create Account .
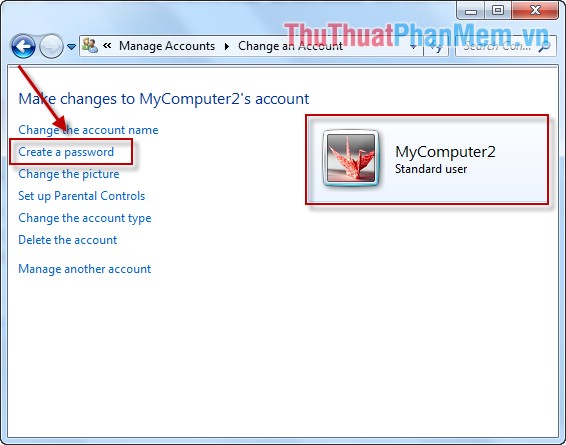
Step 6: After creating the Account appears, click on Create a password to create a password for the account.
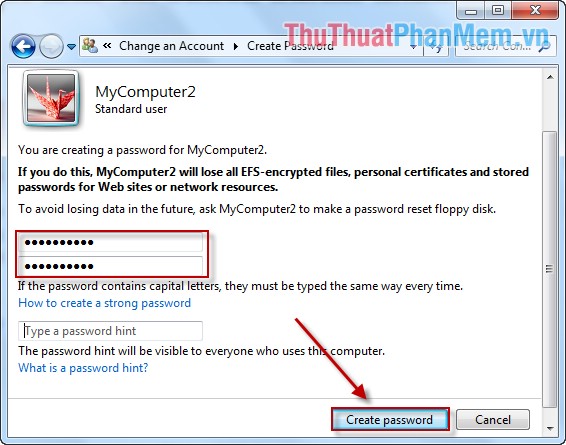
Step 7: A dialog box appears enter the password and click Create password .
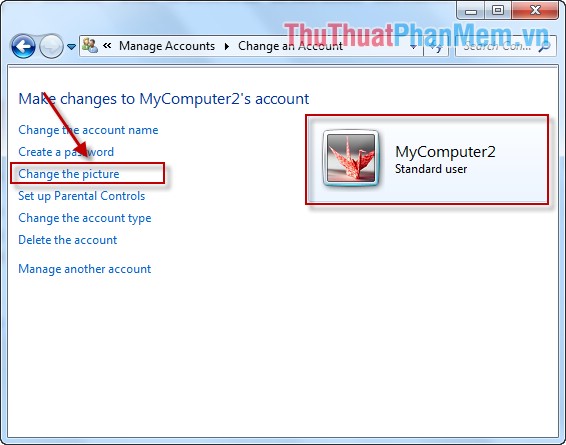
Step 8: After creating the password, click Change the picture to change the image representing the user.
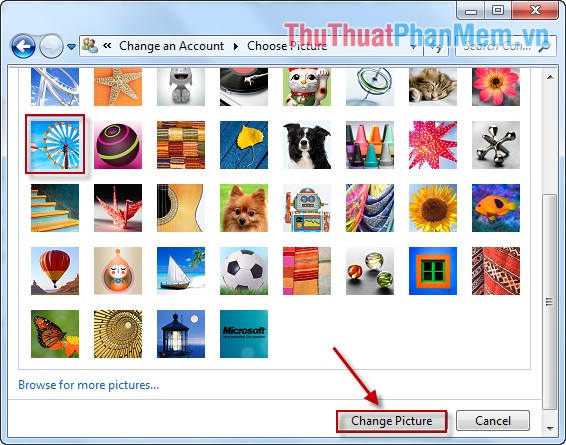
Step 9: Select the appropriate image -> click Change Picture .
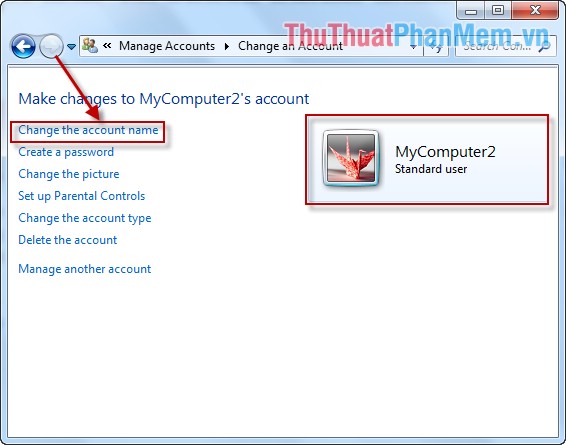
Finally you have created yourself an account in case you want to change the user name, click Change the account name .
A dialog box appears to enter a new name for the user and click Change Name .
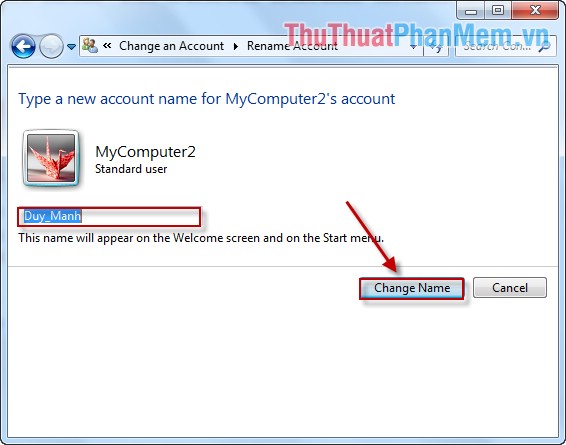
So you have created a full account, when you turn on the computer, the logon screen will display the name of the user to choose to login. Note you should remember your password.
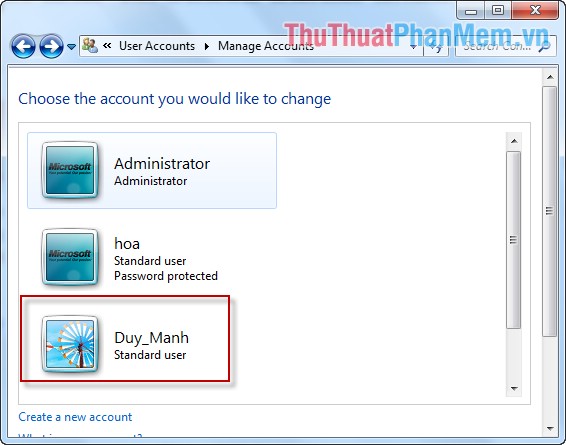
2. Delete the user on Windows 7
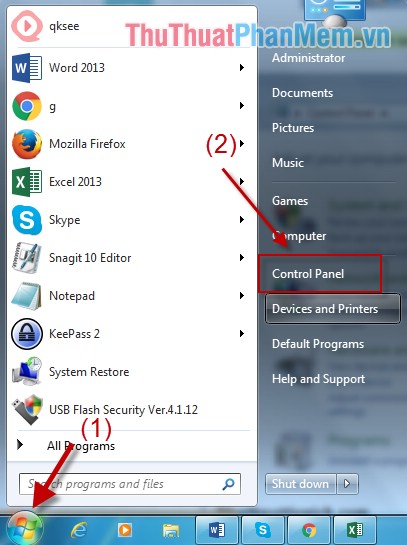
Step 1: Go to Start tab -> Control Panel .
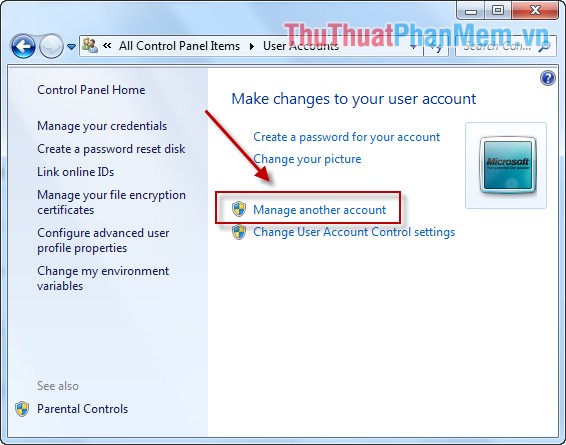
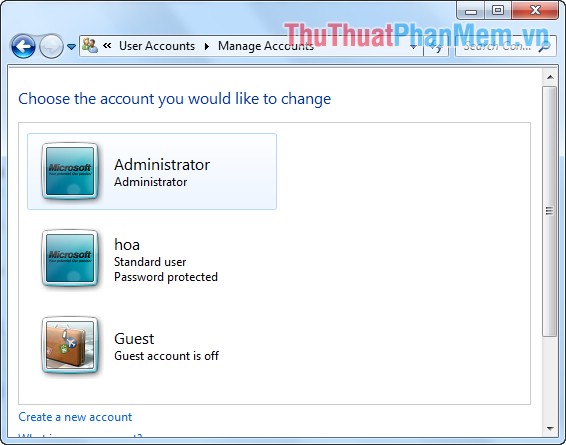
Step 2: A dialog box appears and click Manage another account .
Step 3: Click on the user name you want to delete, for example, here you want to delete the account named Duy_Manh.
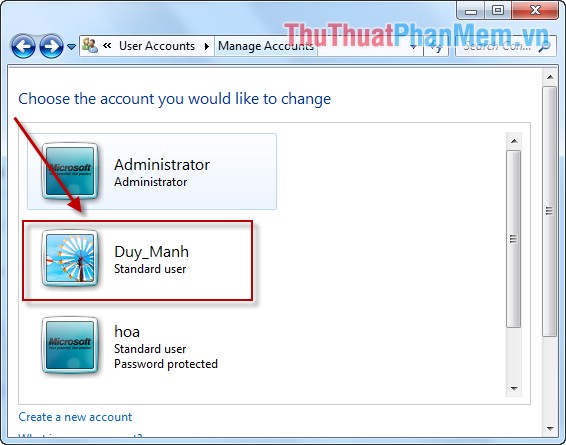
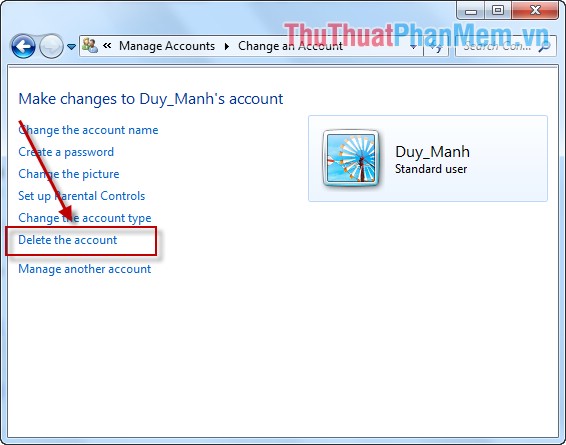
Step 4: A dialog box appears and click Delete the account .
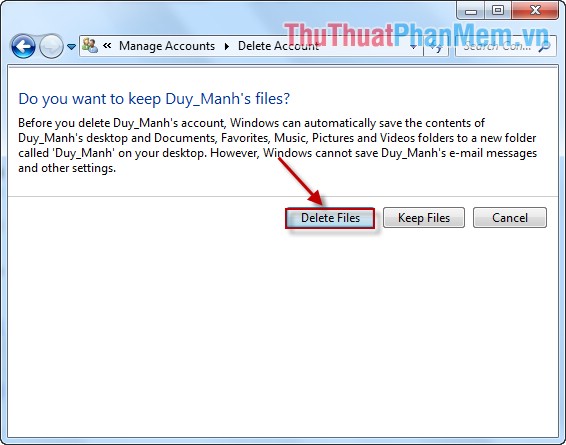
Step 5: When deleting, you should delete all data files related to that account, so click Delete Files .
Step 6: A dialog box appears and click Delete Account .
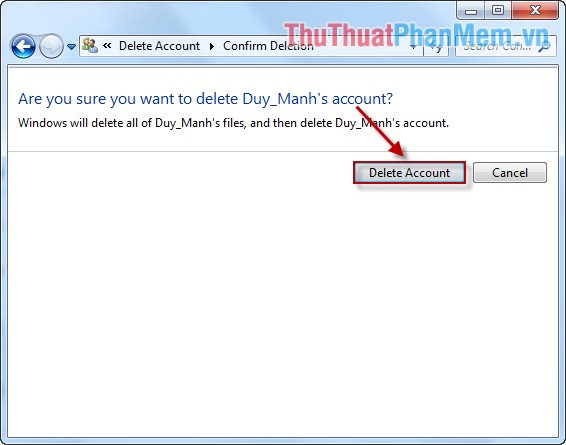
After deleting an account when you turn on the computer, the logon screen no longer shows the username of that account, all information related to the account is deleted.
The above is a guide on how to create and delete a Window account hoping you can apply it appropriately in every situation.
Good luck!