How to restore Windows User Profile 10
If you see an error message that does not allow you to log in to your Windows 10 user account, your profile may have failed.The following article will show you how to fix it or create a new account.
Your user account contains personal settings such as desktop wallpaper, taskbar preferences and some program settings such as browser history.You will feel quite frustrated if you lose these settings.
- How to fix the error The User Profile Service failed the logon. Không thể nạp được người dùng profile
Log in to a temporary profile ( Temporary Profile)
When you cannot log in to your normal user account, you can log in to the temporary account.This usually happens if an important Windows update has been stopped between processing.
You will see either error (or sometimes both):
- You have logged in to a temporary profile.You cannot access your file, and files created in this profile will be deleted when you log out.To fix this, log out and try logging in the next time.Please see the event log for details or contact your system administrator.
- We cannot log in to your account.This problem is usually corrected by logging out of your account, then logging in again.If you do not log out now, any files you create or change will be lost.

The first thing you need to do here is try logging out and then log back in, maybe it works or not but it is worth it to try it.
Logging in to the profile is temporarily inappropriate because any changes you make in the temporary profile are lost every time you log out, so see how to restore your normal profile below. .
Find security identification code
First, you need to find the Security identifier (SID) of the temporary user account you are logged into.Windows uses this unique string to control your rights and groups of interactions.
First, perform acmdsearchand select the relevant result to open the Command Prompt.
Next, enterwhoami / user and press Enter.This command queries the system to tell you the SID code of the current account.
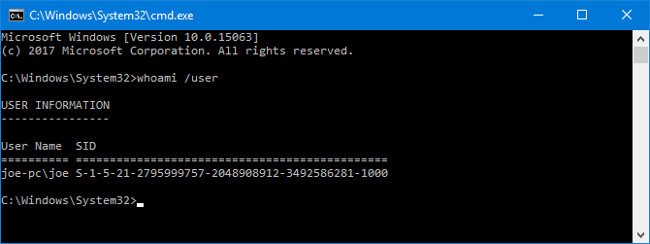
Record your SID code by pressingCtrl + M to highlight it, left-click and drag to blacken the SID code then press Ctrl + Cto copy.
Edit the registry
Now we need to edit in the registry section to restore the original profile.Editing the registry can be dangerous to the system so follow the instructions below carefully.
Do a search forregedit and select the relevant results to download Registry Editor. Paste the following link in the address bar and press Enter:
ComputerHKEY_LOCAL_MACHINESOFTWAREMicrosoftWindows NTCurrentVersionProfileList
On the left pane, you will see a list of SID codes in the ProfileList folder.
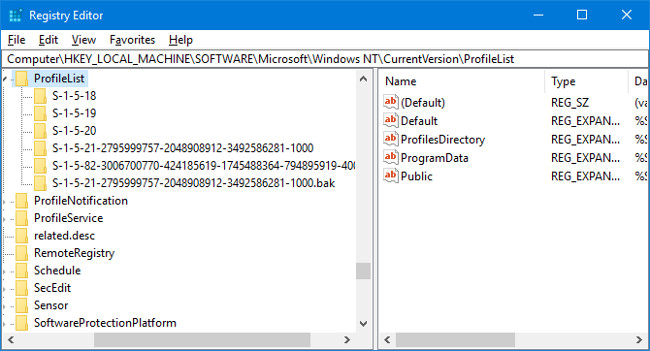
Your SID code can be one of the following three options:
- Your SID code is listed twice, with and without a.BAK tail.
- Your SID code is only listed oncewith a.BAK extension (eg S-1-5-21-2795999757-2048908912-3492586281-1000.bak).
- Your SID code is only listed once and does not havea.BAKextension(eg S-1-5-21-2795999757-2048908912-3492586281-1000).
Although your SID code belongs to any of the three options above, the process is similar and there are only a few minor differences.Follow all the steps below in order, but only the steps out of your options.For example, if your SID code is optional 2, then you do not delete the duplicate folder, but will follow the two steps below to rename the directory and change the directory path.
- Block access to Registry Editor on Windows 10/8/7
Option 1: Delete duplicate folders
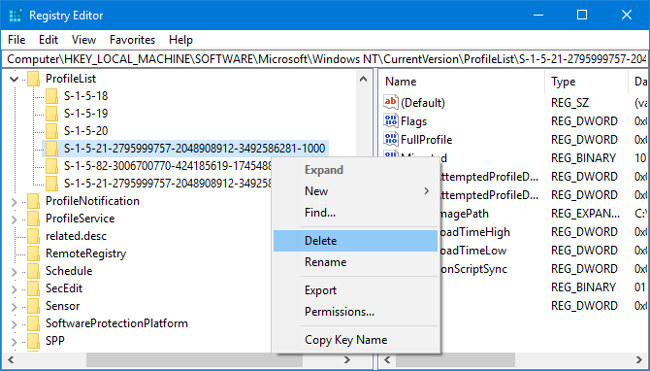
If your SID code is listed twice - and only in this case - you need to delete the directory without the tail a.BAK.Right-click on the folder from the left pane and clickDelete , then click on Yesto confirm.
Options 1 and 2: Rename the directory .BAK
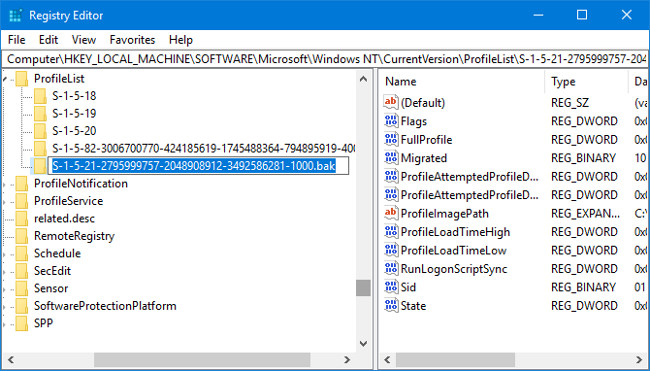
Right-click on the folder that matches your SID code with the .BAK extension, clickRename and delete the extension. BAK . Press Enterto save the changes.
Options 1, 2 and 3: Change directory path
Left click on the folder in the left pane that matches your SID code.And on the right pane, double-clickProfileImagePath . In the Value data field, enter the correct path for your User Profile.

If you are not sure about the path, pressWindows + R key to open Run, enter C: Users and press Enter.This will display a list of all your user profiles.
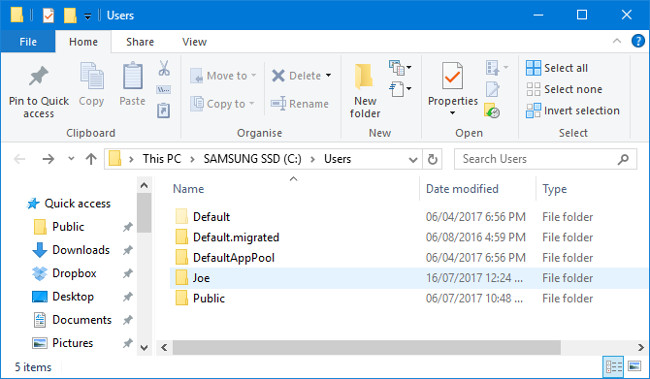
When you have written the correctValue data , click OK.
Next, in the right-hand pane, double-clickState . Change Value data to 0 and click OK.
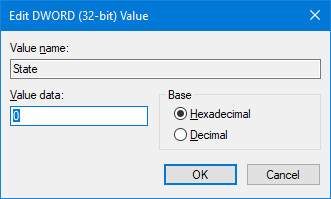
Close Registry Editor and restart your computer.Log back in to your user account and you will see that everything has been restored and returned to normal.
If you still have problems, see how to create a new permanent user account.
Create new profile
If the above instructions still fail to recover your profile, you should create a new User Profile.Note that creating this new User Profile will not restore your computer settings such as wallpaper or taskbar preferences, but you will have a permanent user account.
Step 1: Start in safe mode
To get started, you need to start your computer in safe mode (Safe Mode).To do this, restart your computer.On the login screen, hold downShift and click Power> Restart . When you're done, you'll be on the Choose an option screen , go to Troubleshoot> Advanced options> Startup Settings> Restart.
Your computer will restart.PressF4to start in safe mode.
Step 2: Activate the administrator account
After logging in, perform acmd search . Right-click on the relevant result and select Run as administrator . This will open the Command Prompt . Enter net user administrator / active: yes and press Enter.
Note that you can go back by running the same command, but convertingyes to no.
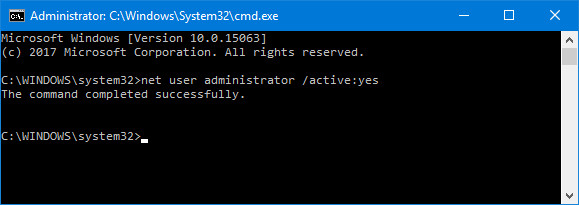
This will activate the hidden admin account on your computer.Restart and then log in to this new account.
Step 3: Create a new account
PressWindows + I key to open Settings. Visit Accounts> Family & other users . Click Add someone else to this PC . Then you just need to follow the instructions. However, if you want to create an internal account instead of a Microsoft account, click I don't have this person sign-in information and then select Add a user without a Microsoft account.
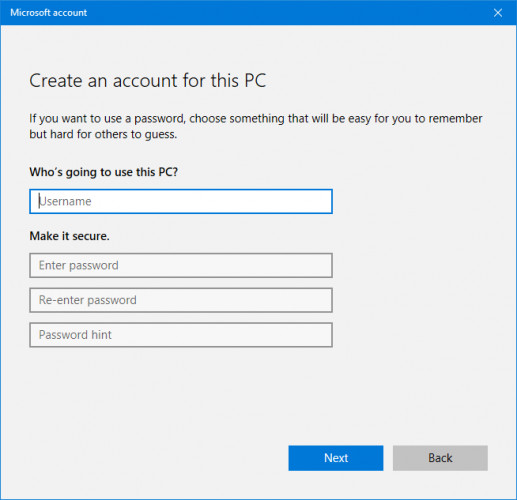
Step 4: Transfer the file to the new account
Restart the computer and log back into the administrator account.PressWindows + R key to open Run, enter C: Users and press Enter, you will be taken to the old and corrupted user account.
Now copy and paste all your user files from the old account to the new account.You should copy each folder one by one or you will accidentally bring some hidden and problematic system files to your new account.
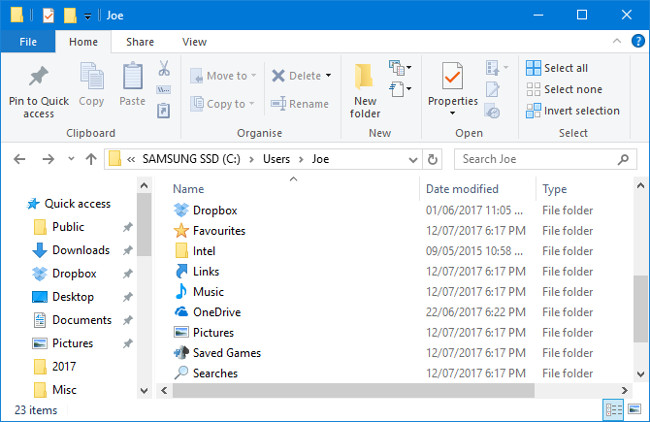
To select all files in a folder, pressCtrl + A. To select a range of specific items, hold down the Ctrlkeywhile you left-click the items.Also, you can hold the left mouse button and drag around the file.
Then pressCtrl + C to copy them and go to the Users folder, go to the new account and press Ctrl + Vto paste your files.
Once completed, log out of your administrator account and log in to your new account.All files you transfer will be there.
Now you have a permanent user account.Fortunately, the file is broken but you don't lose much data.However, you should regularly backup your files to avoid getting lost.