Instructions for using Microsoft Forms
Microsoft launched Microsoft Forms in September 2018. It is used to create surveys, polls and puzzles. This article will show you how to use Microsoft Forms.
Table of Contents
Microsoft launched Microsoft Forms in September 2018. It is used to create surveys, polls and puzzles. Compared to Google Forms, Microsoft Forms has a cleaner interface but some hidden features are hard to find. This article will show you how to use Microsoft Forms.
1. How to create a form
When creating a form, Microsoft Forms gives you seven choices:
- Multiple options
- Text
- Rating
- Date
- Ranking
- Net Promoter Score
When doing multiple choice questions, Question analysis forms and help you answer. For example, if the question is 'Did you buy .', the Form will display suggestions Yes, No and Perhaps.
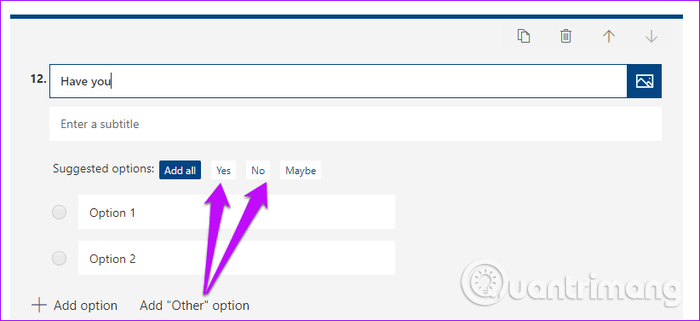
If the first option is Sad, Forms will suggest you add Happy and Angry as the second and third choices.
You just need to select the option and proceed to the next question.
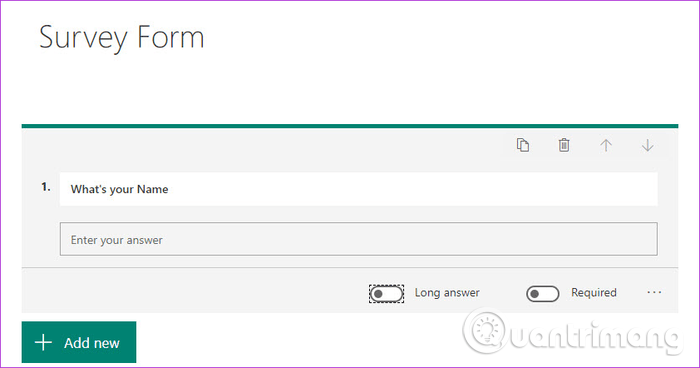
Similarly, for questions that need to be answered in writing, you can specify a long or short answer. In addition, you can limit the type of answers by clicking on the three dots menu and selecting Restrictions .
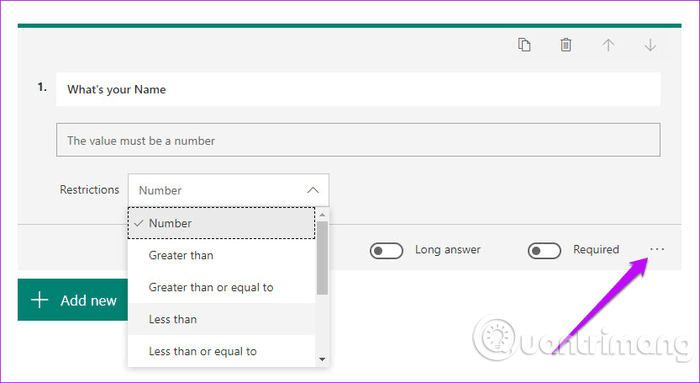
Then, choose one of the options from the drop-down list and add the values.
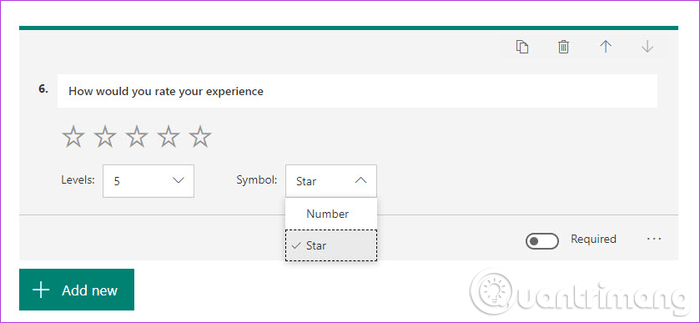
For ratings, you can specify levels as well as icons.
2. Share and embed the form on the website
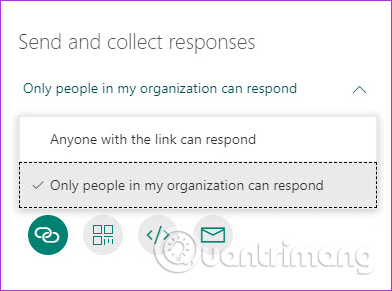
When you complete the form, you can send it to people to collect feedback by clicking on the Share button in the top right corner.
You can select objects for your form. If you want to limit the people in your organization, leave the default option. If not, click Only people in my . and select the option Anyone with the link .
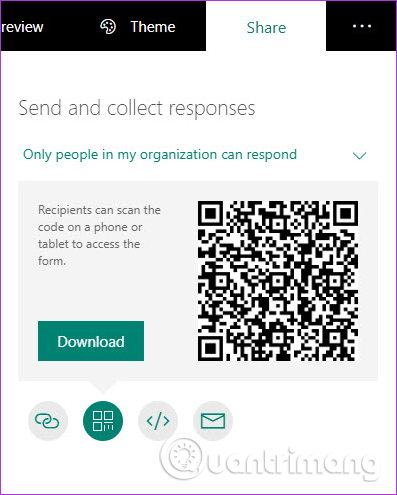
You can share direct links with specific objects. But the best way is to embed the form in your website or blog. Or better yet, create a QR code for the form and then share it on the blog or add it to the email.
3. Branching option
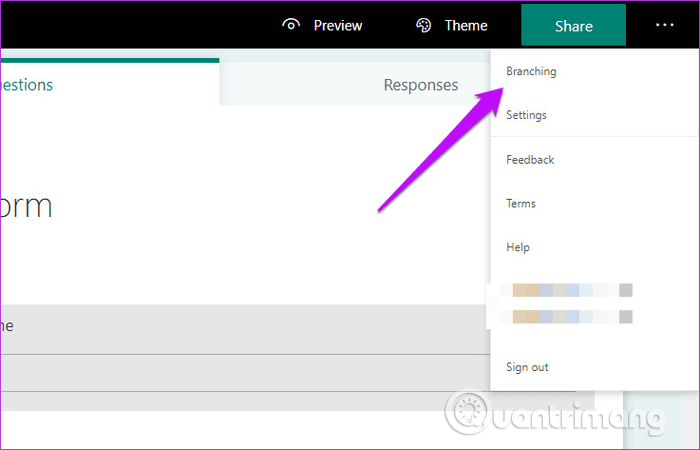
By default, Microsoft Forms does not allow you to add conditional questions like Google Forms. This is one of the hidden features of Microsoft Forms.

For example, in a question with or without, if the answer is Yes, go to a question 2 and if the answer is No, go to question number 3. To add a condition to the question, after completing it, touch Three dots icon in the upper right corner and select Branching .
Next, touch the question you want to add conditions. Now touch the next question from the drop down menu. Note, you need to do this for all questions.
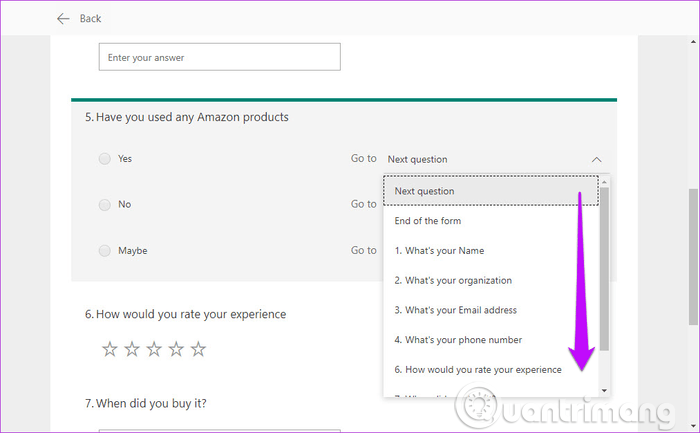
To preview your form with conditional logic, just go back and click the preview icon.
3. Share to cooperate
Microsoft Forms adds business features so you can make forms and survey with friends. To share the form with friends or colleagues, tap the Share button at the top and select the Share option from the menu on the right.
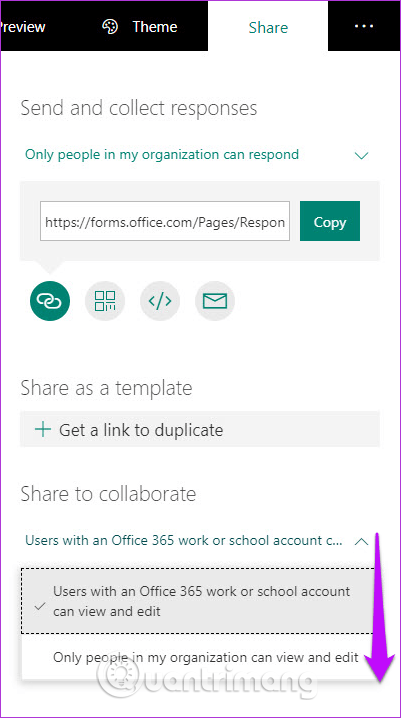
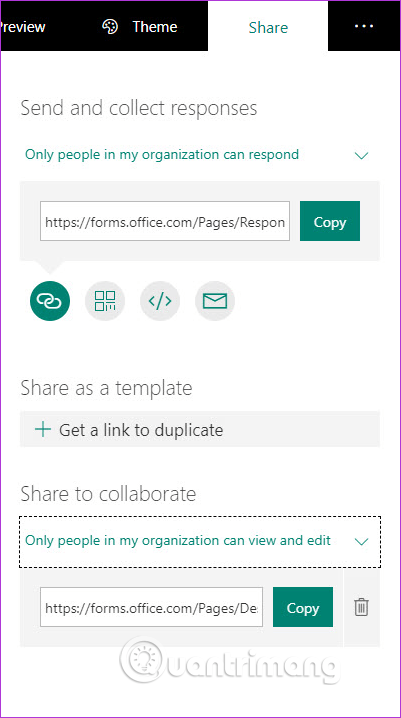
Next, choose the sharing option to work and share links with colleagues. The downside of this feature is that you cannot choose a name to share the form with and someone else to work on later.
5. Groups Forms
Groups is an exclusive Office 365 service that helps you collaborate with people in your team. This feature is not only available on Forms but also a key feature in Office Suite.
With Groups Forms, team members can view and edit forms without linking. These forms will be included in the group form.
6. How to add time limits and other customizations
Microsoft Forms seem to lack some features but as mentioned above they are hidden. To add the start and end dates, go to Settings in the three-point menu, select Start Date and End Date , enter the date.
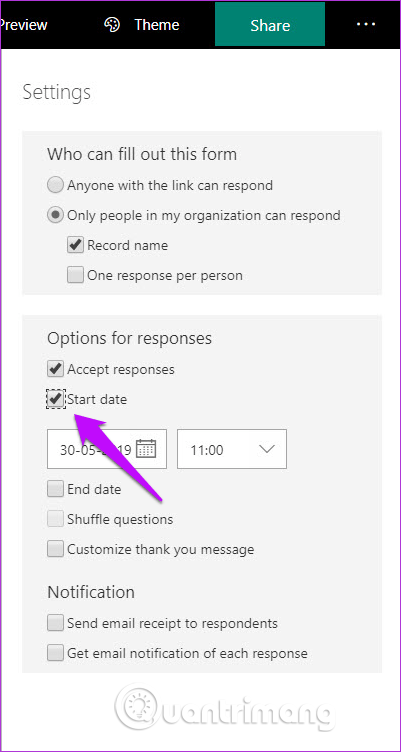
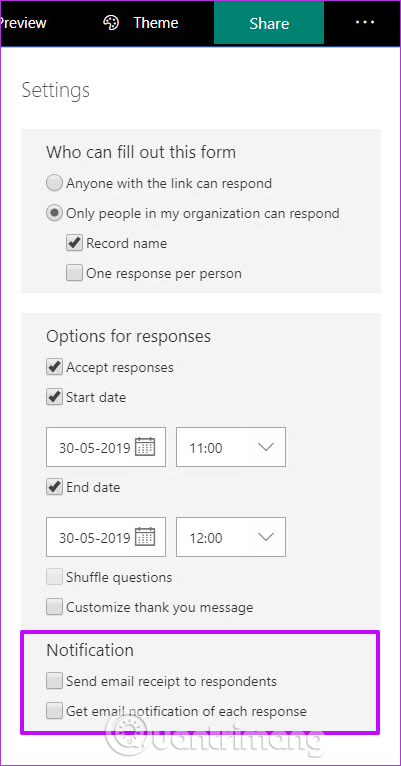
In addition, you can delete questions for different people and add the words 'Thank you' at the end of each form. You can also set up receiving email notifications when someone answers the survey by selecting the option in Notifications .
7. Analyze the answer
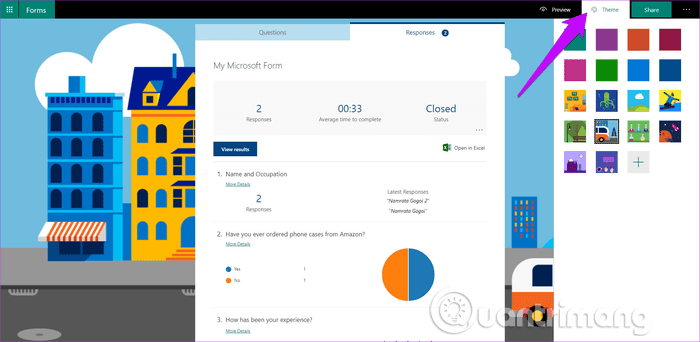
After submitting the survey and getting the answer, so how to analyze and synthesize? The implementation is very simple, you just need to access the Response tab to see all the answers. Microsoft Forms provides visual images for all answers to make them easier to understand.

However, if you want to see all the individual responses, click View results . You will see the respondent's name in the Responder box and their answer below.

To see the next answer, click on the arrow icon. You can also download all the answers on the spreadsheet by clicking the Open in Excel button.
8. Change theme and template
What users like about Microsoft Forms is that the interface is clean and not messy. They also like its theme with bright colors that make your form stand out.
To select a theme, touch the Theme button at the top. You can also create custom colors for your forms or choose photos from your computer library.
For example, if your survey is about gadgets and phones, the background with a utility will be more useful than the background of a person surfing the web.
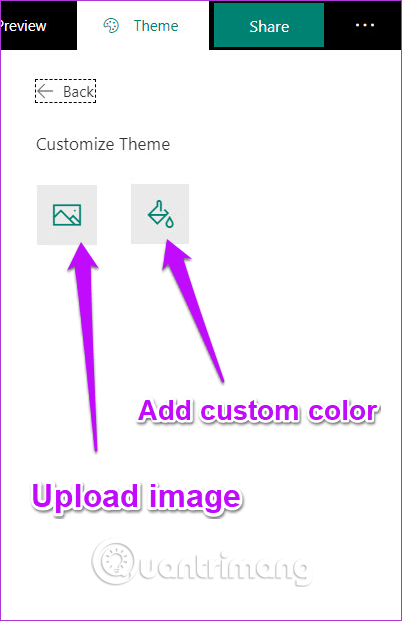
To select the background, click on the plus sign icon and choose one of two options: download photos from your OneDrive account or search the network.
Although Microsoft Forms has a lot of good features and designs, it still lacks certain options such as the ability to download files. In addition, it does not have pre-built templates that users can use without spending a lot of time building structures.
Was this article helpful?
Your feedback helps us improve.
Related Articles
 How to Sync Microsoft Forms with Excel4 minutes read
 How to create exams on Microsoft Forms3 minutes read
 7 ways to take advantage of Google Forms4 minutes read
 How to create exams on Microsoft Teams2 minutes read
 How to use Microsoft Forms to create professional surveys9 minutes read
 How to add branches or nested questions in Google Forms4 minutes read
Reader Comments 0
Sign in with email or Google to join the discussion.