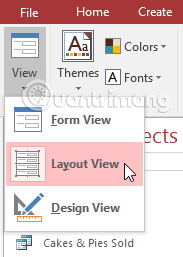
Format forms in Access 2016
After creating the form, you may want to modify its interface. Formatting a form can help make your database look consistent and professional. Some format changes can even make your form easier to use..
After creating the form, you may want to modify its interface. Formatting a form can help make your database look consistent and professional. Some format changes can even make your form easier to use. With formatting tools in Access, you can customize your form so that it looks exactly what you want.
In this lesson, you will learn how to add command buttons, modify form layouts, add logos and other images, and change the color and font of a form.
Throughout this tutorial, we will use a sample database. If you want to monitor, you need to download the Access 2016 sample database file. You will need to install Access 2016 on your computer to practice.
Form formatting
Access provides several options that allow you to make your form look as you want. Although some of these options, such as command buttons, only for forms, other options may be familiar to you.
Command buttons
If you want your form users to quickly perform specific tasks, consider adding command buttons. When you create a command button, you specify an action for it to perform when clicked. By including commands for common tasks right in your form, you'll make the form easier to use.
Access provides many different types of buttons, but they can be divided into several main categories:
- Record Navigation allows users to move back and forth between records in your database.
- Record Operation allows users to perform operations such as saving and printing records.
- Form Operation allows users to quickly open or close forms, print existing forms and perform other tasks.
- The Report Operation provides users with a quick way to do things like preview or send reports from the current record.
How to add a command button to the form
1. In the Form Layout view , select the Design tab , then locate the Controls group .
2. Click the Button command .

3. Select the desired location for the command button, then click.
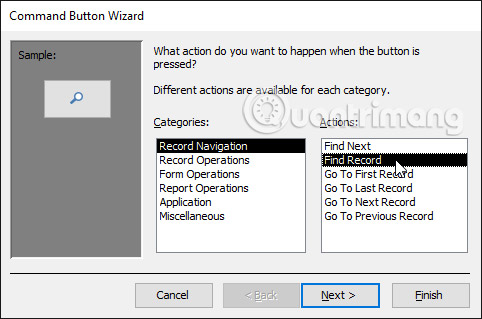
4. Command Button Wizard will appear. In the Categories control panel , select the list of buttons you want to add. For example, we want to find a way to move faster to specific records, so we will select the Record Navigation category .
5. The list in the Actions panel will update to reflect the category you have selected. Select the action you want the button to perform, then click Next. In this example, we will select Find Record.
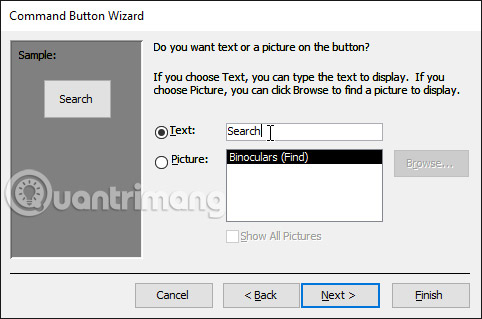
6. You can now decide whether you want your button to include text or images. The live preview of that button will appear on the left.
7. To include text, select the Text option , then enter the word or phrase you want into the text box.
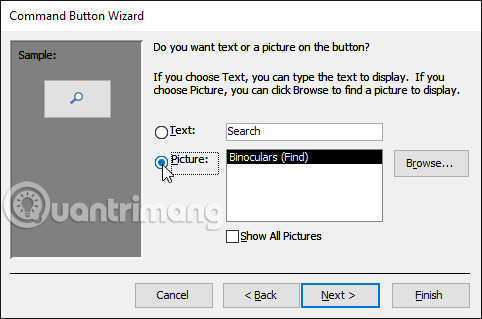
8. To include an image, select the Picture option . You can decide to keep the default image for that button or choose another image. Click Show All Pictures to choose from a different button icon or Browse to select photos from your computer.
9. When you are satisfied with the appearance of the command button, click Next.
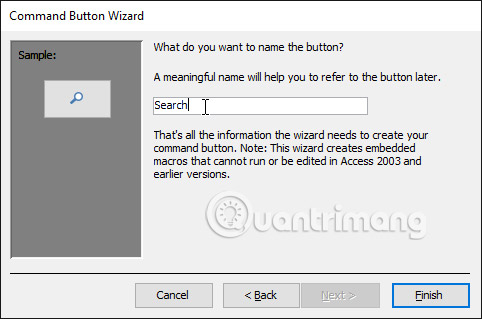
10. Enter a name for the button. This name will not appear on the button, but knowing the name of that button will help you quickly determine the node's location, if you want to modify it with the Property Sheet. After adding the button name, click Finish.
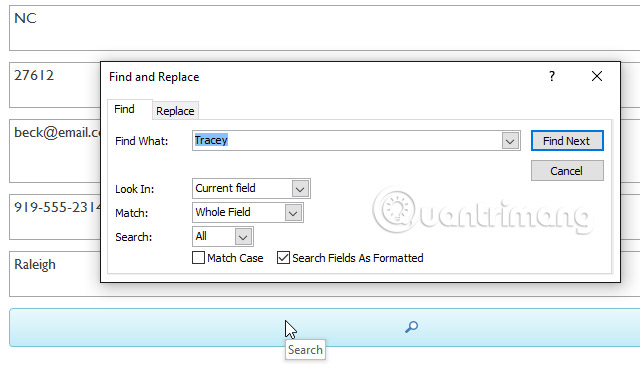
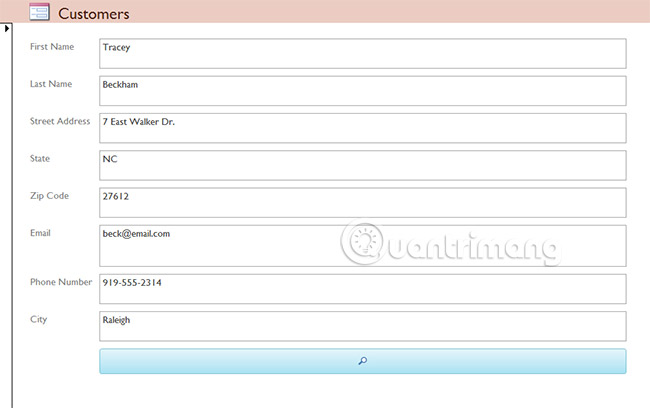
11. Switch to the View mode to check the new button.Our Search button opens the Find and Replace dialog box .
Some users report that Access does not work while formatting the form. If you have trouble performing any of the Layout views , try switching to Design view .
Modify form layout
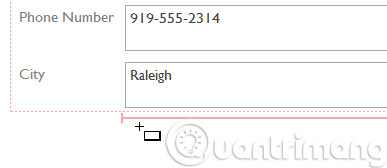
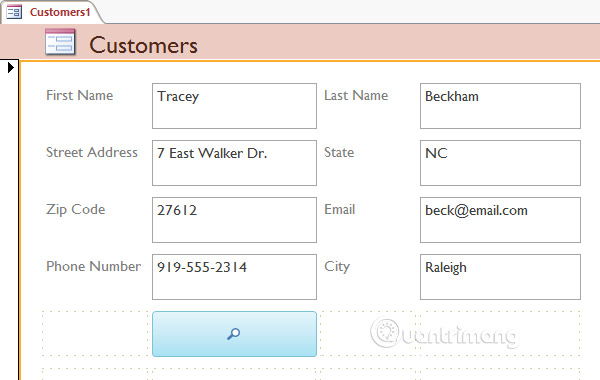
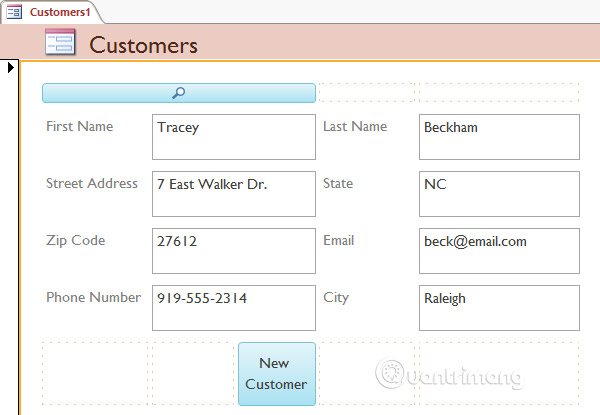
When you create a form, Access arranges form components in a default layout, where fields are neatly stacked on top of each other, with the same width. Although this layout has its own function, you may find it unsuitable for your information. For example, in the form below, most schools are almost completely empty because the data stored there doesn't take up much space.
The form will fit more data if you make the fields and buttons smaller, or even put some of these buttons side by side. However, with the default layout, you won't be able to place two fields side by side or resize a field or node without changing the size of all the details in that field or button. This is because Access creates a form component in rows and columns. When you resize a field, you will actually resize the column that contains it.
To resize and rearrange the fields the way you want, you'll have to modify the layout of the form. For example, because the default layout for the form in the example contains only two columns, one for field tags and one for fields, we'll have to create a new column to place two fields side by side.
You can do this using the command on the Arrange tab , containing all the tools we will need to customize the layout of the form. If you've ever built and modified tables in Microsoft Word, you already know how to use most of these tools.

Change the size of the form component
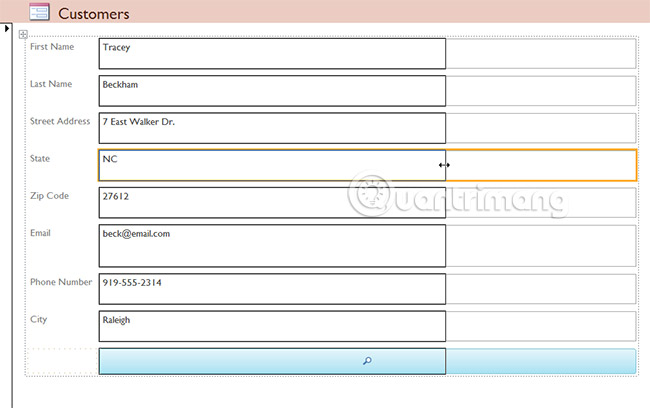
1. Switch to Layout view .
2. Select the field or button you want to resize, then hover over it. Your cursor will become a two-way arrow.
3. Click and drag the mouse to resize the selected object.

4. The field or button, as with any other item associated with it, will be resized.

Move form components
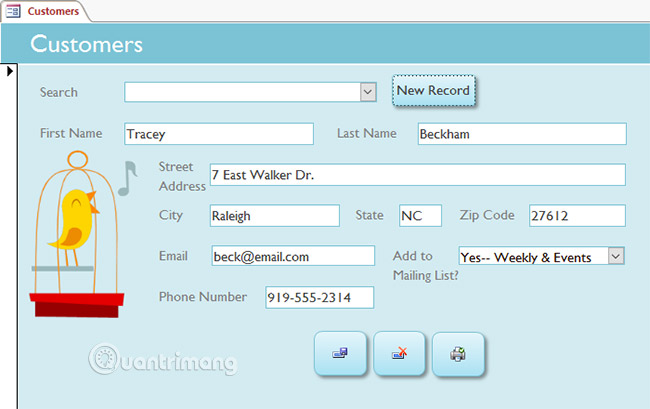
1. If necessary, add columns or rows to make room for the field or node you want to move by using the Insert command in the Rows & Columns group. In this example, we want to move the Last Name field to the right of the First Name field , so we will have to create two new columns on the right: One column for the field tag and one for the field itself. To do this, we will press the Insert Right command twice.
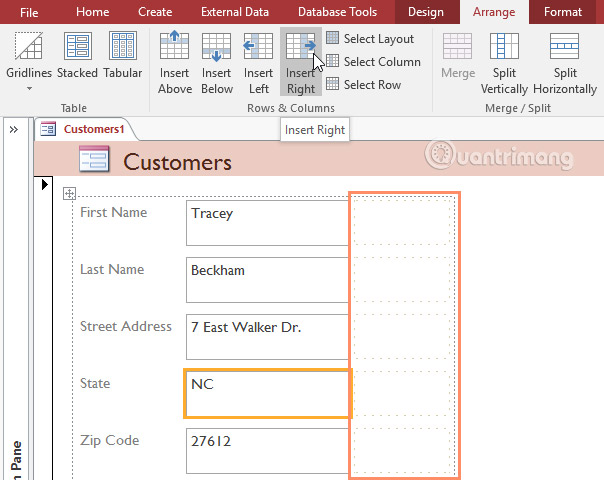
2. Click and drag the field or button to its new location. If you are moving a school, be sure to move the campus label.
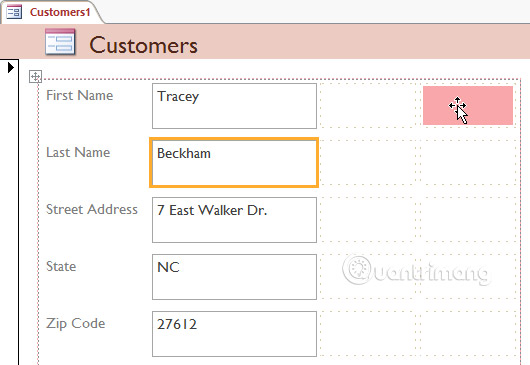
3. Repeat the above steps for any other fields or buttons you want to move.
If you want to create a field with more space than the other column, you can use the Merge and Split commands . The Merge command combines two or more cells, while the Split command divides one cell into several parts. In the example below, the search command at the top of the form is in the merged cell and the New Customer command at the bottom of the form is in the split cell.
Other format options
Adding logos and other images to your form can significantly improve their appearance, because you can apply the theme color and font to the theme.
Modify the colors and fonts of form components
To further customize the appearance of the form, you can apply different colors and fonts to each field, button, label, and other form components. Modifying the form for the form in this way is useful, if you want to use a certain color or font style in the form, but don't want these design elements to apply to the entire database of friend.
For example, in the form below, the author modified the font of the form title. New colors and borders are also applied to form fields and are doing the same with command buttons.
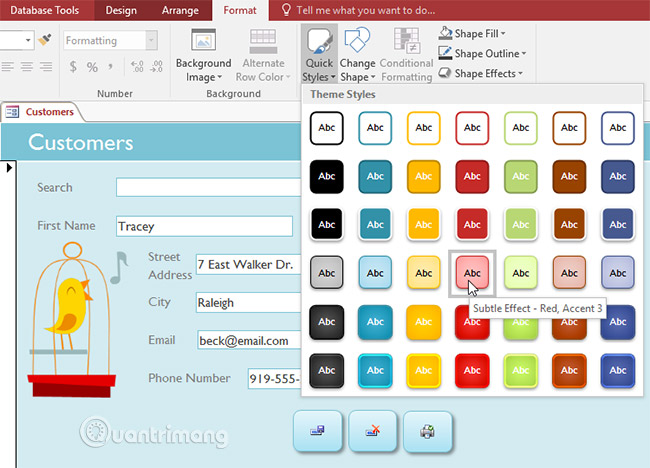
You can make these changes using the same formatting techniques and tools that you will use to modify shapes in Word and other Office programs. Just select the object you want to modify while in Layout or Design view and use the formatting options on the Format tab to customize the look of the object.
Practice!
1. Open the practice database mentioned above.
2. Open the Order Items form .
3. Change to Layout view .
4. Add a command button to create a new record.
5. The button format has just been added with the color and style you choose.
6. Change the theme color and font.
See more:
- Create reports in Access 2016 and use advanced reporting options
- Work with data in Access 2016
- Options to create data queries in Access 2016