Instructions for installing Mac OS on laptop using USB
Mac OS is an operating system exclusively for Macbooks from the Apple brand. But can Windows laptops use it? Below is a quick guide to installing Mac OS on a laptop using a USB..
MacOS is an operating system designed specifically for Apple's Macbook laptop line. The beautiful interface and smoothness of MacOS are what make many people fascinated and want to experience. However, owning a Macbook with a fairly high price is a big obstacle, not everyone can afford it. But the birth of Hackintosh is a big revolution for those who are using Windows laptops and want to use MacOS. If you want to try this operating system, read the instructions for installing MacOS on a laptop using USB below.
What configuration is required to install MacOS?
Macbook is a line of machines with quite strong configuration, so when you want to install Mac OS for your laptop, you must make sure that the configuration of the machine you are using has a CPU from core i3 or higher, RAM from 2GB or higher, graphics chip from HD3000 or higher to meet the process of installing Mac OS. Besides, your hard drive should be SSD and have free space from 120Gb.
Create Hackintosh installation from USB
To install Mac OS on a laptop using USB, you first need to download the software to support creating a Hackintosh installation package from USB and the Hackintosh Yosemite 10.10 installation package to your computer.
Download Hackintosh Yosemite 10.10 Installer
Download Transmac Software
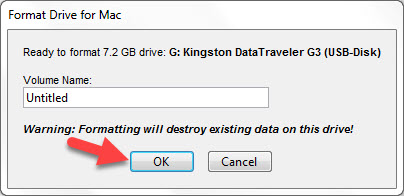
After downloading and installing Transmac, plug the USB into your computer, open TransMac, wait 15 seconds, right-click on the USB and select Format Disk for Mac .


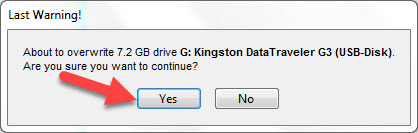
After pressing Yes in this step, Transmac will start formatting the USB.
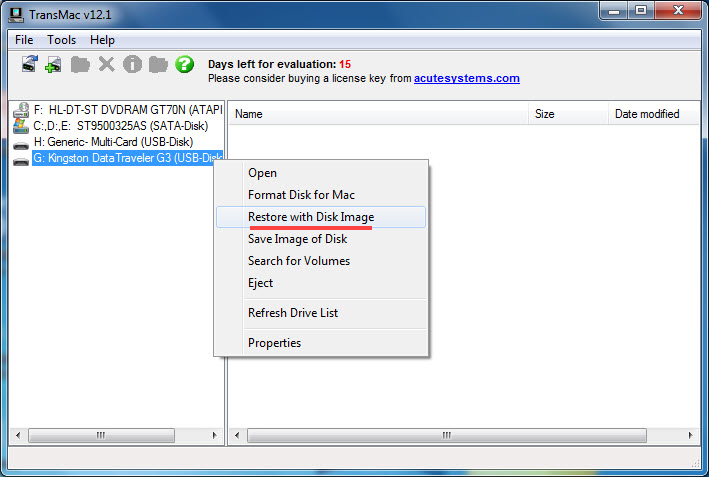
After the USB has been formatted, we proceed to the next step which is to create the Hackintosh installation package on the USB by right-clicking on the USB and selecting Restore with Disk Image
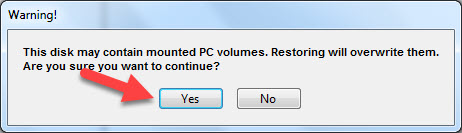
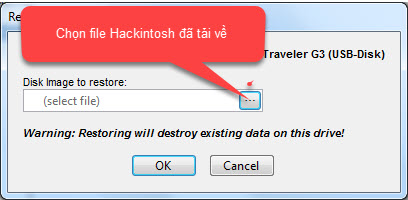
Select Hackintosh File then select OK and Yes
Install MacOS on laptop with Hackintosh
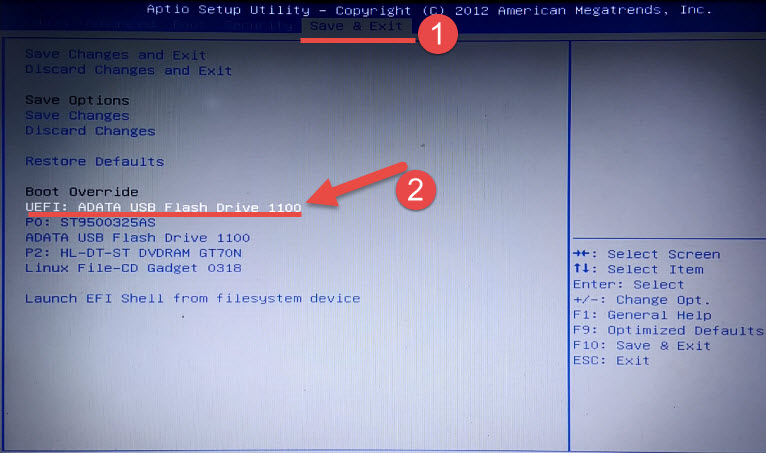
Step 1. After creating the Hackintosh installation package from USB, we proceed to restart the Laptop and boot into USB. For ASUS Laptops, press the F2 key, then switch to the Save & Exit tab, select the USB on which we created the installation package. The USB has the word UEFI at the beginning and press Enter.
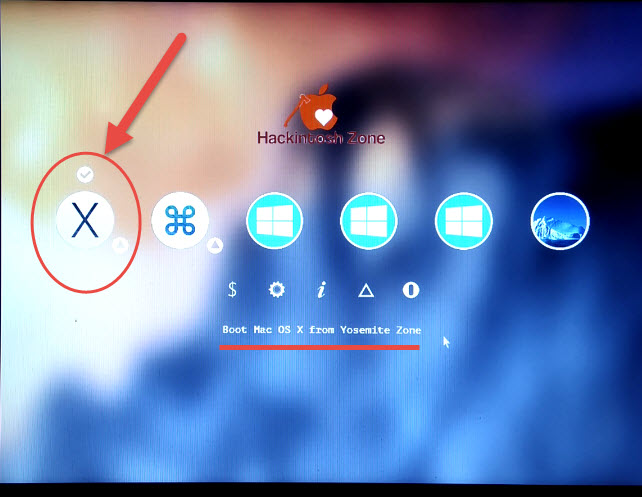
Next select Boot Mac OS X from Yosemite Zone and press Enter or click on the OSX icon.

Loading to install
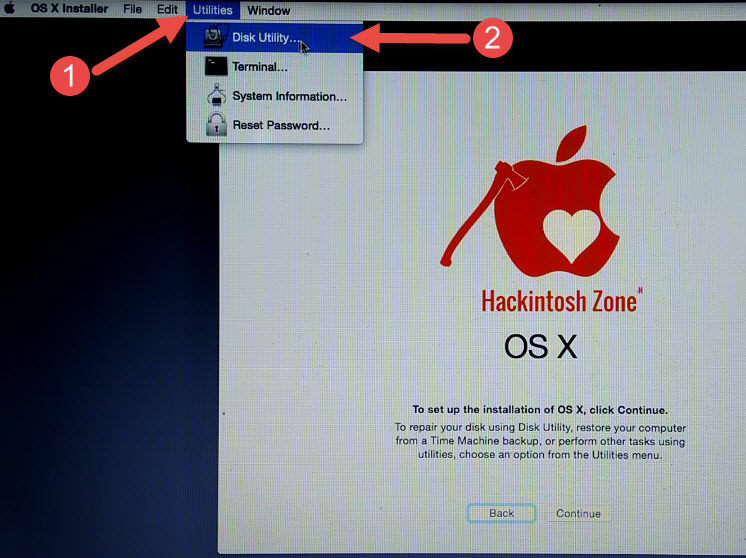
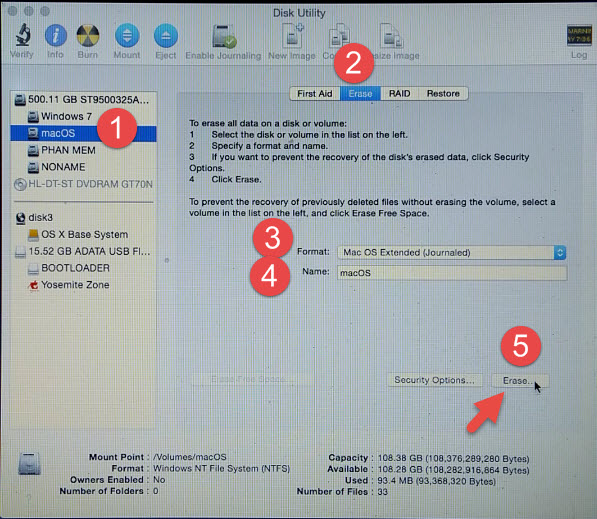
Step 2. Partition the drive to install hackinotsh, select Utilities > Disk Utility to open the drive management program.
Next, you select the partition to install macOS, select the Erase tab and pay attention to the Format section, select Mac OS Extended (Journaled) and the name section, name it as you like, then click Erase to reformat the partition according to macOS standards. After formatting is complete, you turn off the Disk Utility program.
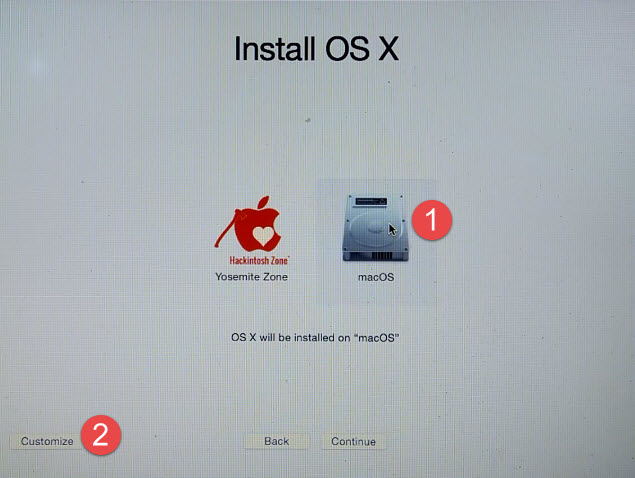
Step 3. Click Continue to start installing macOS

Select the drive named macOS and select Customize to open the hardware setup window, select as shown in the image below

After setting up, select Accept and click Continue to proceed with installing macOS on the Laptop. Now we just wait for the macOS installation process for the Laptop to finish, the computer will restart and enter a boot menu.

Step 4. After entering the boot menu, use the arrow keys to select Option > Graphics Injector > menu, here you use the spacebar to uncheck the Inject Intel section. The purpose is to not load the Intel chip display driver. If you do not uncheck here, you will not be able to boot into macOS.
Finally press return to go back to the boot menu and select Boot Mac OS X from macOS and set up an account to log into macOS.
So Hanoicomputer has instructed you how to install Mac OS on your laptop using USB. Hopefully the above instructions will help you experience this excellent operating system from Apple. Wish you success.