Instructions for installing GIT and configuring GIT on Windows 10
How to install and configure GIT on Windows 10 the most standard. Link download GIT for the latest Windows operating system, basic configuration for GIT on Windows.
In this article I will guide you to install Git (one of the most popular Source Version Control today) on Windows 10.
Ok, now let's get started!
How to install GIT on Windows 10
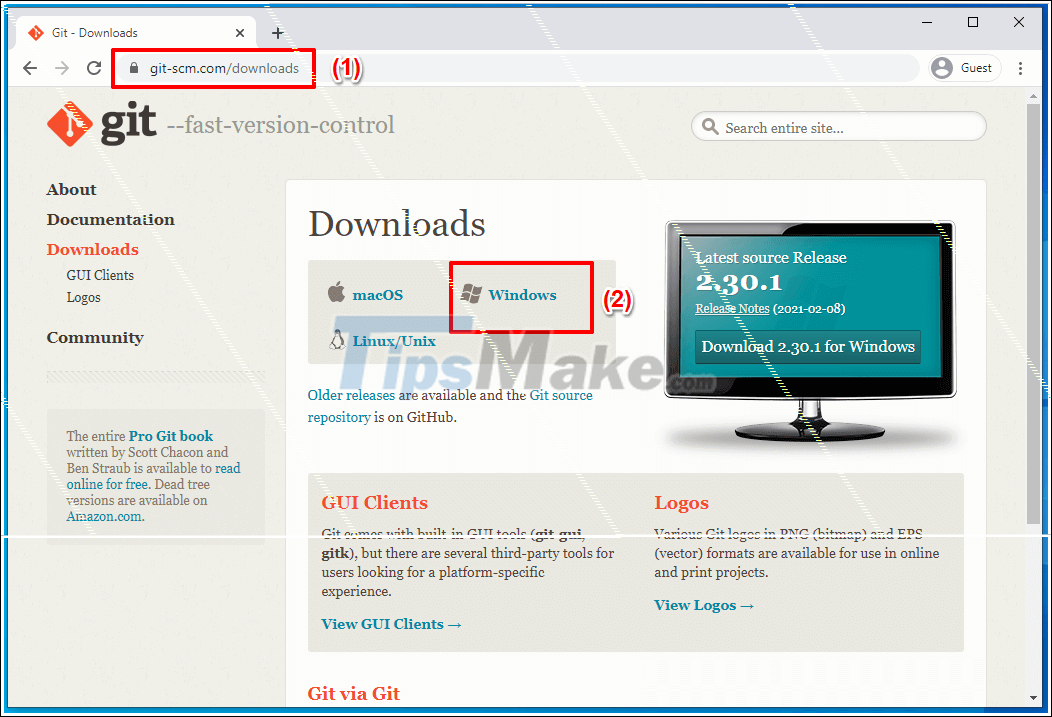
Step 1: First, visit GIT's download page to download the installation file here.
Note: The website can automatically determine 32bit or 64bit Windows operating system when you click the download button.
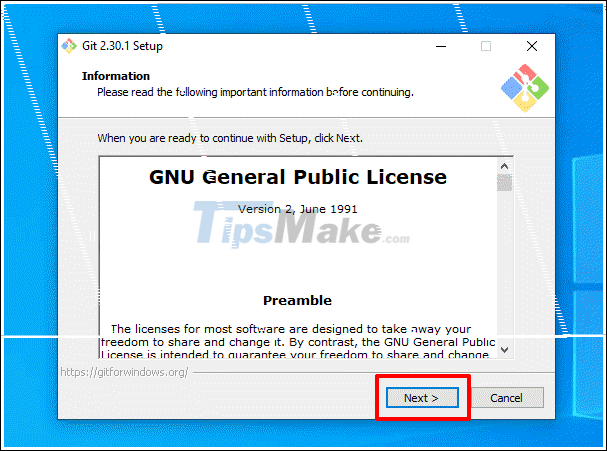
Step 2: After downloading the downloaded file, double-click the file to begin the installation. Click Next to continue.
Step 3:
- (1) This is the step to choose the installation location, the default is C: Program FilesGit. You can change it by clicking the Browse button next to it and choosing a different installation location.
- (2) After installation, g applications occupy 260MB of hard drive space.
=> After selecting the installation location, click Next to continue.

Step 4: These are the components that will be installed by default. If you add any additional components, the post-installation capacity will increase compared to the default 260MB => Click Next to continue.

In this step you leave the default and click Next to continue.

Step 5: This step you choose a default editor for Git. I recommend that if you have Notepad ++ installed, click on the arrow to select Notepad ++ as Git's default editor.

This step you choose by default => then click Next to continue.

Step 6: The next step is to customize the environment variable. You choose item 2 because it is Recommended (recommended / recommended) => Then click Next to continue.

Step 7: Continue to select the first item (Use the OpenSSL library) and click Next to continue.

Step 8: If you do use Linux, when you init Git on Linux, if you go to Windows clone the project and do not check at this step, you will get an error. So you tick here and then click Next to continue.

Step 9: In this step, you will configure which terminal to choose for Git Bash. You can choose MinTTY (Default), or choose the default Windows terminal.
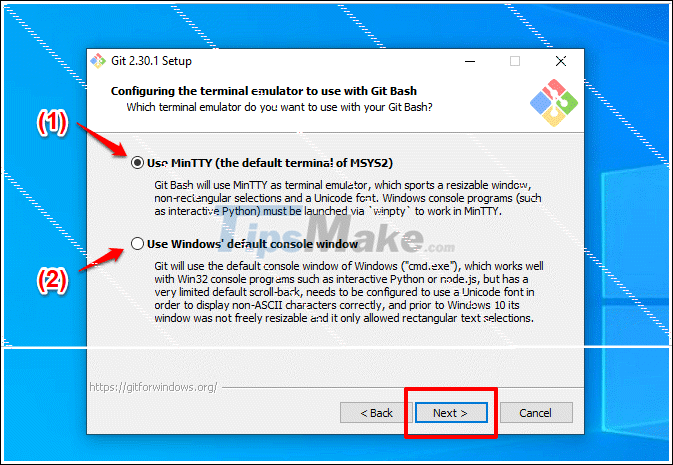
The default configuration is when you run the git pull command to synchronize the code from the Remote Repository to the Local Repository.

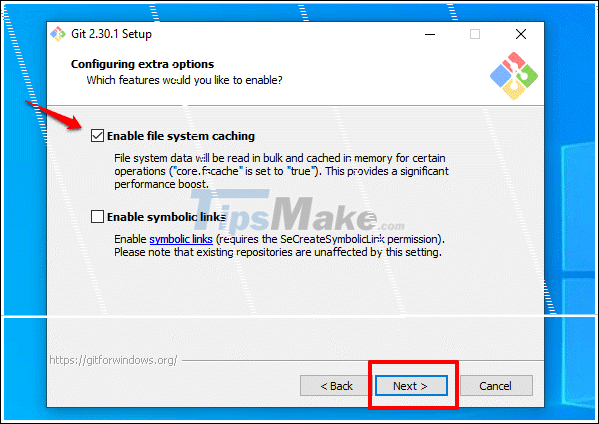
Step 10: This step, you just choose by default and continue.

Continue, choose by default and click Next.
Step 10: This step you should not check because this function is new and there are some errors. Click Install to begin the installation.

Installation takes about 1 minute or less. After installation, click Finish to finish the installation.

Step 11: To check if you have successfully installed it, you can open Git Bash and try a Remote Repository from Github to your computer.

So in this article I have very detailed instructions with you how to install and configure basic Git on Windows 10 operating system already.
The use of Git / Github (Github is a source code repository) is a lot during the teamwork process. So I encourage you to learn and use proficiently these tools.
Hopefully this article will be useful to you. See you in the next articles about dental programming.
- Instructions for installing and configuring DNS Server on Windows Server 2016
- Instructions for configuring LDPlayer for each game type
- Instructions for installing and configuring Microsoft Security Essentials
- How to fix 'Windows could not finish configuring the system' error after running Sysprep.
- Instructions for installing screensavers on Windows
- Instructions for configuring Bullet M2HP Wifi router
- Installing and configuring Exchange 2007 from the command line utility - Part 1
- How to configure FPT optical fiber Gpon modem
- Installing and configuring Exchange 2007 from the command line utility - Part 2
- How to fix Failure configuring Windows updates
- How to use Git to sync notes easily
- Git and GitHub - Using Git the right way to maximize your work
- How to check and update new Git version on Windows
- How to Use Git Effectively
- How to Set Up and Use Git
- How to Create a Pull Request on Github
- How to Clone a Repository on Github
- How to Import a Repository on Github
- How to Set Up a Git Server with SSH on Windows
- 13 skills needed to become Frontend Developer
-
 Quickly fix WLAN AutoConfig errors on Windows 11
-
Add your Gmail account to Outlook with POP.
-
How to use Zperiod to automatically balance chemical equations.
-
How to center a table in Google Docs
-
How do I use the Learn Step by Step mode in Perplexity?
-
Instructions on connecting Gmail to n8n via Google Cloud Console
 Quickly fix WLAN AutoConfig errors on Windows 11
 Add your Gmail account to Outlook with POP.
 How to use Zperiod to automatically balance chemical equations.
 How to center a table in Google Docs
 How do I use the Learn Step by Step mode in Perplexity?
 Instructions on connecting Gmail to n8n via Google Cloud Console
-
Application
-
Web Email
-
Website - Blog
-
Web browser
-
Support Download - Upload
-
Software conversion
-
Social Network
-
Simulator software
-
Online payment
-
Office information
-
Music Software
-
Map and Positioning
-
Installation - Uninstall
-
Graphic design
-
Free - Discount
-
Email reader
-
Edit video
-
Edit photo
-
Compress and Decompress
-
Chat, Text, Call
-
Archive - Share
-
-
System
-
Mac OS X
-
Hardware
-
Game
-
Tech info
-
Technology
-
Science
-
Life
-
Electric
-
Program
-
Mobile