Instructions for installing MS SQL Server
This is a step by step guide to installing MS SQL Server.
Table of Contents
SQL Server supports 2 installation types:
- Standalone
- Based on Cluster
First of all, check:
- Remote access protocol RDP - Remote Desktop Protocol - for the server.
- Bit structure of operating system, IP and server domain.
- Is your account in the administrative group to run the setup.exe file?
- Location to store software on the device.
Required for the 2005 version
- Supported installation files.
- .NET Framework 2.0.
- SQL Server client version.
Required for Windows Server 2008 and 2008R2 versions
- Supported installation files.
- .NET Framework 3.5 SP1.
- SQL Server client version.
- Windows Installer 4.5 or later.
Required for Windows Server 2012 and 2014 versions
- Supported installation files.
- .NET Framework 4.0.
- SQL Server client version.
- Windows Installer 4.5 or later.
- Windows PowerShell 2.0.
Steps to install MS SQL Server
Step 1 : Download the Evaluation version here. http://www.microsoft.com/download/en/details.aspx?id=29066 When the download is complete, you will see the files below, depending on the selection of 32-bit or 64bit versions.
ENUx86SQLFULL_x86_ENU_Core.box
ENUx86SQLFULL_x86_ENU_Install.exe
ENUx86SQLFULL_x86_ENU_Lang.box
or
ENUx86SQLFULL_x64_ENU_Core.box
ENUx86SQLFULL_x64_ENU_Install.exe
ENUx86SQLFULL_x64_ENU_Lang.box
Step 2 : Double-click the SQLFULL_x86_ENU_Install.exe file or SQLFULL_x64_ENU_Install.exe, extract the necessary files to install into the SQLFULL_x86_ENU or SQLFULL_x64_ENU folder .
Step 3 : Open the SQLFULL_x86_ENU or SQLFULL_x64_ENU folder and double-click the SETUP file . The instructions below will install the SQLFULL_x64_ENU version .
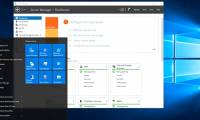
Step 4 : After clicking on the SETUP file, the screen below will appear.

Step 5 : Click Installation on the left side of the screen above.
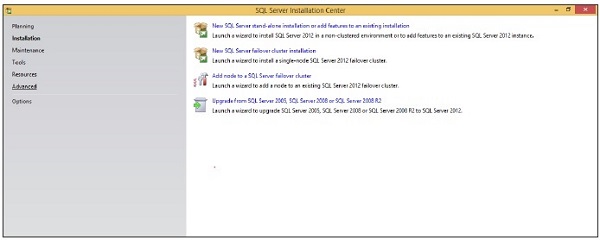
Step 6 : Click the first option to the right of the screen above. Then, the screen below will appear.
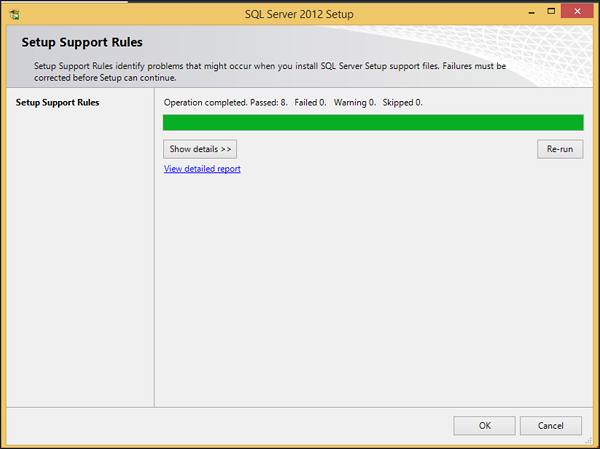
Step 7 : Click OK and the following message screen will appear.
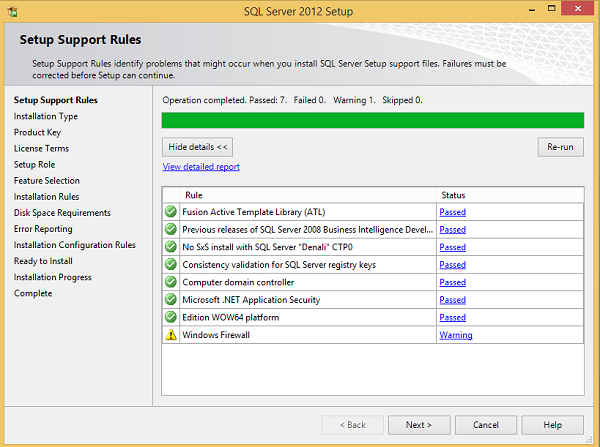
Step 8 : Click Next to display the screen below.
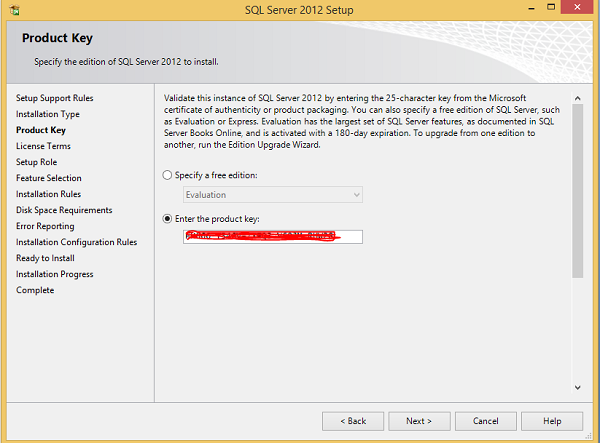
Step 9 : Make sure you check the correct key and click Next.
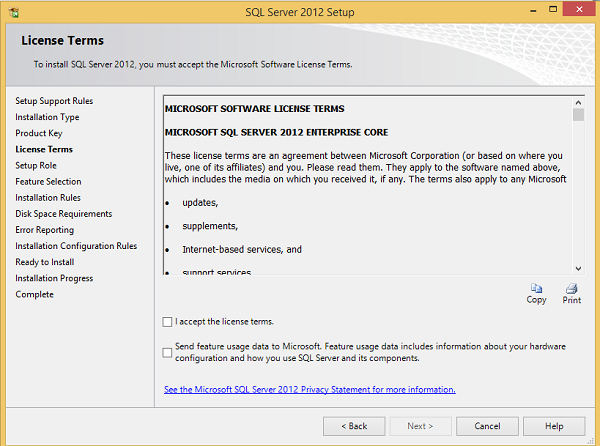
Step 10 : Select the dialog box to approve the copyright rules and click Next.
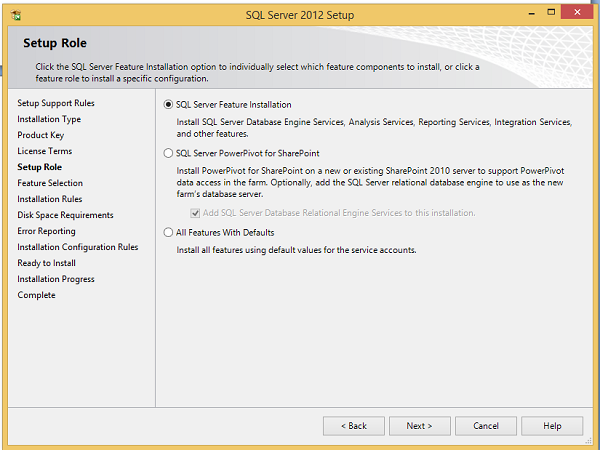
Step 11 : Select SQL Server Feature Installation and click Next.
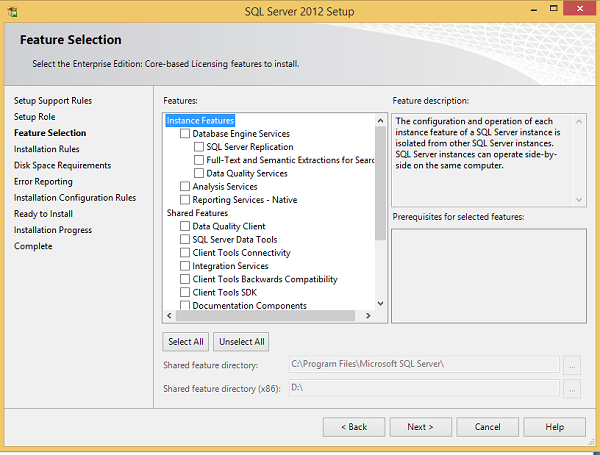
Step 12 : Select the database services and select Next.
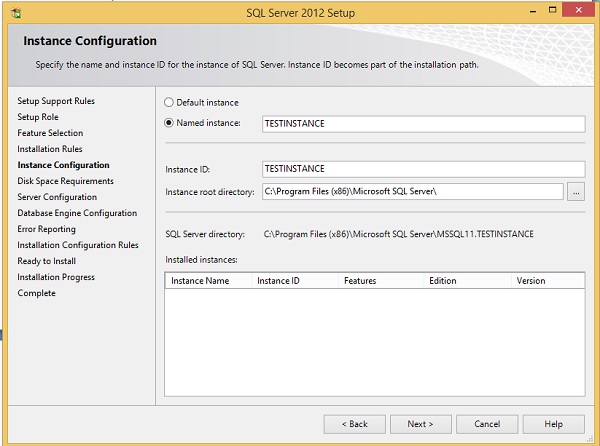
Step 13 : Enter a name for Instance (here use the name TestInstance) and select Next.
Step 14 : Click Next on the screen above, then the screen below will appear.
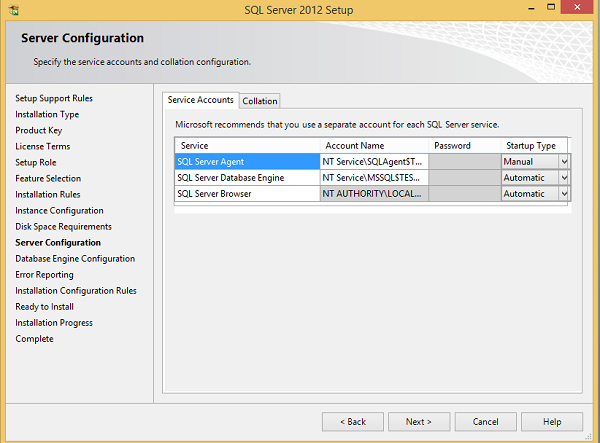
Step 15 : Select the services and startup forms for those services and select Collation.

Step 16 : Make sure to choose Collation correctly and select Next.
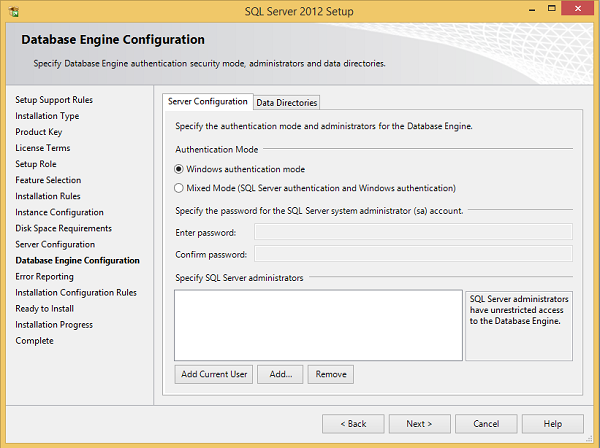
Step 17 : Make sure to select the authentication mode and select the Data Directories tab .
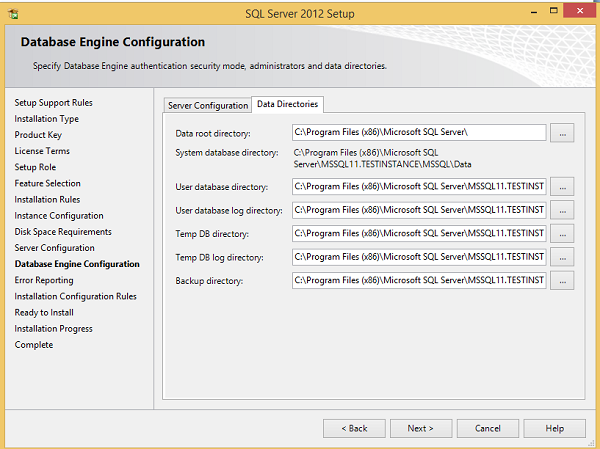
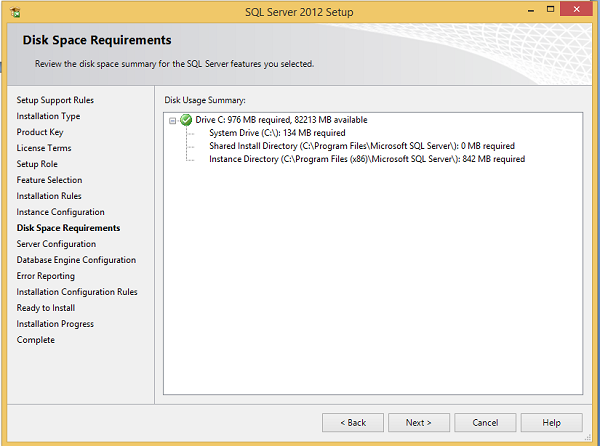
Step 18 : Select the directory address above and click Next. Then the screen below will appear.
Step 19 : Click Next on the screen above.
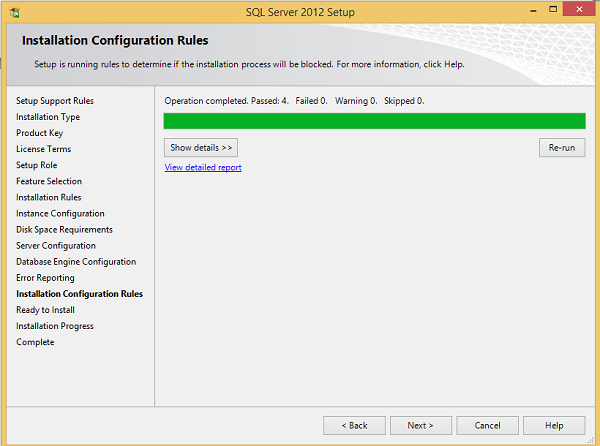
Step 20 : Click Next on the screen above, the screen below will appear.
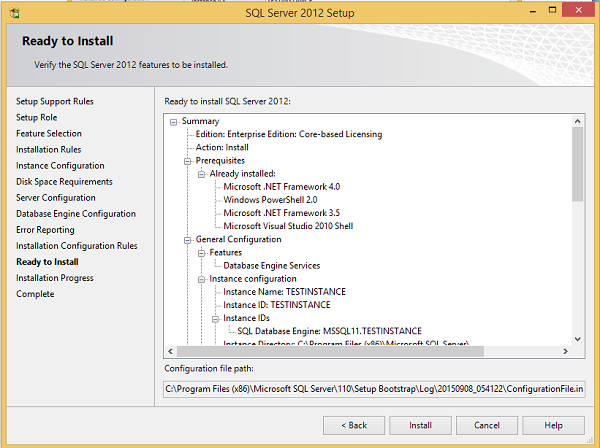
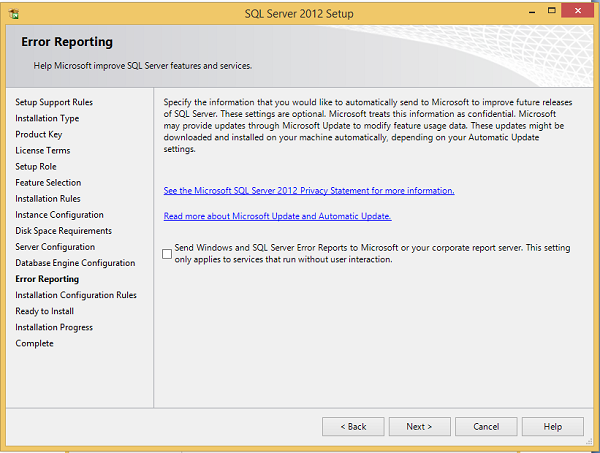
Step 21 : Check that the options above are correct, then select Install.
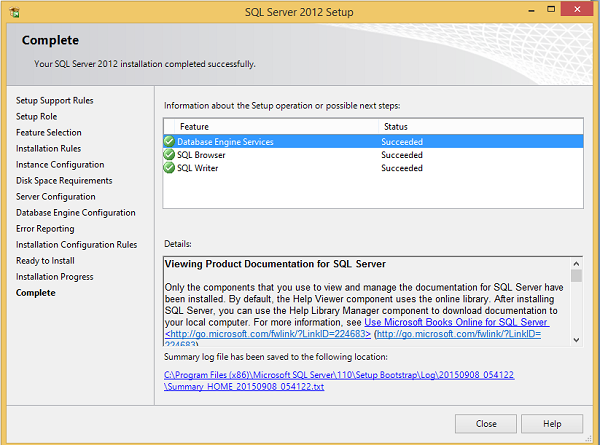
Wait a while, when the installation process finishes, the screen above will appear. Select Close to end the installation.
Previous article: MS SQL Server versions
Next article: Architecture of SQL Server
Was this article helpful?
Your feedback helps us improve.
Related Articles
 Instructions for installing and configuring DNS Server on Windows Server 201612 minutes read
 Instructions for installing SQL Server 201917 minutes read
 Install SQL server 2016 from the Installation Wizard (Setup)13 minutes read
 Instructions for installing SQL Server 2017 step by step12 minutes read
 Instructions for installing MDaemon Mail Server6 minutes read
 Instructions for installing and configuring Microsoft Security Essentials9 minutes read
Reader Comments 0
Sign in with email or Google to join the discussion.