Transfer mailboxes in Exchange 2007 through the Exchange Management Console
Neil Hobson
There are many tasks that every Exchange administrator must perform daily and moving mailboxes is one of those tasks. The most obvious example of mailbox migration is when a user is transferred from one Exchange server to another Exchange server in the same forest, which can be the development stage from Exchange 2000 or Exchange 2003 to Exchange 2007. However, there are many other reasons that you need to do this task, such as moving the mailbox to a new database where there is a larger mailbox size limit, or maybe a process. General balance when you want all your databases to be approximately the same size.
Moving mailboxes in a forest needs to be considered, but this issue is introduced very little in other articles. One thing to consider is that it can make it difficult for administrators during the mailbox transfer process to be deleted items in the items cache, which are also known as 'dumpster' (a dumpster is a name that can be used for items designed to receive, transmit, and contain redundant portions), not to be transferred when the mailbox is moved. This can be annoying to users when they try to retrieve items they already know they can be retrieved before the move appears. However, before you do any mailbox transfer problems, the first thing to do is to tell the user to check their deleted cache items and retrieve the important mail before the transfer. mailbox takes place.
Moving mailboxes from one server to another in the same forest is a really simple process, this process can be done using either Exchange Management Console or Exchange Management Shell. If you want to switch from Exchange 2000 or Exchange 2003, there is no need to try to transfer mailboxes using Active Directory Users and Computers or Exchange System Manager, because there is no way to do that. As you may have read elsewhere, Exchange 2007 will have the Active Directory Users and Computers snap-in, which means that the recipient's work is done in the Exchange Management Console or through a utility. Let's take a look at both of these procedures, starting with the Exchange Management Console.
Move mailboxes through the Exchange Management Console
1. Run Exchange Management Console, in the control tree, navigate to the Recipient Configuration button and click on it.
2. Under the Recipient Configuration button, select Mailbox .
3. In the results pane you will see a list of mailboxes within the Exchange organization. If this is the first time to move user mailboxes, these mailboxes will still be located on an Exchange 2000 or Exchange 2003 server and thus you will appear Legacy Mailbox in the Recipient Type Details column. The mailboxes that have been moved to Exchange 2007 will appear as User Mailbox . There are other mailbox types shown in Figure 1 below, where User3 is a mailbox still located on an Exchange 2003 server.
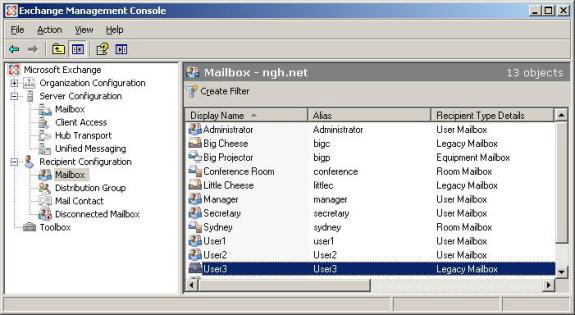
Figure 1: Mailbox is displayed in the Exchange Management Console
4. To move a mailbox, the process is very simple, just tick the mailbox to transfer, right-click it and select Move Mailbox . Note that you can select multiple mailboxes at once. Select the Move Mailbox option . will appear the Move Mailbox utility, this is the first screen of this utility you will see in Figure 2.
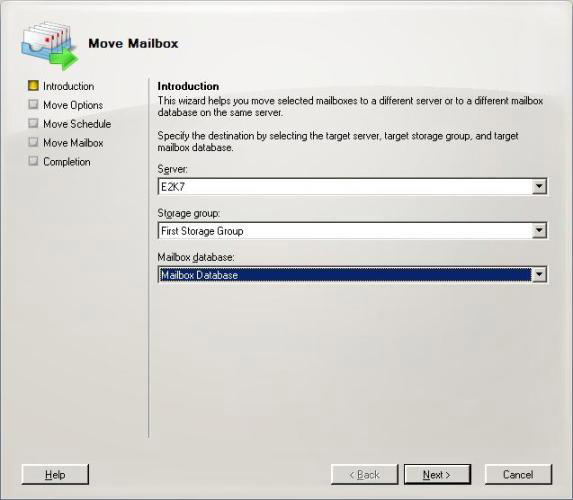
Figure 2: Introduction screen of Move Mailbox utility
5. On this introduction screen, select the target Exchange 2007 server, storage group, and database that you will place mailboxes on. When you're done with these settings, click the Next button.
6. Next, the Move Options screen will be displayed, as shown in Figure 3. This screen will allow you to control what happens if the mailbox transfer process encountered an error. Here you can choose to ignore the mailbox and therefore not move it, or ignore some error messages. You can declare many error messages in the mailbox transfer process that you will ignore. In Exchange 2003, the largest number of items is 100, but inside the move mailbox utility you can now enter 2 ^ 31-1, or 2,147,483,647. If you ask me, 100 is more than enough because if you see a lot of mailboxes fail, you might have a problem when you do it. When you have completely agreed with your choice, click Next .
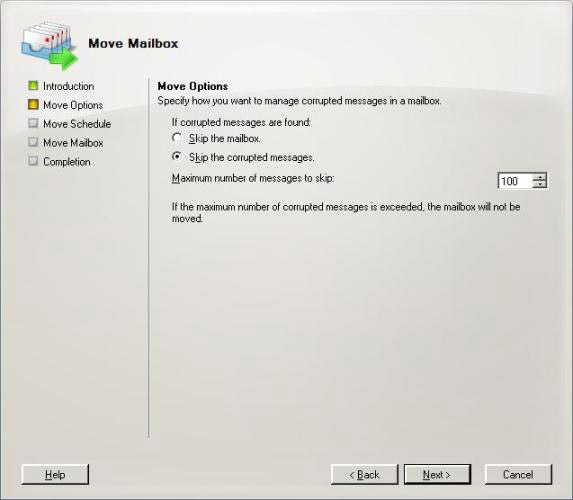
Figure 3: Select screen of Move Mailbox
7. Next is the Move Schedule screen, as shown in Figure 4. This screen allows you to move the mailbox immediately, or after a scheduled time. This screen is not valid during the transfer. If you select the At the following time option , the date and time are set to the current time, so you will have to choose a time when you want the transfer process to start. You should also note that the option Cancel tasks that are still running after (hours) will allow you to specify how long the process will run before being canceled. This is especially useful when transferring a large number of mailboxes at night. For example, Figure 4 shows that the mailbox transfer will be canceled after 8 hours, which means that if they are started at 21:00 this process will be stopped at 5am, this way is guaranteed that any user who can arrive early is not affected by the mail transfer process. If a mailbox is in progress during this process, it will be moved back to the source server and all previously transferred mailboxes are kept on the target server. Next, when you are completely satisfied with your choices, click Next .
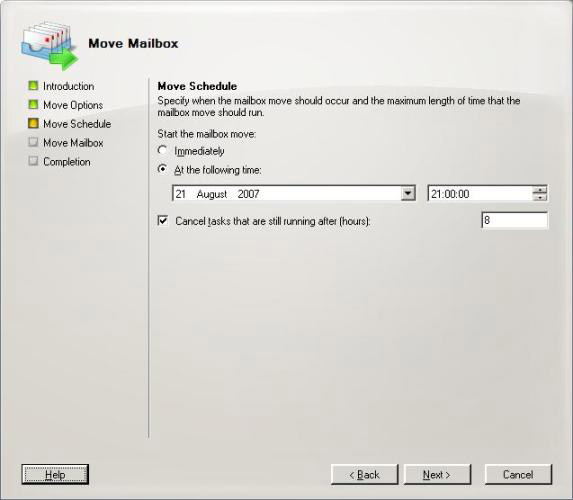
Figure 4: Scheduling screen for mailbox transfer process
8. The penultimate screen will be displayed as a screen that summarizes how your mail transfer will be performed, so you can review the full details of this work. When satisfied with your decision, click the Move button to perform the process. If you decide to move mailboxes at a scheduled time, the summary screen will show a countdown process as shown in Figure 5. You can cancel this transfer anytime by clicking the Cancel button. .
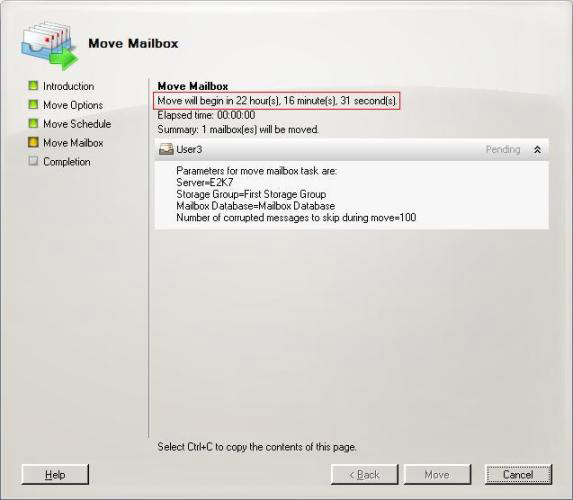
Figure 5: Scheduled countdown time table
9. If you choose to move multiple mailboxes at the same time, you will see the same screen shown in Figure 6. Here as you can see, there are 4 mailboxes being moved at the same time, the fifth mailbox, User9's mailbox is shown at the end with Pending status. Within the Exchange Management Console, you cannot move more than 4 mailboxes at a time, though you can change the number of workflow threads using the Exchange Management Shell (we'll cover later in this article). this series).
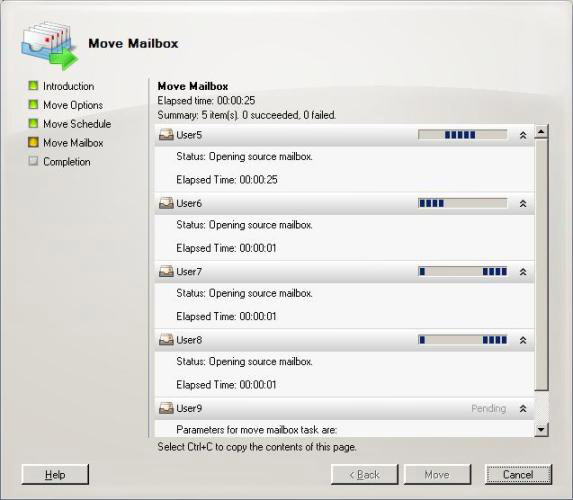
Figure 6: Convert multiple Mailboxes at once
10. If all goes well, the final screen will be displayed as shown in Figure 7.
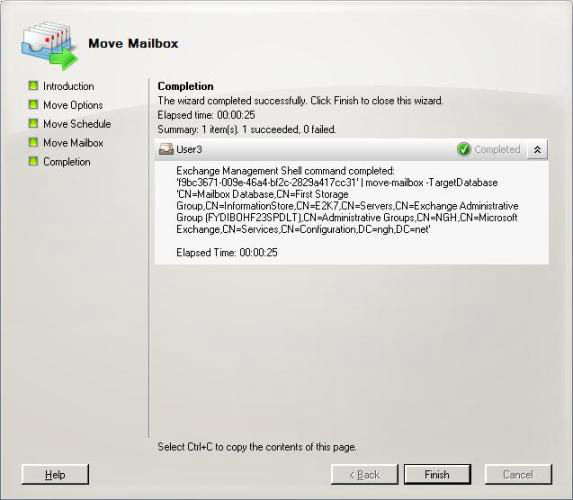
Figure 7: The final screen
The Exchange Management Console cannot be used to move mailboxes in different forests. To do that, you need to use the Exchange Management Shell.
Exchange does quite a bit of testing to ensure your mailbox migration is successful. For example, if you try to move the mailbox to an Exchange 2007 database with a mailbox size smaller than the current mailbox size, you will see an error message as shown in Figure 8. Or an example of a check Another look, you can see in Figure 9 when I did to create a replica mailbox during the test process, resulting in this replica mailbox being deleted before trying to convert the mailbox.
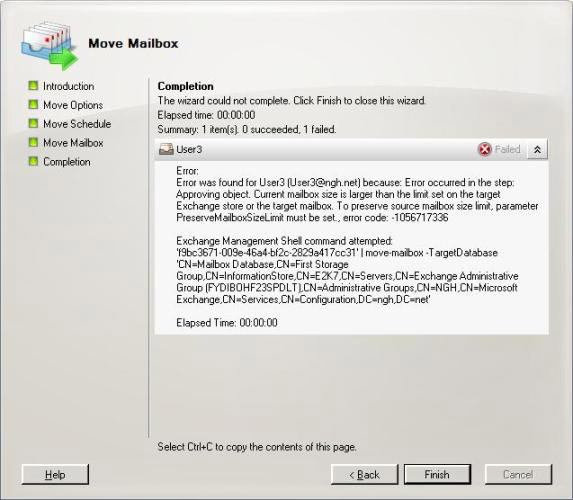
Figure 8: Check mailbox size
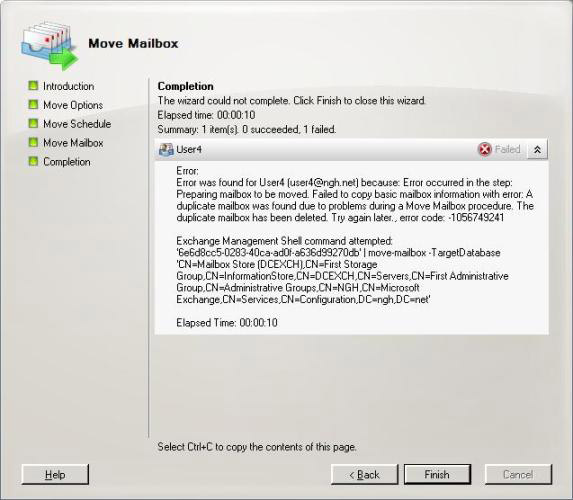
Figure 9: Mailbox error message tells how
Event log
What do you see in the event viewer when the mailbox transfer process is done? In my test, there are similar events recorded even if the diagnostic write is set to low or high mode. In the entire event log section below, you will see that there are 3 sources of Exchange Migration and a category of Move Mailbox. The first event recorded is event 1006, as shown in Figure 10. Here you can see that the process is being performed. Source and target databases are revealed as well as the mailbox Exchange Exchange properties being transferred.
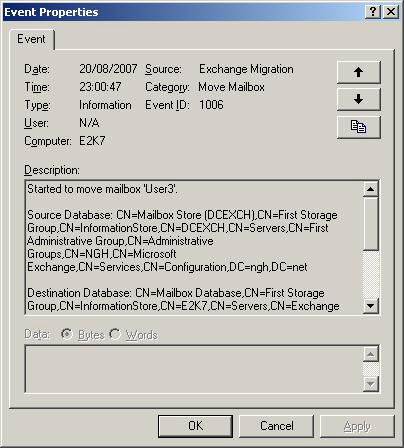
Figure 10: Event 1006
When the mailbox has been moved, event 1007 is recorded as you can see in Figure 11.
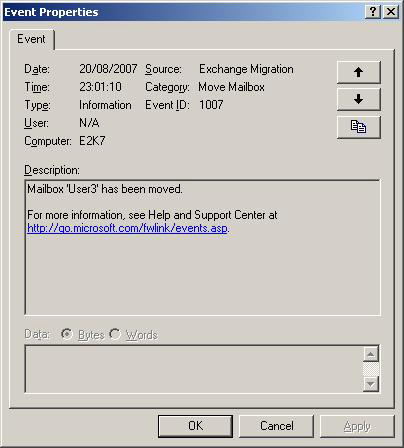
Figure 11: Event 1007
Finally, event 9354 is logged, this is the event that tells you that your original mailbox has been deleted from the source database, as shown in Figure 12.
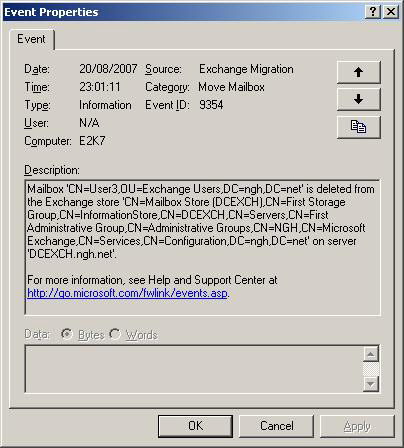
Figure 12: Event 9354
Another event entry that should be worth mentioning is the first introduced in Exchange 2003. It is often taken care of as the best way to ensure that users will get out of their mailbox when you transfer it. If the user tries to access their mailbox while it is in the process of being moved, event 9660 will be logged with the MSExchangeIS source and the Logons category. An example of this event is shown in Figure 13.
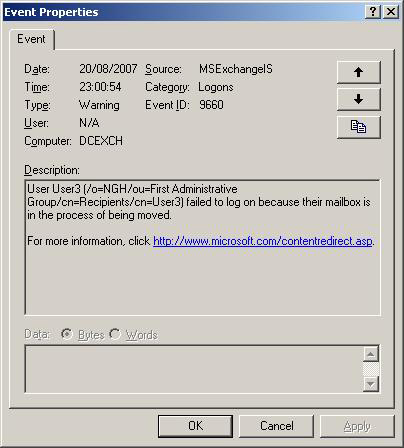
Figure 13: Event 9606
Conclude
Moving mailboxes in Exchange 2007 is done quite easily when you use Move Mailbox wizard from within the Exchange Management Console. In the second part of this article series, I will continue the migration process but use the Exchange Management Shell.
 Transfer mailboxes in Exchange 2007 through Exchange Management Console (Part 2)