Table of Contents
This updated guide examines Create a Custom Management Interface for Exchange 2007 and organizes the essential facts, background, and practical takeaways in clear American English.
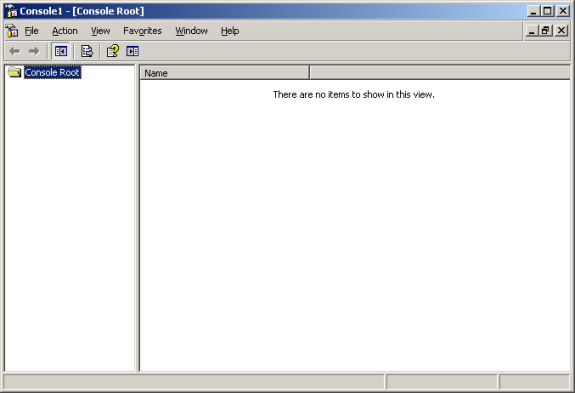 Figure 1: MMC blank
In the Add / Remove Snap-in window, click Add , then find and select the Exchange Server 2007 snap-in (as shown in Figure 2). Click Add again, followed by Close and OK .
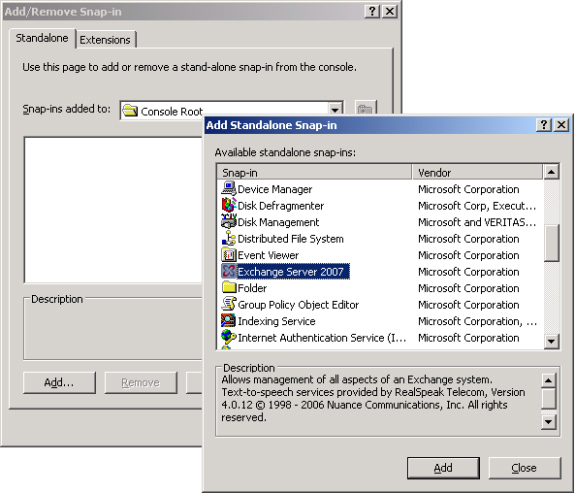 Figure 2: Adding the Exchange Server 2007 Snap-in
Expand the Microsoft Exchange tree, and right-click on the Recipient Configuration central work node, select ' New Window from Here ' in its content menu, see Figure 3.
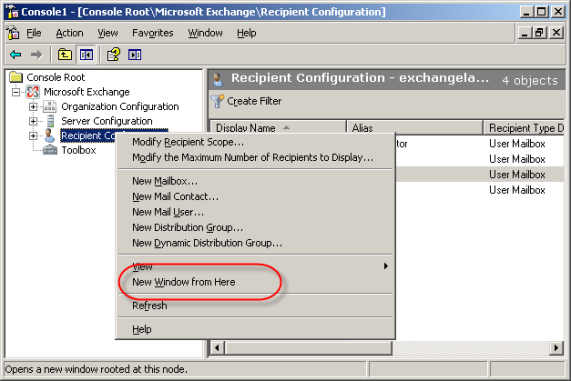 Figure 3: Open the Recipient Configuration button in a new window
Now we have a basic Exchange 2007 Recipient Management snap-in as you can see in Figure 4, but need to give it some other functionality.
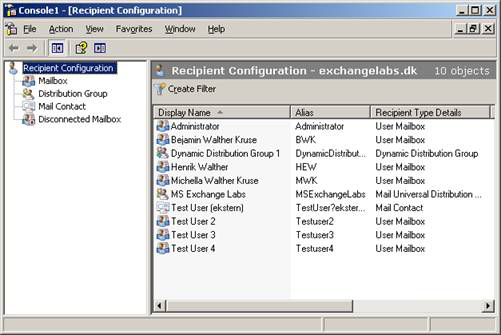 Figure 4: Recipient Configuration Console
The first thing to do is to activate the Action panel to remove the standard menus as well as the standard toolbar because they are not needed in Exchange 2007. To do so, click View | Customize and cancel the 'Standard' (Action and View) menus and the Standard toolbar. Finally select the Action panel, then click OK (see Figure 5).
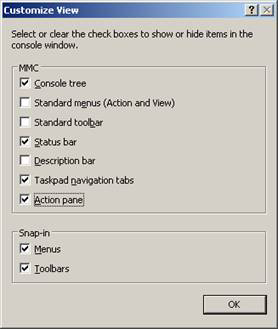 Figure 5: Customize the appearance of the management interface Recipient Management Console
Let's decorate the console a bit, click File | Options ; in the Options window, replace Console1 with the ' Exchange 2007 Recipient Management ' text line. Now click the Change Icon button and navigate to the Bin folder inside the C: Program FilesMicrosoftExchange Server folder. Here you can select the file ExSetupUI.exe , click Open to select the Exchange 2007 icon as shown in Figure 6. Then click Apply .
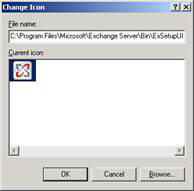 Figure 6: Change the console icon
You now choose User mode - limited access in Console mode (as shown in Figure 7). Finally, uncheck ' Allow the user to customize views ' then click OK .
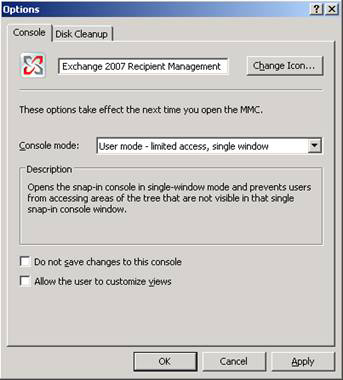 Figure 7: Name the interface and change the default options
You can now save the console by clicking File > Save As . Save this control with the Exchange 2007 Recipient Management Console.msc file name and answer Yes when the message is shown in Figure 8.
 Figure 8: Notice of verification of MMC change
Now close the console and reopen it from where you saved it. Now the interface will look like in Figure 9.
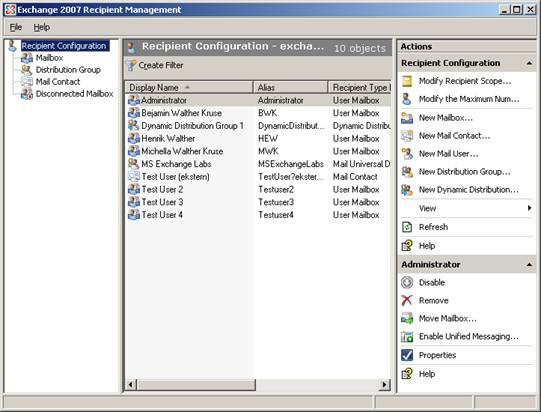 Figure 9: New recipient management interface
You can also create management interfaces independent of central nodes like Organization Configuration, Server Configuration or Toolbox. To do this, follow the same steps as above, but need to open a new management window by right-clicking the button corresponding to the one you want to change. If you have installed both Exchange 2007 Tools and Windows AdminPak on the same server or workstation or installed Exchange 2007 Management Tools directly from the Domain Controller, you can also create a separate interface to access Both the ADUC snap-in and the Exchange 2007 Management Console are shown in Figure 10.
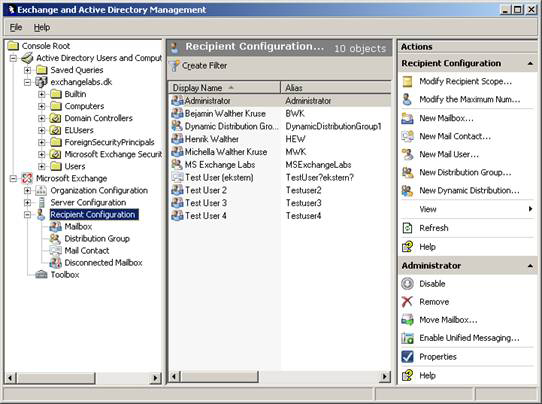 Figure 10: Active Directory and Exchange management interface
Note that if you have a lot of help teams that just want a team to manage User Mailboxes, Mail Users, Mail Contacts and Distribution Groups under some organization (OU), you can use the rights and permissions. micro of Recipient for this purpose. If you want some helpers who are responsible for managing Exchange users in Denmark can only manage lower level objects than an OU named DK, we can do this by Select the Recipient Configuration button and then click Modify Recipient Scope in the Action panel. Now you'll open a window as shown in Figure 11.
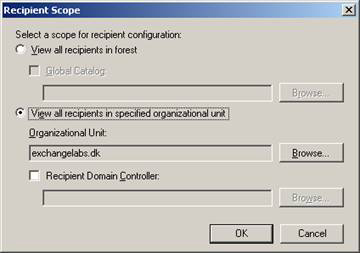 Figure 11: Limited options for recipients
Below View all recipients in specified organizational unit > Organizational Unit , click Browse . Then we can select the corresponding OU (Figure 12), in this case the corresponding OU is DK, then click OK twice.
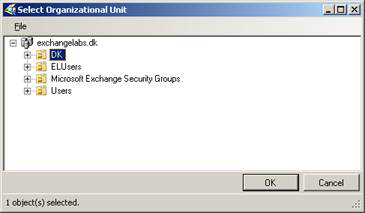 Figure 12: Select the default OU
Now, we will be able to manage Exchange objects in the DK OU listed for recipients in Recipient Configuration. In addition, when creating new Exchange recipients, the corresponding utility by default will be set up so that an object in that OU can be created as you can see in Figure 13.
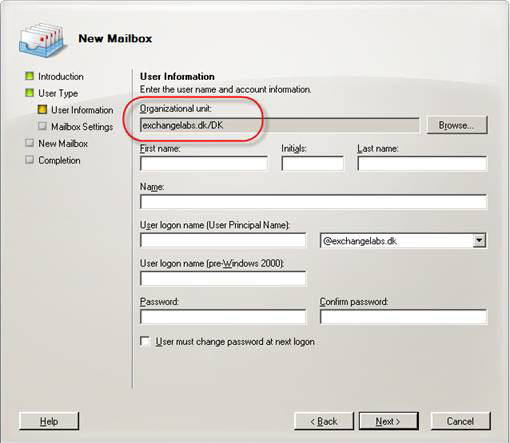 Figure 13: Organizational Unit (OU)
Note : You should also remember to restrict the permissions for the respective OU by using the Delegate Control option, which can be found on the menu when you right-click on the OU in the ADUC snap-in.
FAQ
What is Create a Custom Management Interface for Exchange 2007 about?
It provides a structured overview of exchange, explains the main context, and highlights practical takeaways for readers.
Why does this topic matter?
Understanding the main concepts helps readers evaluate the issue, avoid common mistakes, and make better-informed decisions.
How should readers use this information?
Use the guidance as a practical starting point, confirm details that may have changed, and follow current product, safety, or security recommendations.
Related Articles
 Exchange 2007 Sp1: Manage Ccr Cluster with the Exchange17 minutes read
 Transfer Mailboxes in Exchange 2007 Through Exchange Management10 minutes read
 Public Folder Management in Exchange 200711 minutes read
 Remote Exchange 2003 Administration9 minutes read
 How to Create Custom Shortcut Keys for Raspberry Pi8 minutes read
 Managing Resource Mailboxes in Exchange Server 2007 (Part 1)10 minutes read
Reader Comments 0
Sign in with email or Google to join the discussion.