Insert and edit flowcharts (SmartArt) in Excel
Instructions on how to insert and edit flowcharts (SmartArt) in Excel. To insert the flowchart you perform the following steps: Step 1: Go to the Insert card - illustration - SmartArt: Step 2: The Choose a SmartArt Graphic dialog box appears, select the type of flowchart to insert.
The following article details you how to insert and edit flowcharts (SmartArt) in Excel 2013.

To insert a flowchart, follow these steps:
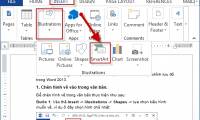
Step 1: Go to the Insert tab -> illustration -> SmartArt:
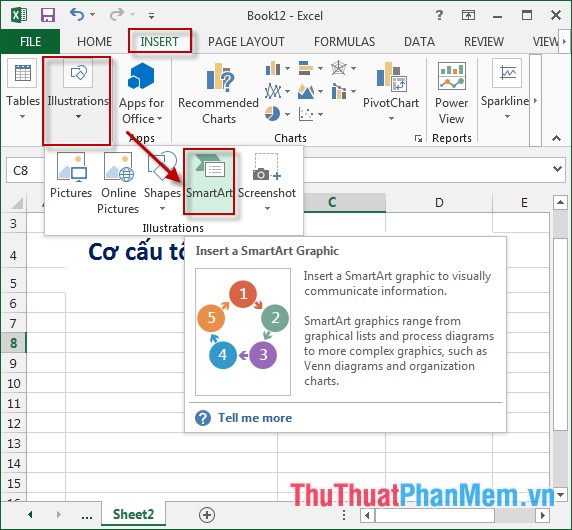
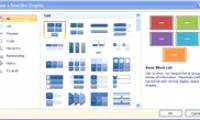
Step 2: The Choose a SmartArt Graphic dialog box appears, select the type of flowchart to insert:

Step 3: After selecting the flowchart displayed on the spreadsheet, enter the content to be displayed in the text section -> get the results:

Step 4: If you want to insert another content for the flow chart, click the location to insert the flowchart -> Design -> Add Shape:

- Results after inserting flowchart -> enter content for new flowchart element:

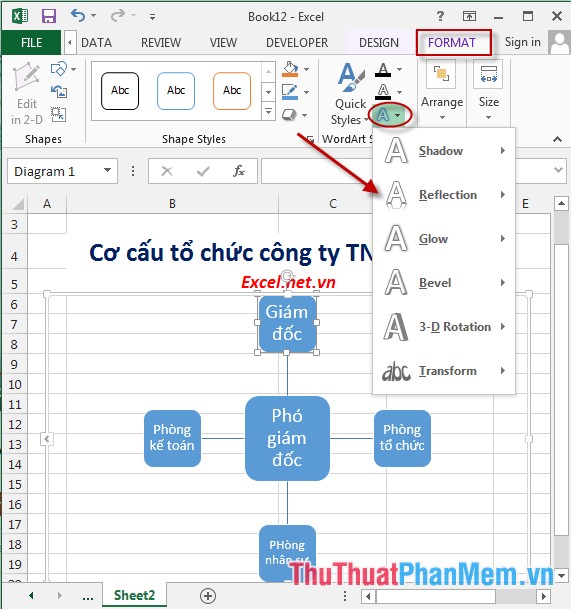
After creating the flowchart, you want to edit the flowchart more beautifully and visually, do the following:
- Click on the flowchart component to edit -> Format -> edit the text content -> select the icons in WordArt Style including font colors, borders and effects for text:
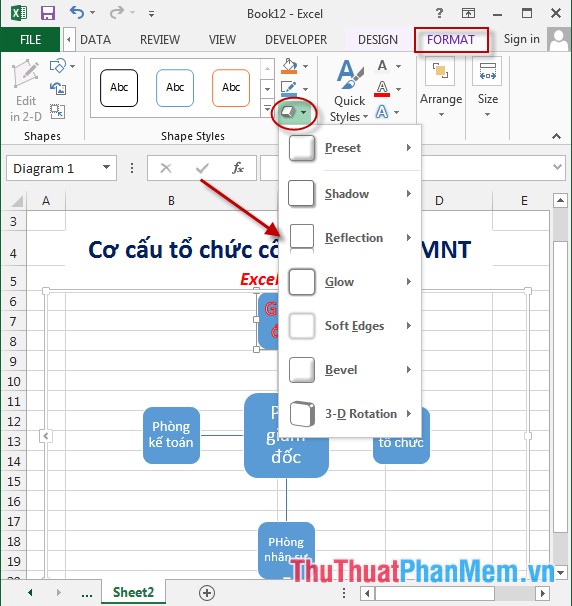
- Edit the display frame of the flowchart: Click on Shape Styles -> select the format like frame color, frame border and frame effect, for example here choose effect for frame:
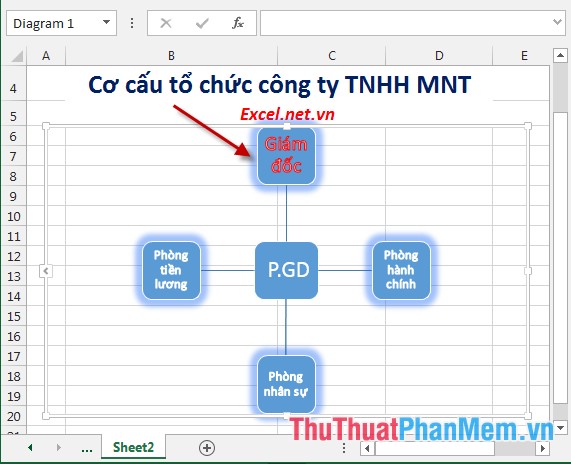
- After adjusting the flow chart, the result is as shown in the picture:
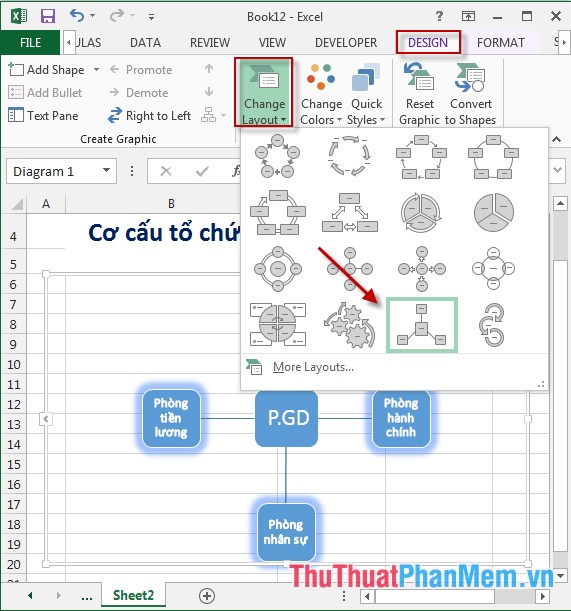
- In case you want to change the flow chart type, do the following: Click the flowchart -> Design -> Change Layout -> select the flowchart type you want to change:
Above is a detailed guide on how to insert and edit flowcharts in Excel 2013.
Good luck!
Was this article helpful?
Your feedback helps us improve.
Related Articles
 Insert and edit flowcharts in Word2 minutes read
 How to insert a SmartArt object in Excel2 minutes read
 How to create SmartArt graphics in Excel4 minutes read
 MS Excel 2007 - Lesson 9: Insert images and graphics into a spreadsheet3 minutes read
 Work with SmartArt graphics in PowerPoint 20166 minutes read
 Use SmartArt effects in PowerPoint2 minutes read
Reader Comments 0
Sign in with email or Google to join the discussion.