Work with SmartArt graphics in PowerPoint 2016
SmartArt in PowerPoint 2016 allows presenters to transmit information in graphics instead of just using plain text. There are many ways to use SmartArt to illustrate different ideas..
SmartArt in PowerPoint 2016 allows presenters to transmit information in graphics instead of just using plain text. There are many ways to use SmartArt to illustrate different ideas.
How to insert SmartArt graphics
1. Select the slide to insert SmartArt graphics.
2. From the Insert tab , select the SmartArt command in the Illustrations group .

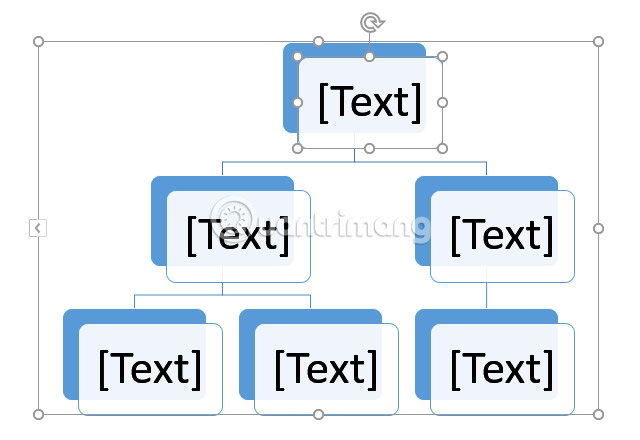
3. A dialog box will appear. Select a category on the left, then select the desired SmartArt graphic, then press OK.

4. SmartArt graphics will appear on the current slide.
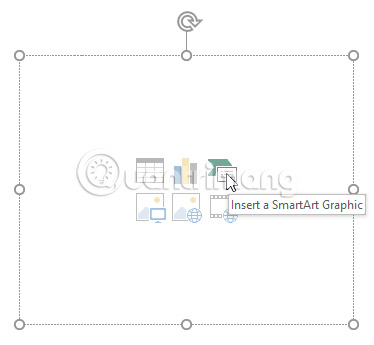
Users can also click the Insert a SmartArt Graphic command in the placeholder to add SmartArt.
How to add text to SmartArt graphics
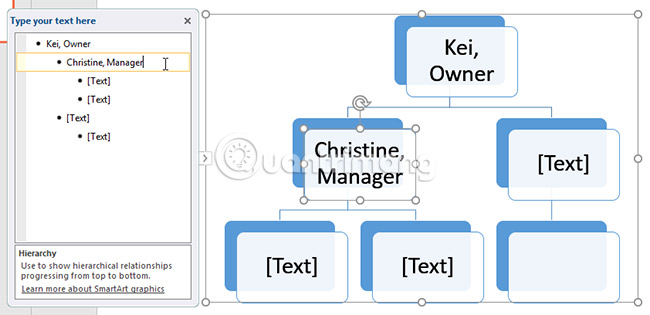
1. Select SmartArt graphics. The text frame will appear on the left
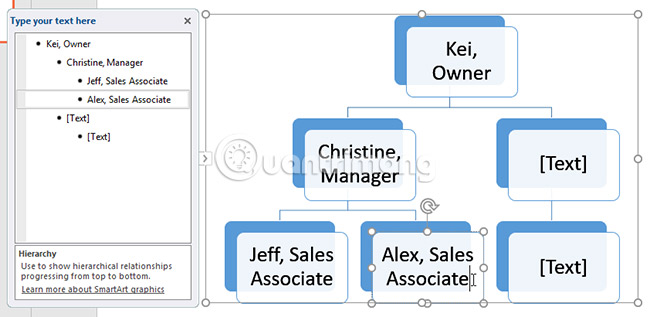
2. Enter the text next to each bullet (bullet) in the text box. Text will appear in the corresponding shape. Text will be resized automatically to fit the area inside the shape.
Users can also add text by clicking on the desired shape and then entering the content. This method will be useful if you just need to add text to a few shapes. However, for more complex SmartArt graphics, working in text frames is often faster and easier.
How to rearrange, add and delete shapes
It's easy to add new shapes, change their order and even remove shapes from SmartArt graphics. Users can do all this in a text box (the same process as creating an outline with a list of multiple levels). For more details, please refer to the article: Working with lists in PowerPoint 2016.
- To downgrade a shape, select the desired bullet, then press the Tab key . That bullet will move right, and the shape will move down one level.
- To level up a shape, select the desired bullet, then press the Backspace key (or Shift + Tab ). That bullet will move to the left, and the shape will increase by one level.

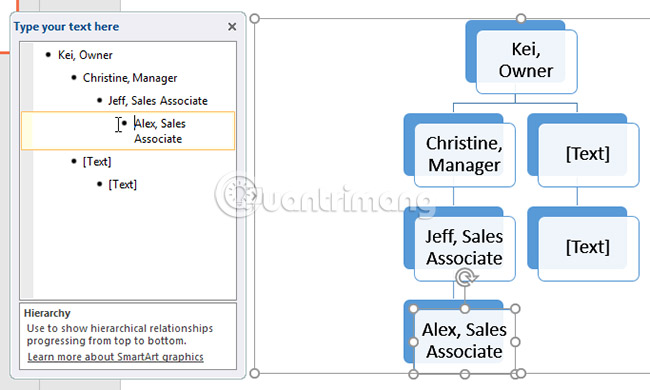
- To add a new shape, place the insertion point after the desired bullet, then press Enter. A new bullet will appear in the text box and the corresponding new shape will appear in SmartArt graphics.
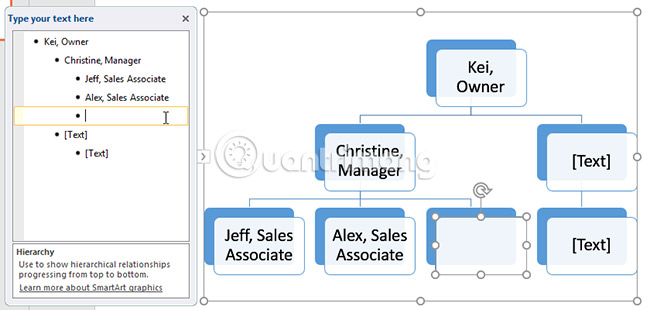
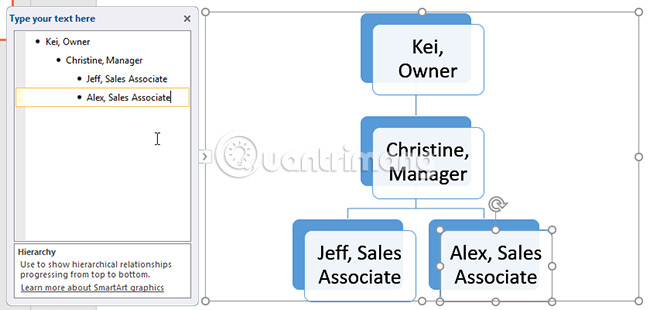
- To delete the shape, continue pressing Backspace until the bullet mark is deleted. The shape will then be removed. In the example in this article, we will delete all shapes without text.
Sort SmartArt from the Design tab
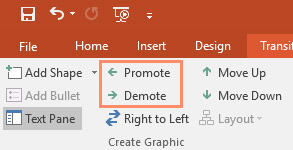
If you don't want to use the text frame to sort your SmartArt, users can use the commands on the Design tab in the Create Graphic group . Just select the shape you want to modify, then select the desired command.
- Promote and Demote: Use these commands to move shapes up or down between levels.
- Move Up and Move Down : Use these commands to change the order of images on the same level.

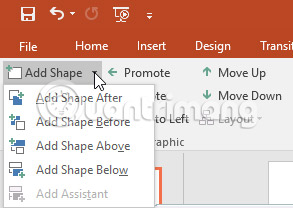
- Add Shape: Use this command to add a new shape to the graphic. Users can also click on the drop-down arrow to get more accurate location options.
In the example in today's article, we organized a graphic with a hierarchical layout. Not all SmartArt graphics use this layout, so keep in mind that these commands may work slightly differently (or not at all) depending on the specific graphic layout .
Customize SmartArt
After inserting SmartArt, there are some things that users should change so that its appearance becomes more eye-catching. Whenever the user selects SmartArt graphics, Design and Format tabs will also appear on the right of the Ribbon. It's easy to edit the style and layout of SmartArt graphics on these 2 tabs.
- There are several SmartArt types available, allowing users to quickly modify the look of SmartArt. To change the style, click the desired option from the SmartArt styles group .

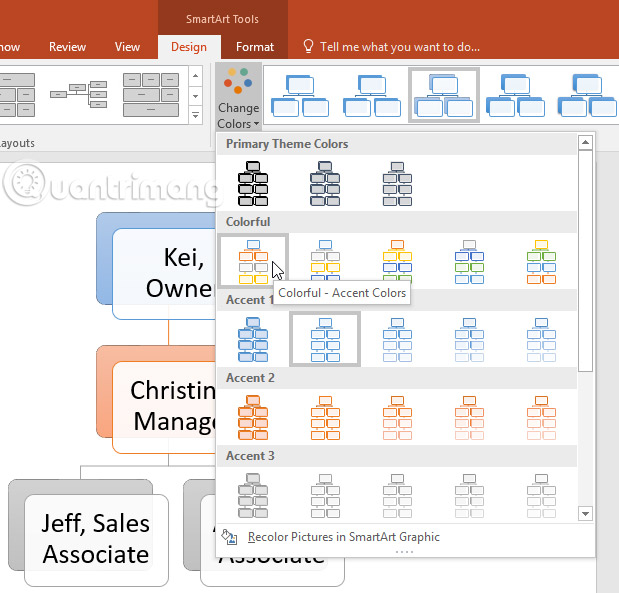
- There are many color schemes for use with SmartArt. To change the color, click the Change Colors command and select the desired option from the drop-down menu.
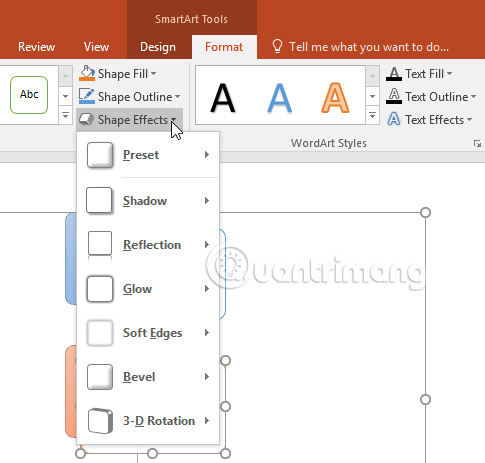
- Users can also customize each shape independently. Just select any shape in SmartArt graphics, then select the desired option from the Format tab .
How to change the SmartArt layout
If you don't like the way information is organized in SmartArt graphics, users can always change its layout to better suit each specific content.
1. From the Design tab , click the More drop-down arrow in the Layouts group .
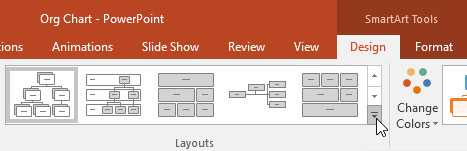
2. Choose the desired layout or click More Layouts for more options.
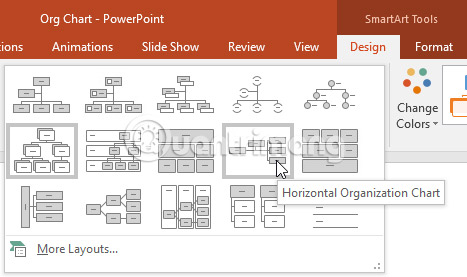
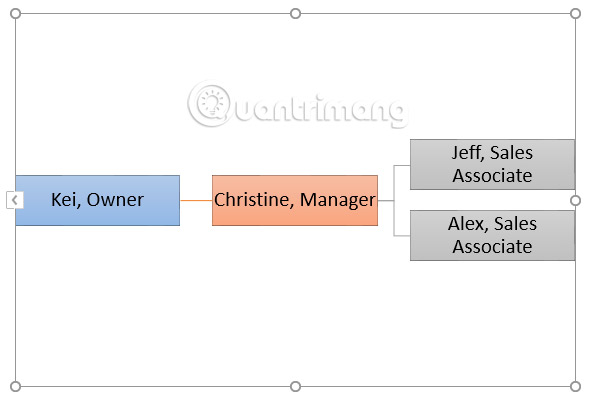
3. The selected layout will appear.
If the new layout is too different from the original, some parts of the text may not appear. Before deciding on a new layout, check carefully to make sure no important information is lost.
Good luck!
See more:
- Presentation tips with Powerpoint
- How to create SmartArt graphics in Excel
- Mind mapping in PowerPoint