Table of Contents
This guide explains how to zoom in Maps, Images in PowerPoint, with clear steps, practical tips, and important checks before you begin.
How to zoom in detail in PowerPoint
Step 1:
First of all you insert a map image or image you want to add a detailed zoom effect. Next, right-click on the slide and select Duplicate Slide to duplicate the slide.

Step 2:
In the mirrored slide, we choose the position we want to enlarge, then click Insert and then choose Shapes , then click the ellipse . We press Shift and then hold the mouse to draw a circle around the position to be enlarged.
Next click on the circle and then look at the Format section, choose Shape Fill> No Fill to remove the border in the circle. Next click Shape Outline and select the border color and border thickness .

Step 3:
Next click on the image , then select Format and click Crop .

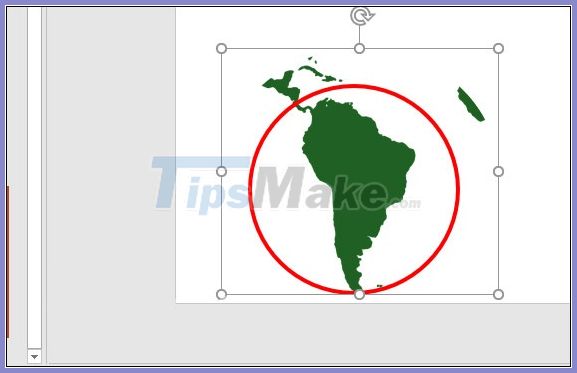
At this time around the image will show borders with 4 black corners as shown below. Then you drag the frame closer to the red circle .

Keep clicking Crop, then choose Crop to Shape and choose the oval to crop the image in a circle.

Then the image will remain as below.
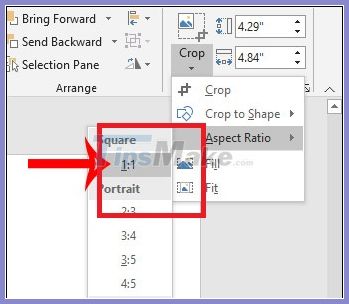
Continue to click Crop and choose the 1: 1 crop ratio .
Step 4:
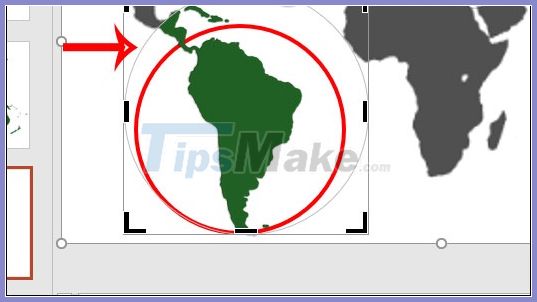
Now you need to move the light circle border close to the red circle . Select the entire image, press Ctrl + X and then click on the original slide to overwrite the original slide position .
Step 5:
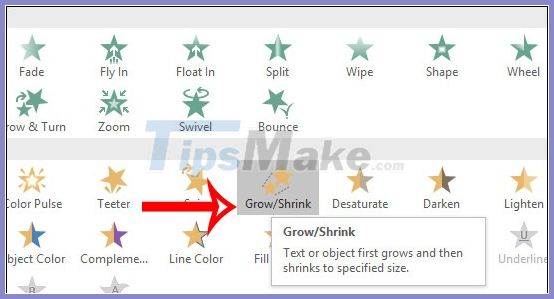
Highlight the area where you need to zoom in to select the newly pasted image, click Animations , expand the effect and choose the Grow / Shrink effect . You should now see that location in the zoomed map.
Step 6:
Click on the Animation Pane , press Shift and then click on the image and enlarge effect . Click on the inverted triangle icon and choose Effect Options..
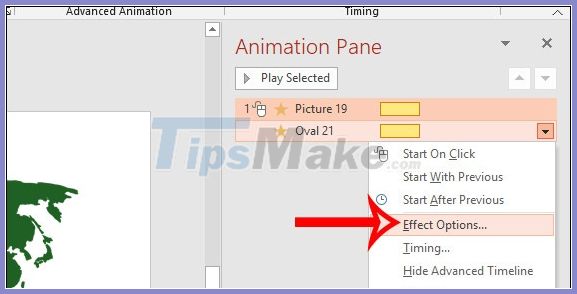
Now we will adjust how much zoom you want. Enter the zoom level then press Enter and press OK to save.

Step 7:
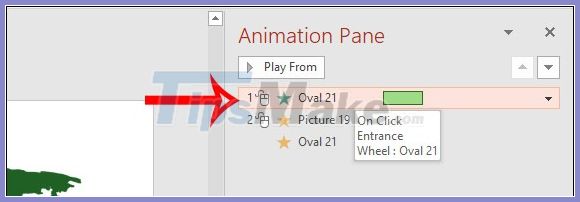
Click on the red border, then select Add Animation and choose the Wheel effect so that the circle appears around the map position.
Now you will need to move the Wheel effect to the top to appear before the zoom effect, by moving to the top in the Animation Pane interface .
Step 8:
Look at the image, then look at the Timing section in Start, select After Previous so that the zooming effect runs right after the circle effect shows, without clicking again.
Finally, just run a test slide to see the results are done.

FAQ
What should I know about Zoom in Maps, Images in PowerPoint?
Focus on the key features, requirements, limitations, and practical use cases explained in this guide.
How do I get the best results with Zoom in Maps, Images in PowerPoint?
Follow the recommended steps, use current software or information, confirm compatibility, and review settings before major changes.
Are there any risks or limitations?
Potential limitations depend on compatibility, data quality, cost, privacy, support, and how the product or method is used.
Related Articles
 Infinite Zooming on Google Maps6 minutes read
 PowerPoint 2019 (Part 14): Inserting Images: Explained7 minutes read
 How to Put a Picture Behind Text in PowerPoint8 minutes read
 How to Insert Text into Images in PowerPoint: PowerPoint Tips4 minutes read
 How to Insert Images Below the Word on PowerPoint: PowerPoint Tips4 minutes read
 PowerPoint 2019 (Part 1): Getting Started with PowerPoint: Explained7 minutes read
Reader Comments 0
Sign in with email or Google to join the discussion.