Table of Contents
Learning how to preview images where needed on Google maps is easier when the steps are completed in the correct order. Use this guide to prepare, make the changes, and verify the result.
Being rated as the most useful online map application today, Google Maps is increasingly asserting its popularity when giving users the ability to search for locations and locations quickly. Even with every device, every location you can find a convenient destination and direction is based on the suggestion of Google Maps.
Besides, the preview of the destination is possible when using this map application. This will make it easy to visualize where to look, and it will be easy to reach that location. If you do not know how to use this feature, you can follow the tutorial below of Network Administrator.
Step 1
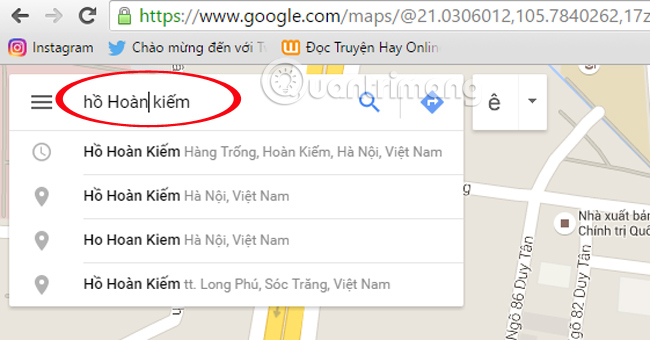
Start by go to the Google Maps app homepage and sign in to your personal Google account. At the main interface of the app, you need to Enter the name of the destination you want into the search box . A list of results appears, click the correct search results.
Step 2
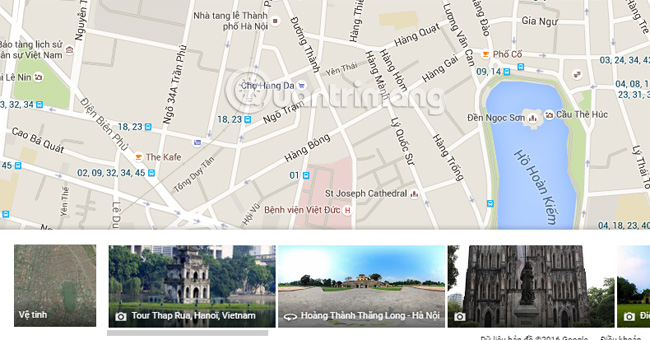
Soon a map appears for the area we search for. And the place to look will be marked with special marks. At the map interface, scroll down and Click the image icon Show image .

Step 3
Soon, a series of images of the location appears with different shooting angles, appearing below the map. Besides, you will also see pictures of famous places around that area.
Step 4
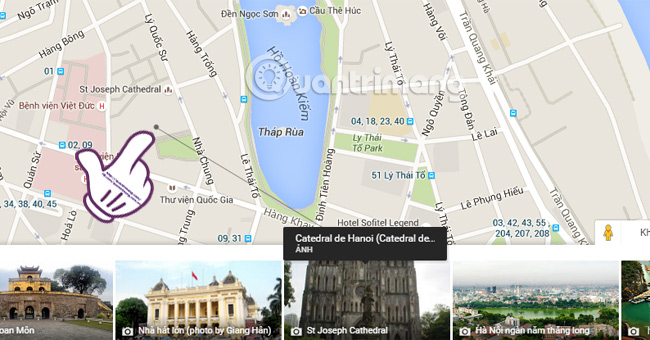
Google Maps also allows us to Query backwards from the images provided below . when needed to know the location of a point, just hover over the image and see the line connecting the image to the place of the place.
Step 5
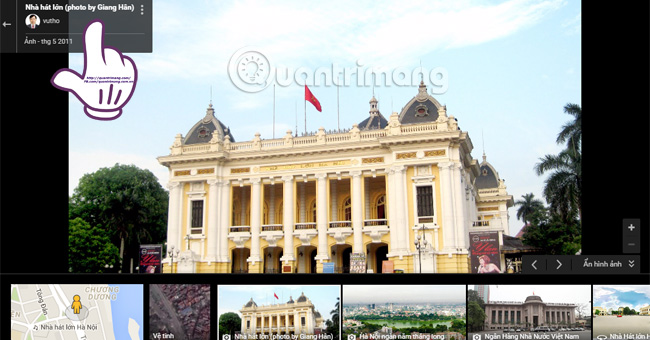
When you click the image, we will be able to see the whole place with the enlarged, sharp and clear image. On the left is the name of the photographer and the time.
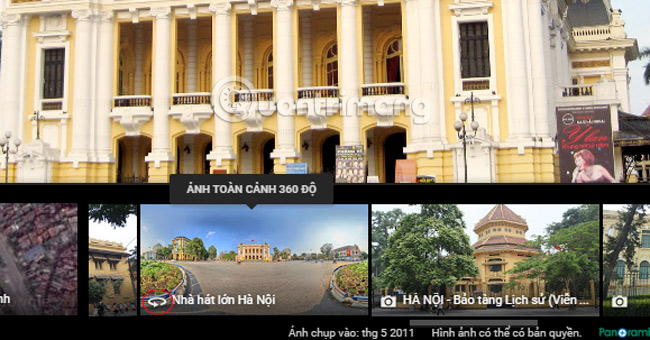
The app also allows us to view photos with 360 degrees. However, only a thumbnail image has A rotating icon That can be viewed in 360 mode.
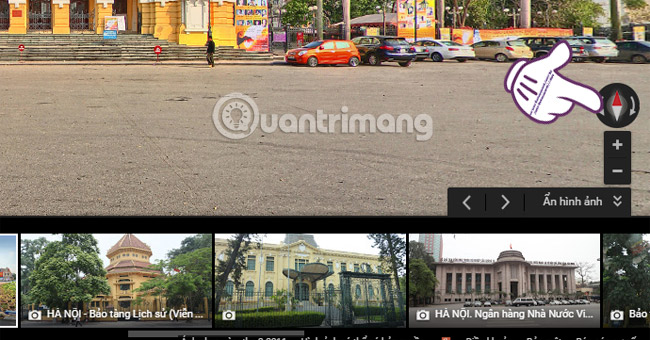
As soon as we click the 360-degree panorama, we can rotate every direction when clicking on The compass icon Or use Ctrl + drag To view the panoramic 3D image.
With this useful feature of Google Maps, you won't worry about getting lost and not finding the location you need to find. Hope you can take advantage of the unique features of Google Maps when searching for places.
Refer to the following articles
- Google Maps: 8 useful tips to know
- Instructions for using Google Maps offline on Android
- Instructions for sending Google Maps location on PC to smartphone
I wish you all success!
FAQ
What should I prepare before I preview images where needed on Google maps?
Review the requirements in the guide, confirm that your device or software is compatible, and save important work before changing settings related to preview images where needed on Google maps.
Why might preview images where needed on Google maps not work as expected?
The most common causes are incompatible versions, missing permissions, incorrect settings, or an interrupted internet connection. Recheck each step and restart the app or device when appropriate.
Can beginners follow these preview images where needed on Google maps steps?
Yes. Follow the steps in order, avoid skipping confirmation screens, and compare your interface with the screenshots because labels may differ slightly between versions.
Related Articles
 Google Maps New Version on the Computer Officially Launched4 minutes read
 Instructions for Using Google Maps Offline on Android5 minutes read
 Strange Images Found on Google Maps That Will Leave You Bewildered8 minutes read
 How to Using Ar Road Features on Google Maps3 minutes read
 4 Indispensable Google Maps Gestures When Driving: Practical Guide6 minutes read
 How to Label Locations on Google Maps for Quick Access4 minutes read
Reader Comments 0
Sign in with email or Google to join the discussion.