How to Use Rulers in Microsoft Publisher
Correct publication design can sometimes come down to a matter of inches or centimeters. Microsoft Publisher, in addition to its margin, row, column, baseline, and boundary guides, displays a horizontal and vertical ruler to show the...
Table of Contents
Method 1 of 6:
Displaying and Hiding the Rulers
-
 Toggle the rulers on and off. The default is to have the rulers on (displayed). You may wish to hide the rulers to focus better on the publication itself.
- In Publisher 2003 and 2007, select "Rulers" from the "View" menu. This will hide the rulers if they are currently displayed and display them if they are currently hidden.
- In Publisher 2010, check or uncheck the "Rulers" box in the "Show" group on the "View" menu ribbon.
- You can also right-click anywhere on the publication window other than a text or graphic object and select "Rulers" from the popup menu that appears.
- The rulers are set so that the upper left corner is the origin (zero) point on both the horizontal and vertical rulers. As you move your cursor over the publication window, thin lines move along the rulers to display the horizontal and vertical position of your cursor.
Method 2 of 6:
Moving the Rulers
-
 Place your mouse cursor over the ruler you wish to move. If you move your cursor over the horizontal ruler, your cursor will change to a pair of horizontal lines surrounded by arrows that point up and down. If you move your cursor over the vertical ruler, it will change to a pair of vertical lines surrounded by arrows that point to the left and right.
- You can also choose to move both rulers at once by placing your cursor over the square where the horizontal and vertical rulers meet. Your cursor will change to a 2-headed diagonal arrow.
-
 Hold down the "Shift" key on your keyboard and drag your cursor to where you want the ruler(s) to move. Your cursor will change to a 2-headed arrow as (a) box(es) appears to represent the ruler(s) you're moving.
 -
 Release the mouse button and "Shift" key. Your ruler(s) will now appear in the new position(s).
Method 3 of 6:
Moving the Ruler Origin Point
-
 Hold down both the "Ctrl" and "Shift" keys on your keyboard.
 -
 Position your cursor over a ruler or the junction point. Where you position the cursor depends on which ruler origin point you wish to change.
- To change the origin point of the horizontal ruler, place your cursor on the vertical ruler. Your cursor will change to a 2-headed horizontal arrow.
- To change the origin point of the vertical ruler, place your cursor on the horizontal ruler. Your cursor will change to a 2-headed vertical arrow.
- To change the origin point of both rulers, place your cursor on the square where the rulers meet. Your cursor will change to a 2-headed diagonal arrow.
-
 Drag the ruler(s) to where you want the new origin point to be.
Method 4 of 6:
Resetting the Ruler Origin Point
-
 Put your cursor over the ruler whose origin you wish to reset. Your cursor will change to a 2-headed arrow.
- To reset the origin of both rulers at once, place your cursor over the square where the horizontal and vertical rulers intersect.
- To reset only the origin of the horizontal ruler, place your cursor over that ruler and hold down your "Shift" key.
- To reset only the origin of the vertical ruler, place your cursor over that ruler and hold down your "Shift" key.
-
 Double-click your mouse. Your ruler's origin point will be reset.
Method 5 of 6:
Rescaling the Rulers (Publisher 2003 and 2007 Only)
-
 Access the "Options" dialog box. The "Options" dialog box is a multi-tabbed box that governs how Publisher does certain things, including the measurement unit displayed on the rulers. To access this dialog in Publisher 2003 or 2007, select "Options" from the "Tools" menu.
 -
 Select the "General" tab. Normally, the "Options" dialog box will open with the "General" tab, the leftmost tab, already selected.
 -
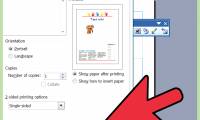
 Choose the measurement option you want from the "Measurement units:" dropdown list. You can choose from 5 units.
- Choose "Inches" to display the rulers in inches. This is the default option.
- Choose "Centimeters" to display the rulers in centimeters. One inch equals 2.54 cm.
- Choose "Picas" to display the rulers in Picas. Picas are a measurement unit used in printing; 1 inch equals 6 picas.
- Choose "Pixels" to display the rulers in pixels. Pixels are a screen measurement; in Publisher, 1 inch equals 96 pixels.
- The fifth option, "Points," changes the unit of measure to points, but displays the rulers in inches. Points are another measurement unit used in printing, commonly used to measure font sizes. One inch equals 72 points. You may want to use this option if you plan to have a number of objects on any of the pages in your publication to give you better precision in placing the guides to lay them out or to improve the layout of large blocks of body text.
Method 6 of 6:
Snap to Ruler Marks
-
 Access the "Ruler Marks" option.
- In Publisher 2003 and 2007, select "Snap" from the "Arrange" menu and then select "Ruler Marks." A check mark will appear in front of the option.
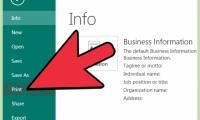
- This option is not available on the default Publisher 2010 menu ribbons. You can add it to any of the ribbons by selecting "Options" from the "File" page in "Backstage" view and selecting "Customize Ribbon" from the left pane of the "Publisher Options" dialog box.
-
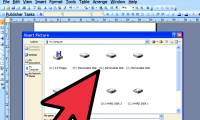
 Select the object (graphic or text box) you want to move. Your object will be surrounded by a set of white sizing handle dots.
 -
 Move your cursor over the object until it becomes a 4-headed arrow.
 -
 Drag the object up, down, left, or right. When the indicator lines on the rulers reach the point(s) you want, release your left mouse button, and the object will snap to the ruler marks.
Was this article helpful?
Your feedback helps us improve.
Related Articles
 How to Use Basic Microsoft Publisher6 minutes read
 How to Download Microsoft Publisher6 minutes read
 How to convert Microsoft Publisher files (.pub) to PDF3 minutes read
 How to Add a Photo to a Document Using Microsoft Publisher11 minutes read
 How to Create an Invitation in Microsoft Publisher13 minutes read
 How to Use Microsoft Publisher6 minutes read
Reader Comments 0
Sign in with email or Google to join the discussion.