How to use the Radial Gradient filter in Lightroom
The Radial Gradient filter is a great feature if you want to edit specific aspects of your photo in more detail.
Table of Contents
Adobe Lightroom has some useful tools to help your photos look more advanced, and you'll probably start with basic sliders. But over time, you may discover some of the more difficult tools to use - such as the Radial Gradient filter.
The Radial Gradient filter is a great feature if you want to edit specific aspects of your photo in more detail. For example, you can use it to make people and objects look clearer - without affecting other areas in the image.
Today, you'll learn how to use the Radial Gradient filter in Lightroom. The article will cover the main things you can adjust with this tool, along with providing specific instructions on how to implement what you learn.
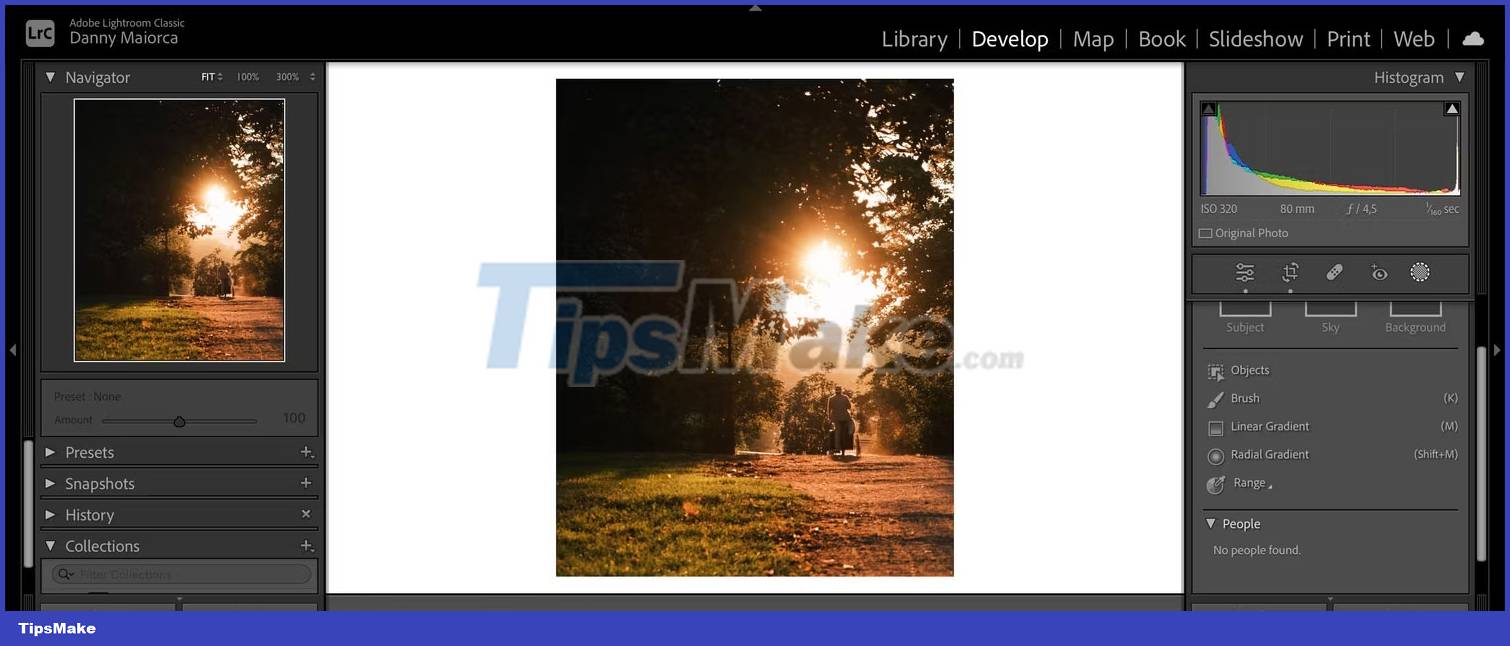
What is the Radial Gradient filter in Lightroom?
Before looking at the specific aspects of the Radial Gradient filter that you can change and how to use it, knowing what the tool actually is will help you use it more effectively. The Radial Gradient filter is a feature in Lightroom that allows you to select a specific area of an image and apply various adjustments, such as changing certain lighting aspects.
The Radial Gradient tool is different from the Linear Gradient filter you'll see in the same section when using Lightroom. The Linear Gradient tool allows you to adjust an image from top to bottom or vice versa, while Radial Gradient is better for selecting circular areas. In this respect, it is more similar to the Brush tool.
In addition to using the Radial Gradient filter in Lightroom Classic, you can also use this feature if you want to use Lightroom Creative Cloud (CC). This tool works identically in both applications.
What can you change with the Radial Gradient filter?

Let's look at some of the things you can change in your photos using the Radial Gradient filter in Lightroom. The article has divided them into individual subsections below.
1. Color
There are several ways to change the color of an object in Adobe Lightroom, and the Radial Gradient filter is one of them. With this tool, you can adjust saturation - and it works the same way as adjusting saturation for the entire photo.
Another cool aspect of editing colors in the Radial Gradient filter is that you have access to color sliders. With this, you can adjust the color of the image area you cover with the Radial Gradient filter.
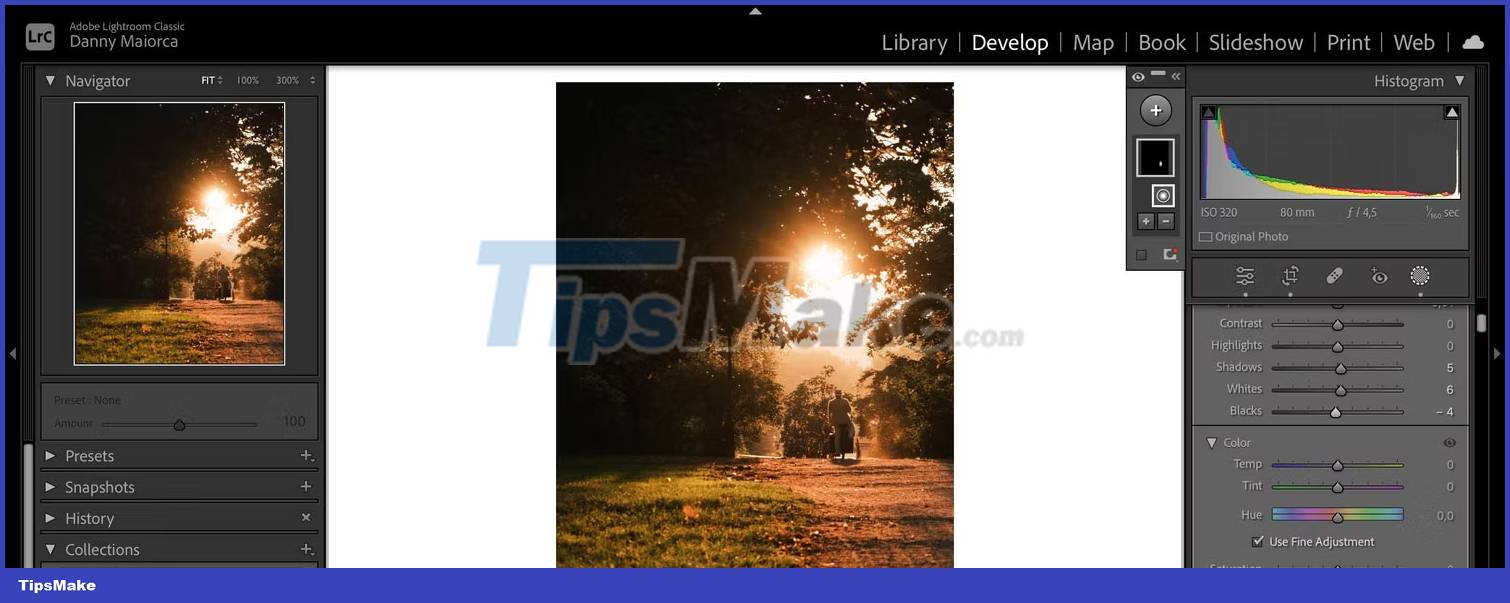
2. Lighting
Unfortunately, using the general exposure and contrast sliders - along with tone curves etc. - will change the brightness of the entire image in Lightroom. In case you only want to refine certain areas, you can use the lighting tools included in the Radial Gradient filter.
Radial Gradient has sliders where you can adjust each of the following:
- Exposure
- Whites
- Blacks
- Contrast
- Highlights
- Shadows
Each of these sliders works in the same way as the general sliders.
3. Pattern
Using the right texture can give your images a more vibrant feel and allow the viewer to fully immerse themselves in what you've created. And if you don't want to change the texture for the entire image, you can always use the Radial Gradient filter instead.
The texture slider will make your part of the photo look sharper or less sharp, depending on how you move it. However, you should remember that pushing your edits too far can make your photo look unrealistic - so you should take a minimalist approach in this regard.
4. White balance
Sometimes, you may not like the temperature in certain areas of your image. You can easily change this with the white balance sliders in Lightroom via the Radial Gradient filter.
Just like when adjusting the white balance of an entire photo, you can change the temperature and tone. You should set white balance right in the camera, and it's one of the basic camera settings you need to understand.
How to use the Radial Gradient filter
Now let's see how to use the Radial Gradient filter in Lightroom. You need to understand 3 different aspects: Resizing the filter, applying the desired effects, and erasing areas that you have accidentally painted over.
Change the Radial Gradient filter size
Before applying any effects to your photo, you should resize the Radial Gradient filter. The best way to do this will depend on the size of the area you want to adjust.
To change the Radial Gradient filter size, follow these steps:
1. Select the Masking tab in Lightroom. It's a circular icon.

2. Click Radial Gradient or press Shift + M on your keyboard.
3. Draw on the area of the screen where you want to apply the Radial Gradient filter. Then, move the circle however you feel is right.
If you want to speed up your editing workflow, consider using some of Lightroom's AI features - such as denoising.
Apply effects to photos
Applying effects in the Radial Gradient area is easy. First, move the sliders until you are satisfied with your image.
After adjusting the slider, you can press the Enter key on your computer. Your changes will then take effect immediately.
The Radial Gradient filter is sometimes quite difficult to use, you can use some simpler methods to improve your photos in Lightroom.
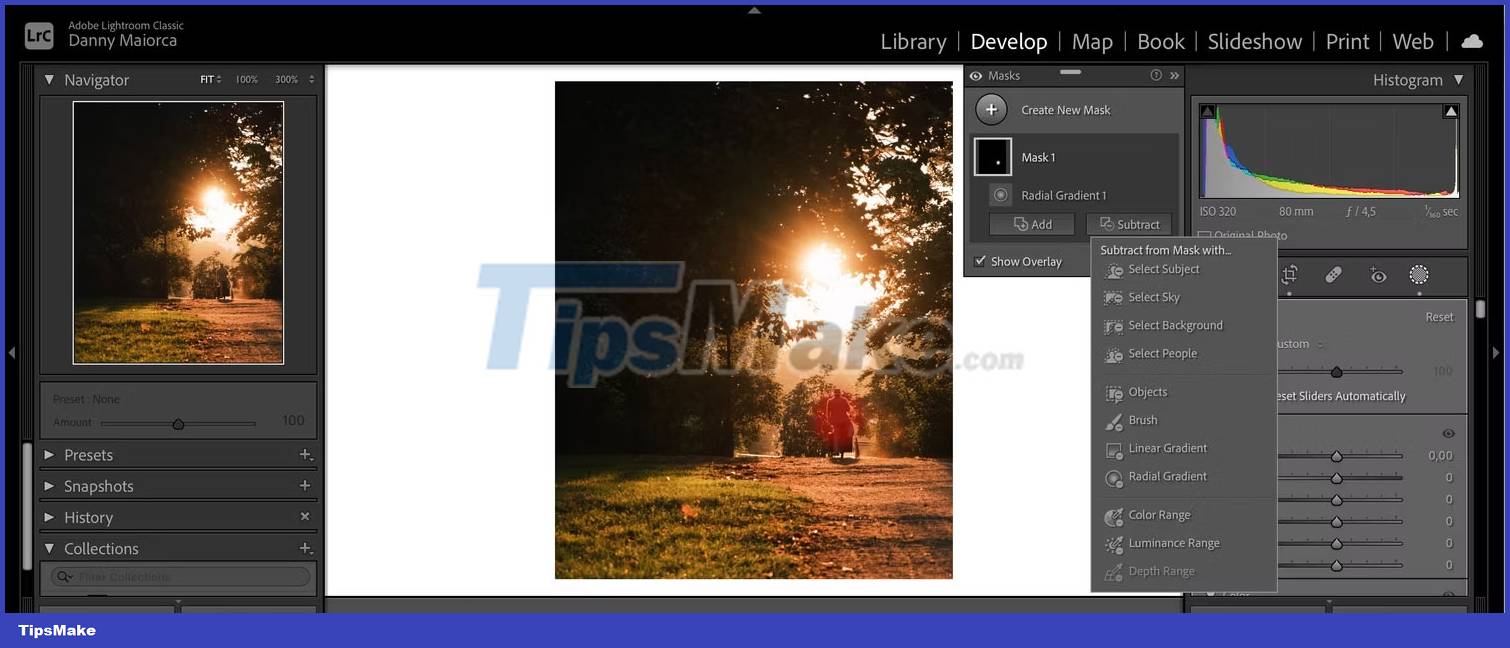
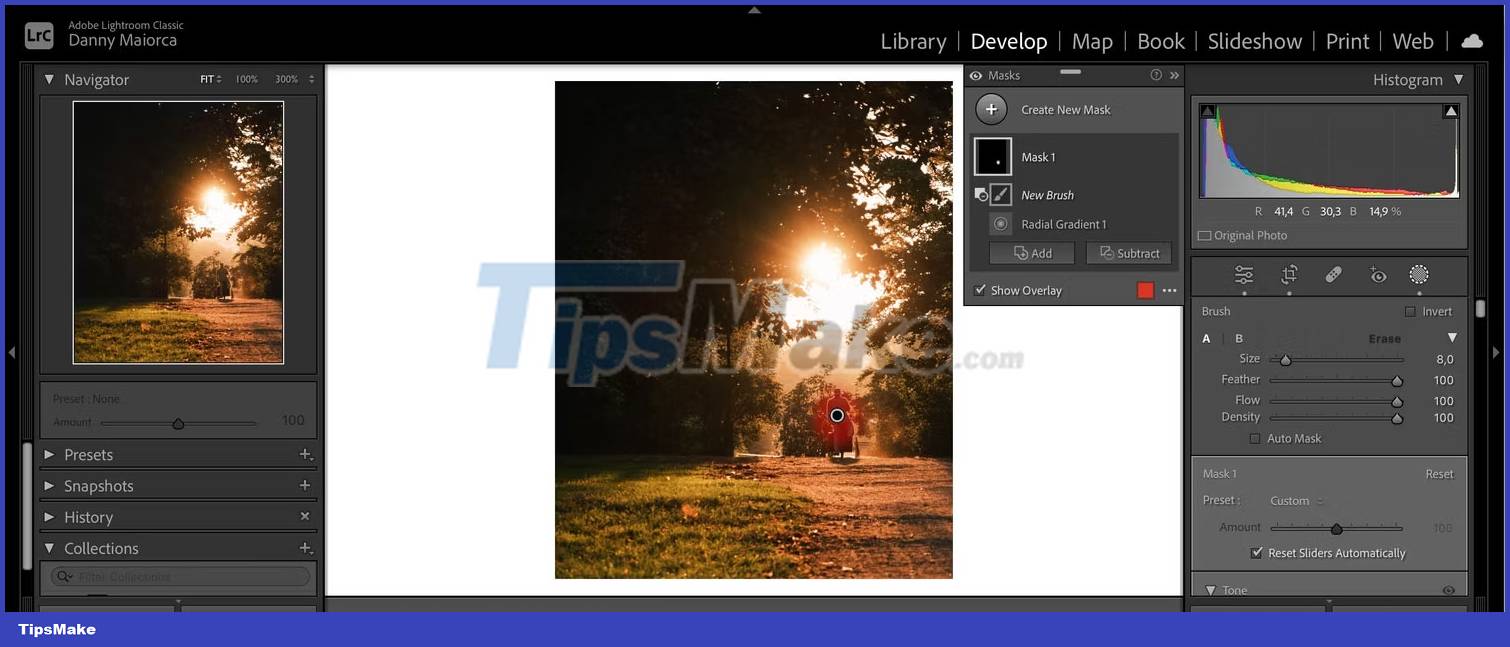
Erase areas that you accidentally painted over
It's quite easy to overdraw when using the Radial Gradient filter in Lightroom, but fortunately, there are tools you can use to fix the problem:
1. In the Masks section, select Subtract.
2. You will see a list of options appear in the drop-down menu. The best choice is to choose Brush as it will give you more control over the exact areas you want to erase.
3. Move the Brush over the areas where you have overdrawn.
Was this article helpful?
Your feedback helps us improve.
Related Articles
 Gradient - color linear transformation in CSS7 minutes read
 Canvas element in HTML54 minutes read
 How to Create a Gradient in Photoshop9 minutes read
 How to use Photoshop CS5 - Part 29: Create a zoom effect in a photo5 minutes read
 Instructions on how to improve and speed up Lightroom7 minutes read
 Synthesize the most beautiful CSS Background Gradient template6 minutes read
Reader Comments 0
Sign in with email or Google to join the discussion.