Instructions on how to pair HDR photos on Lightroom
Along with popular photo editing and editing software, Lightroom is chosen by many people. We can perform photo editing tasks from simple to complex, like creating High Dynamic Range images with Lightroom.
If you are a photographer, it may not be strange with the High Dynamic Range (HDR) concept. To get an HDR image, the photographer will need 2, 3 or more photos with a subject, different brightness scenes, and then stitch them together to get an HDR image. To be able to merge images into a standard HDR image, we can use today's professional photo editing software, such as Lightroom. This tool provides users with simple to professional photo editing features, and we can use Lightroom to create an HDR photo as quickly as possible.
So how does HDR image creation process with Lightroom software? Please refer to the tutorial below for more photo editing experience.
- Download Adobe Photoshop Lightroom
- Download Adobe Photoshop Lightroom for iPad
- Download Adobe Photoshop Lightroom for Android
Step 1:
To create an HDR image, we need two images with the same brightness in each image. It is also possible if we want the image to show the contrast clearly. If taken on the phone, we can adjust the exposure to within + -2 EV , one image has exp -2 exposure, one has exp +2 exposure.
Step 2:
Next, open the Lightroom software on the computer. We will open images that want to merge HDR photos. Then select Photo> Photo Merge> HDR .
Or users can also right-click on a composite image and select Photo Merge> HDR.

Step 3:
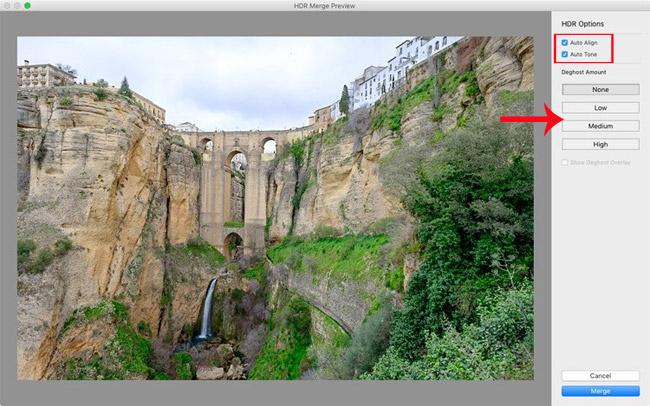
When pressing a photo merge command, the software will automatically stitch to create an HDR image. Next in the HDR Merge Preview interface, we will proceed to customize the image to include, the layout difference (Auto Align), automatically adjust the Color Tone (Auto Tone) and Deghost Amount .
To get a good HDR image, users should choose to use Auto Aligh and Auto Tone only.
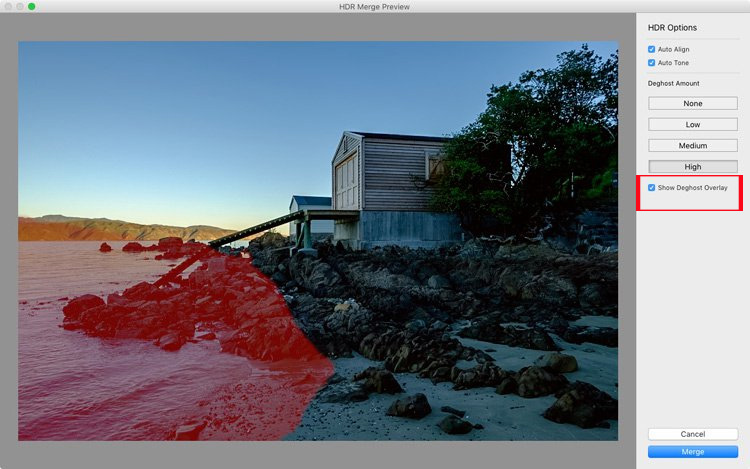
In case the image has many subjects with different motions (Ghost), you should use more Deghost Amount . There will be 3 levels to choose Low, Medium or High. Depending on the eyes of the arts, as well as the experience of each person, we choose the level of the image to match. It's best to try each level to easily compare images.
Note , if you use the Deghost Amount and want to see the image before saving, click on Develop, then select the zoom ratio 1: 1.

Check Show Deghost Overlay right below so that the software recognizes the red Ghost areas to handle them.

Step 4:
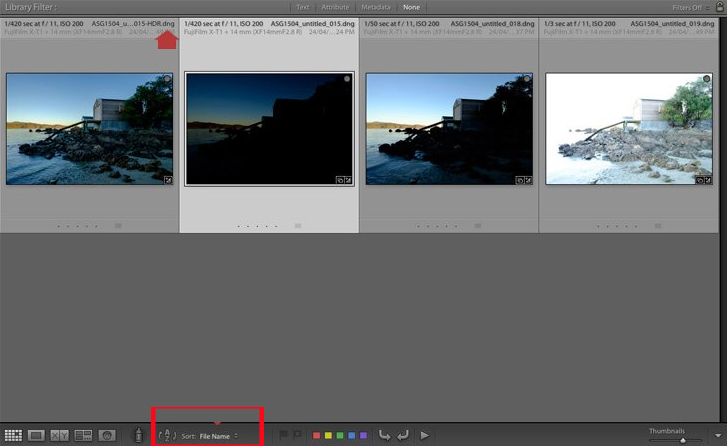
After you have finished editing the image, we proceed to save the image on Lightroom when pressing the Merge button . Photos will be saved in DNG file format .
In case of not finding HDR image after transplanting on Lightroom, click Sort - File Name below. The image that appears first is the fully HDR image.

So you have finished the HDR photo taken from Lightroom editing software already. Lightroom does not provide users with too many features and tools to edit HDR photos, but that will help us to focus on images more, creating simpler images is not too complicated without a list of glamorous custom. The completed image can also be easily changed if you want to be in the Develop on Lightroom section. Try Lightroom to create multiple HDR images with different brightness differences.
Refer to the following articles:
- 5 basic photo editing tips on Adobe Photoshop Express
- How to use Photoshop CS5 - Part 5: Photo editing
- How to use Photoshop CS5 - Part 1: Toolbox
I wish you all success!


 How to cut a circle image on Paint
  How to fix the error of saving JPEG images into JFIF on Chrome
  Instructions on how to crop a circle image online
  How to create a 3x4 photo in Paint
  How to batch format photos in Windows 10
  How to delete text in photos with Paint