How to use Photoshop CS5 - Part 15: Remove wrinkles with the Healing Brush tool
In the next article in the Photoshop tutorial series, we will explore and use the Healing Brush - this is one of the best editing tools, especially for objects like lines. skin, corners of eyes ...
We can turn people 40, 50 or 60 years old back to the previous time, regain their youthful appearance.

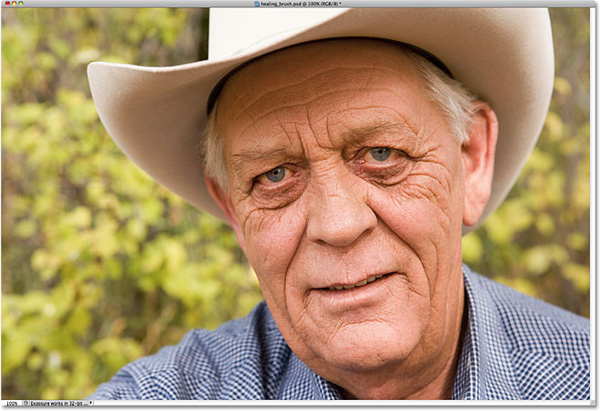
Sample photo
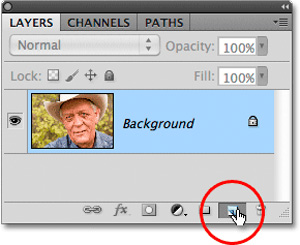
First, we start by adding a new layer completely above the Background. Hold Alt (Windows) or Option (Mac) and click the New Layer icon in the control panel:

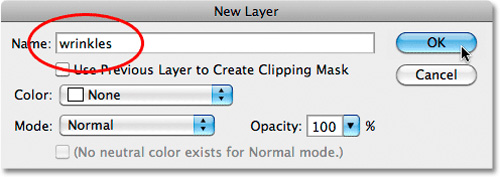
The New Layer window displays, naming this new layer wrinkles and clicking OK:

Click OK, and from this step onwards, we will only manipulate this layer wrinkles only:

Next, select the Healing Brush tool from the Tools menu:

Much like the Spot Healing Brush , the Healing Brush tool is used based on replacing the basic structures of certain areas. By default, the Healing Brush selects only the sample from the active layer, but it seems quite inconvenient so we'll change the Sample Mode selection from Current Layer to All Layers from the list:

Besides, remember to uncheck the Aligned box. In the experience, when using the Clone Stamp Tool , select the Aligned item, but for the Healing Brush you don't need:

Basically, the process of using the Healing Brush takes about 2 steps. First, we choose a nice, smooth image to sample, then move to the part to manipulate to smooth. The important point here is to combine so cleverly and appropriately, because the area in the corner of the eye is not much and different from the rest of the face. For young people, the skin around the corners of the eyes is usually smooth and stretched, so we just need to apply this process to older people rather than satisfactory. To be more certain in this selection process, enlarge the eye tail and hold down the Alt (Windows) or Option (Mac) keys to turn the Healing Brush work cursor into an icon as shown below:

After selecting a suitable sample area, release the Alt (Windows) or Option (Mac) button, move the Healing Brush to the 'youngest' part of the corner of the eye. Please pay attention to changing the size of the brush with the shortcut [or]. In this process, we notice that the + sign appears on the tool selection movement area. The entire area below this icon is copied exactly when you manipulate:

When releasing the mouse, Photoshop replaces the wrinkled, old skin with smooth skin, with the corresponding color and brightness. As you can see, the birds' feet have gradually disappeared:

To avoid repeated use of a fixed sample area, select different parts after sampling. Because if such continuous sampling is completely ineffective, it is clear that the facial skin is different. We need quick hands and eyes, press the Alt (Windows) or Option (Mac) keys to select different areas depending on the depth of the corner of the eye and the amount of sample skin you can use. In special cases, take the pattern continuously and seamlessly, and if you get an error, press Ctrl + Z (Windows) or Command + Z (Mac), then do it again.

Our results after the above process
Once we have 'cleaned up' the area that runs along the corner of the eye, we continue with the interior. Take samples from the nearest skin area, and replace the surrounding parts gradually:

Keep repeating like that, until this line is almost gone:


This process is often quite long and complicated, requiring people to be meticulous, patient and calm. This is our achievement after applying the above method to both eyes:

With the above result, it can be said that we are close to the final destination. But naturally, a person with the same age without any wrinkle is unreasonable. To fix this, we need to change the Opacity option of the mask layer, for example, 50% is a reasonable value range for most cases:

And this is our perfect result:

In addition, you can refer to sample video tutorial here:
Good luck!


 Don't miss out on these 11 beautiful free brushes for GIMP
  Very nice brushes for Photoshop - Download now for free
  Eyebrow brush for Photoshop
  Tutorial to create a sparkling snow effect using Photoshop Brush
  How to style hair and beard in Photoshop
  How to rotate 'brushes' in Photoshop in just 5 seconds with this tip