How to use Photoshop CS5 - Part 17: Batch image processing with Photoshop Actions
What would you do if you had to handle dozens, hundreds, even thousands of photos with requests in a short amount of time? That will be a difficult and complicated issue for many people ...
QuanTriMang - What do you do if you have to handle dozens, hundreds, or even thousands of photos with requests in a short amount of time? That will be a difficult and complicated issue for many people, but you will not need to spend a lot of time because in the following article, we will present and guide great support features, It's Photoshop Action .
>>> Resize photos quickly with Photoshop Action
In simple terms, Photoshop Actions is the process of repeating a certain operation on multiple objects. Every time you use the tool, change the color, brush size . all these actions are recorded and applied on any file afterwards. But all is perfect only if you are precise in the initial modeling process, but if you make a mistake, it will take longer than the original manual:

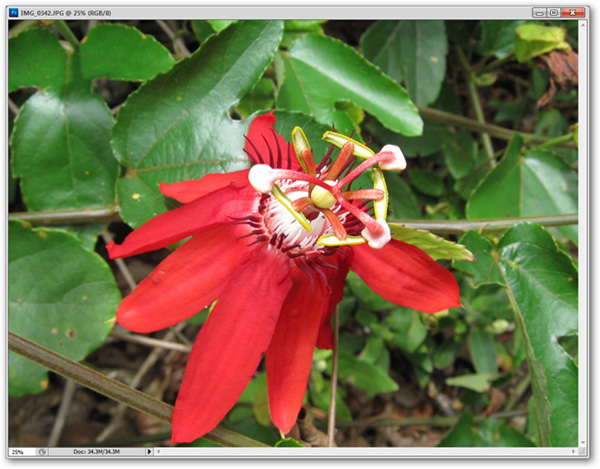
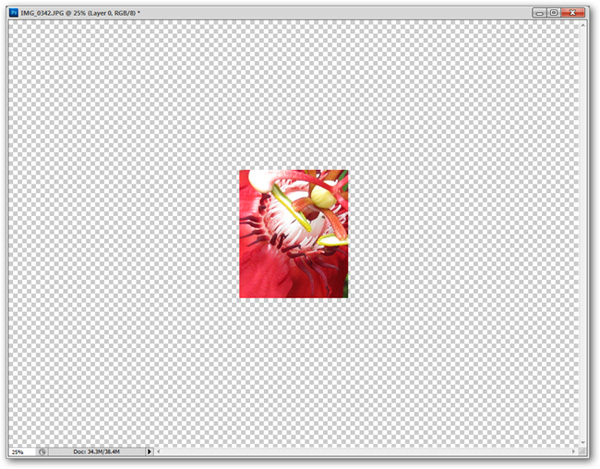
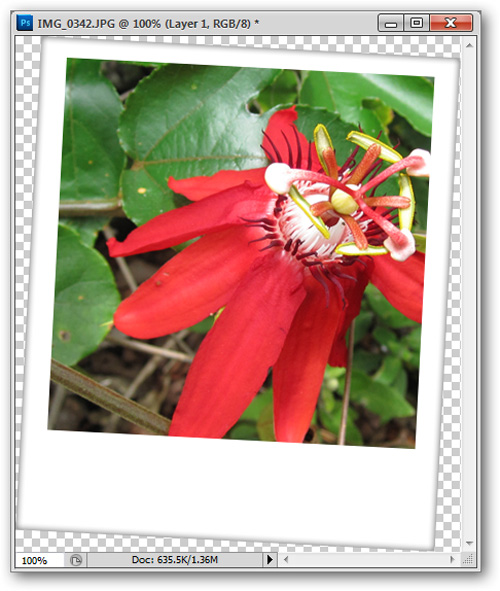
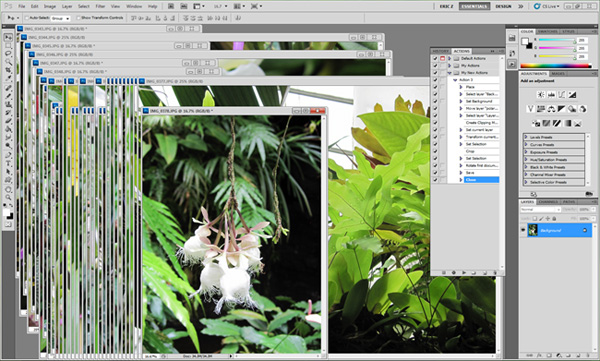
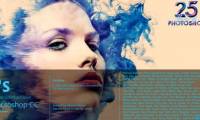
In this test, we will take a sample on the following image:
Create new Action:
Actions are the default component of Photoshop Essentials in CS5 version. If you cannot find this item in the History section, click Window> Actions or use the shortcut Alt + F9 :

Select the icon
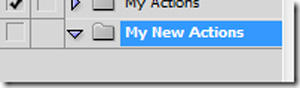
 in Actions Panel and New Set to create your own action:

Name and click OK:

In the Panel again, you will see a combination of actions that appear in the list:
Click
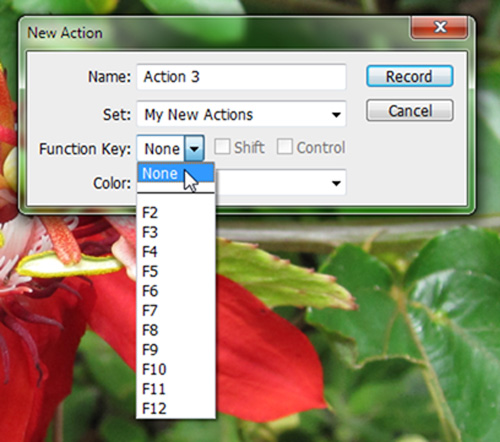
 to create New Action :

Note that you can use keyboard shortcuts for each action, and Photoshop allows users to assign specific keys from F2 to F12:
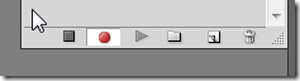
Every time a new action is created, Photoshop will automatically start recording your entire action, not counting the waiting time between steps:

Remember the modeling action:

After opening the sample image, start the modeling process by pressing the button with the following icon:
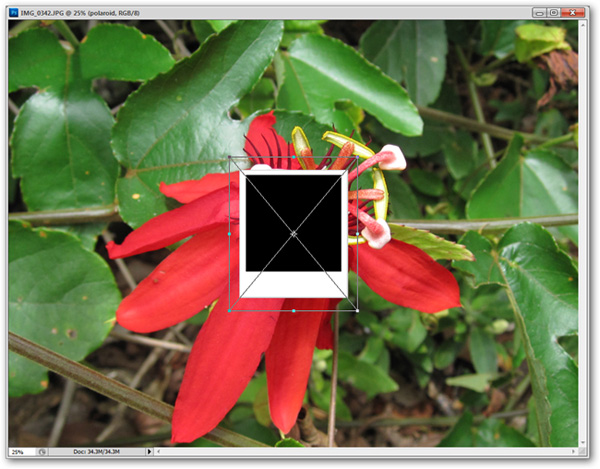
Use the File> Place command to insert a sample image for Actions. Photoshop can apply this modeling process to many images, but if you are not proficient, the user will probably get an error. Therefore, be very careful in this process:

Once you have set the standard frame to the sample image, press Enter to select:
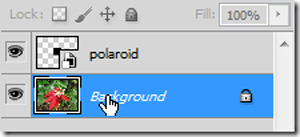
Select Background Layer in the control panel and double click on this layer:
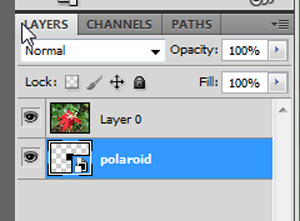
Then, a new layer will be created, click OK:

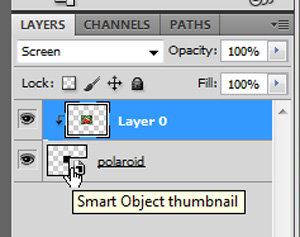
Move the polaroid layer below Layer 0:
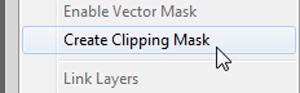
Right-click on Layer 0 and select Create Clipping Mask:
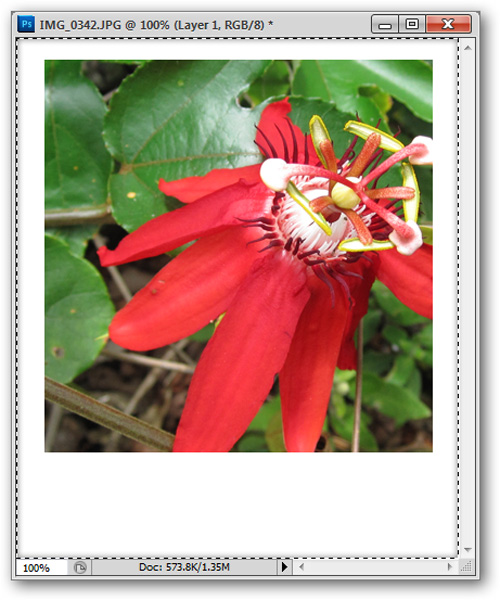
JPG image files will be proportional to the sample frame. While doing the above, Photoshop will record the entire operation, move the cursor, use the brush, change the color . to the exact coordinates:
Make a choice
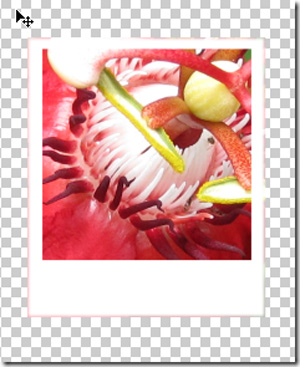
 to change Layer to Screen mode. This process will make the picture disappear when moving to the white part of the polaroid layer:
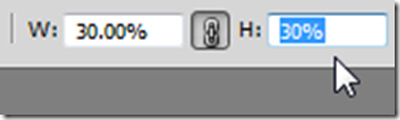
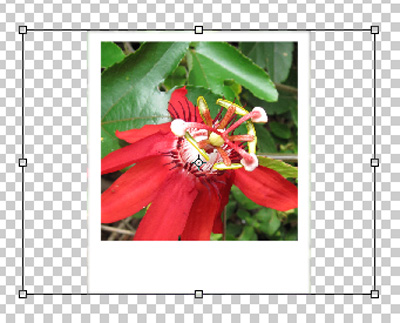
When you're still selecting Layer 0, choose Edit> Transform> Scale , you can use the mouse to resize Layer 0, but Actions work much better with specific specifications. Change the Width and Height in proportion, for example here we convert 30% value:
After changing the size and position, press Enter to apply:
Then, hold Ctrl and select the polaroid Layer to make a selection around the layer:
Select Next Image> Crop:
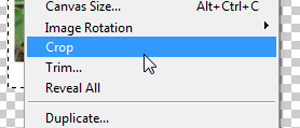
And cut off the extra unnecessary parts:
To create a bit more fancy, we will rotate the image in a certain angle with Image> Image Rotation> Arbitrary:
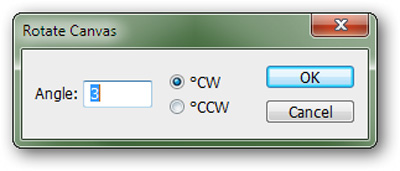
Here is the result after rotating the 3-degree image:
After that, we will save the resulting image file into a certain folder:
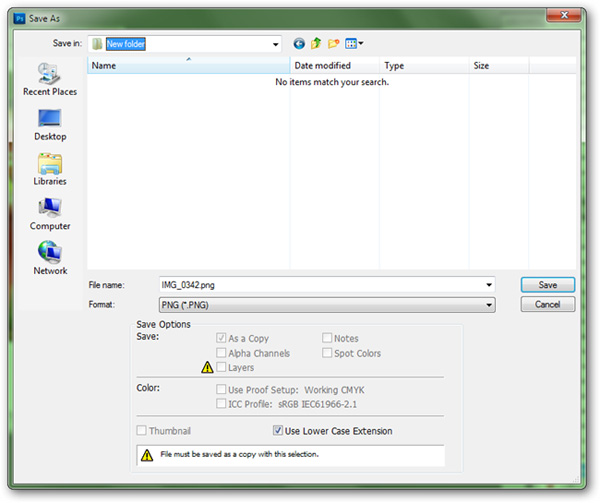
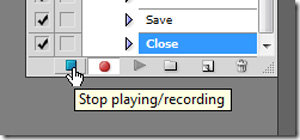
Note that Photoshop still records all your operations in advance. But when it comes to this naming step, it is imperative that you change the file name, and if you keep it, Photoshop will only save the file with a unique name. Then, close this sample image file and click the Stop button in the Actions panel:
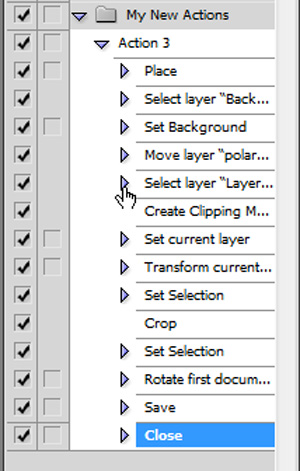
All operations are recorded and listed in detail here:
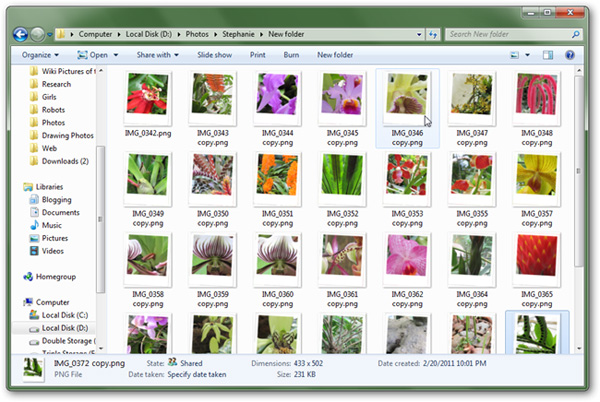
Bulk editing photos with Action just big:
This is an interesting part of this process after successfully creating Action, all you need to do here is to open all the photos you need to edit and press the Play selection button as shown below:
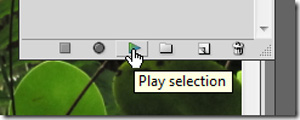
And wait, our results are as follows:
This process is only really confusing and confusing in the modeling step, but just focusing and being careful, you have a rather comprehensive and effective skill when faced with a large number of photos that need to be handling. Good luck!
Was this article helpful?
Your feedback helps us improve.
Related Articles
 How to create actions in Photoshop for batch processing images3 minutes read
 Setting up Photoshop Action batch image processing4 minutes read
 Funny photo series in Photoshop battle of photo-making experts (Part 1)3 minutes read
 16 videos for new discoveries on Photoshop CC (Part 1)3 minutes read
 Funny photo series in Photoshop battle of photo developers (Part 4)3 minutes read
 How to batch resize photos in Photoshop4 minutes read
Reader Comments 0
Sign in with email or Google to join the discussion.