Table of Contents
This updated guide examines How to Uninstall G Data Internetsecurity 2012 and organizes the essential facts, background, and practical takeaways in clear American English.
Method 1of 2:
Using the All Programs Option
 Click the Start button on left bottom of the desktop; scroll up your mouse and then click on the All Programs or Programs on the menu on left pane.
 Enter the G Data InternetSecurity 2012 entry on the list, scroll down that list and then run the Uninstall in it as system administrator.
 Please wait and then you select the Next > option from the following G Data InternetSecurity 2012 window, which is an uninstall wizard for the G Data product here.
 Select theRemoveoption from the next window namedProgram Maintenance; click the Next > button on it again.
 Click the Remove button on the final Remove the Program window and follow the rest of the wizards you will see to complete the standard uninstall of GDIS program. See the following Option Two section for more related tips.
Method 2of 2:
Using the Uninstall a Program Option
 Click the Start >> (Settings) >> Control Panel >> Add/Remove Programs or Uninstall a program.
 For Windows 7 / Windows Vista end-users, you may directly locate and run the G Data InternetSecurity 2012 from the Uninstall or change a program list to automatically uninstall it on your machine. And for Windows XP SP3 users, you may then click the Remove or Change/Remove button behind the targeted item you wanna uninstall.
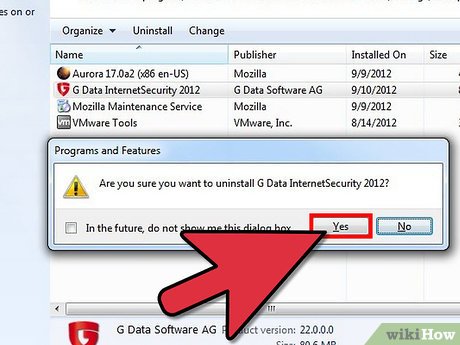 For Windows 7/ Vista users, select the "Yes" option from the Programs and Features to go on with the uninstall process.
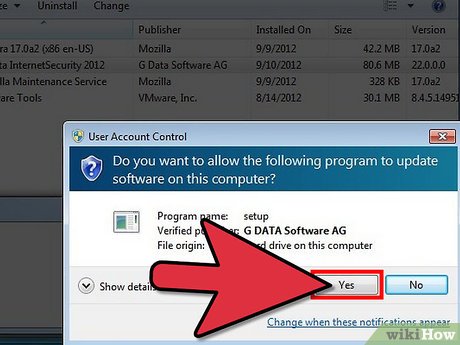 Select the Yes option from the following blue UAC window.
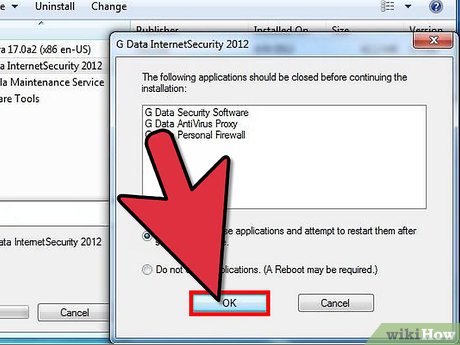 For more common users, choose the "Automatically close" option from the below GDIS info box. Click the OK then.
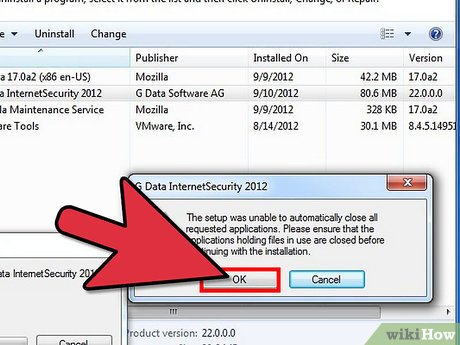 Click OK on the following info box by GDIS. See the below screen shot for more details.
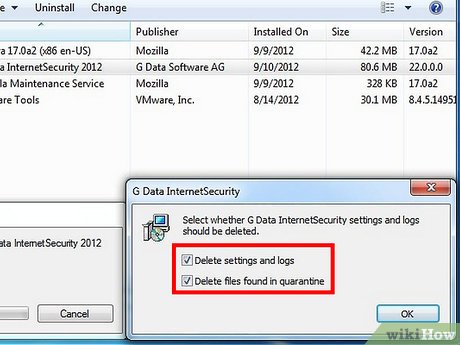 To completely uninstall G Data InternetSecurity 2012, add the "Delete files found in quarantine" option to the below G Data Internet Security information box. Click OK on it.
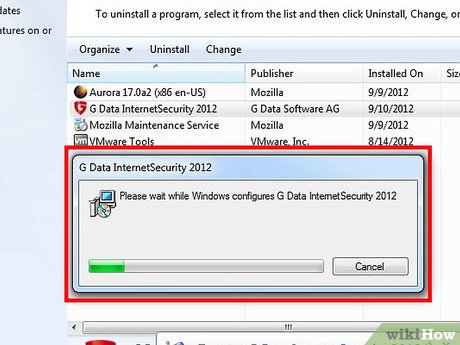 Please be patient while your Windows machine is uninstalling your unwanted GDIS 2012 program.
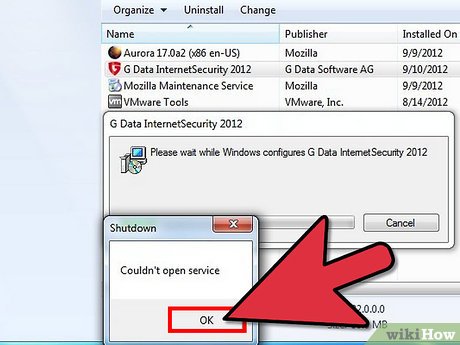 Click the OK on the "Shutdown box" if you see it.
 Ensuring you've saved all your personal files, click the Yes to restart your Windows.
FAQ
What is How to Uninstall G Data Internetsecurity 2012 about?
It provides a structured overview of uninstall, explains the main context, and highlights practical takeaways for readers.
Why does this topic matter?
Understanding the main concepts helps readers evaluate the issue, avoid common mistakes, and make better-informed decisions.
How should readers use this information?
Use the guidance as a practical starting point, confirm details that may have changed, and follow current product, safety, or security recommendations.
Related Articles
 How to Uninstall LinkiDoo6 minutes read
 How to Completely Uninstall WSL on Windows 10/114 minutes read
 How to Uninstall Facebook Messenger: Practical Guide4 minutes read
 4 Ways to Return to the Previous Version of Windows 10 Without Losing Data8 minutes read
 How to Remove Xbox Game Bar Windows 11 App3 minutes read
 Remove the Software with Geek Uninstaller - Uninstall Software Thoroughly3 minutes read
Reader Comments 0
Sign in with email or Google to join the discussion.