How to Uninstall Vipre Internet Security 2012
Need some tips to uninstall VIPRE Internet Security 2012 from Windows 7? And/or from other Windows Operating Systems? Then you can follow the detailed steps below. Click on Start button labeled with Microsoft Corp. Move onto the Control...
Table of Contents
Method 1 of 2:
Remove the the majority of the VIPRE software you installed
-
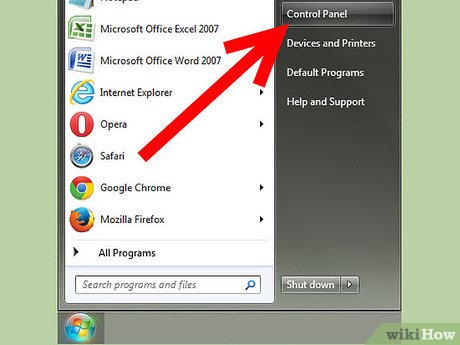 Click on Start button labeled with Microsoft Corp. Move onto the Control Panel. Or you can also type "uninstall" in the "Search programs and files", press Enter key.
 -
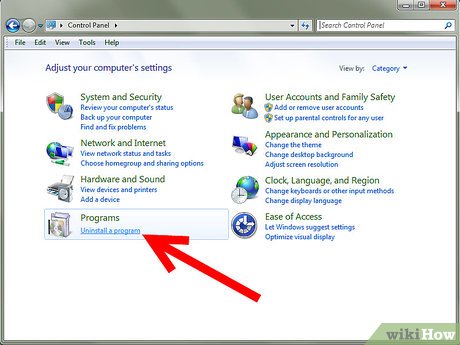 In the Control Panel, you click on "Programs - Uninstall a program" link.
 -
 Locate the "VIPRE Internet Security" item listed in "Uninstall or change a program", you then launch the option "Uninstall/Change" for it. Or you right click on it, run the Uninstall/Change command to automatically remove it.
 -
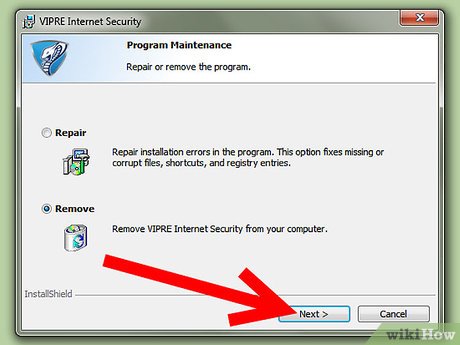 Select the option "Remove" from VIS windows. You go on clicking on Next > button.
 -
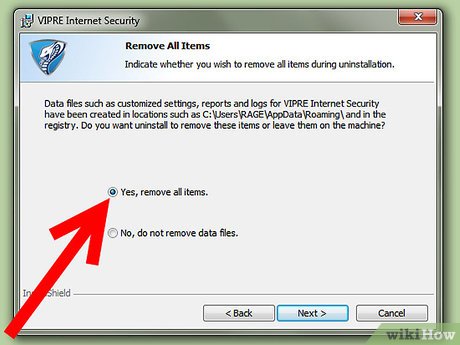 To free up the space in system drive, or other disks you have, you can then tick the option "Yes, remove all items.", click Next >. Or you can save the VIPRE virus database and other data in your system.
 -
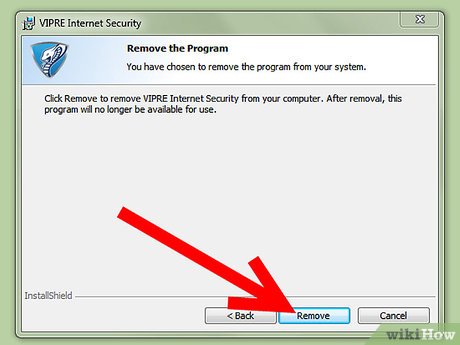 Finally, you click on Remove button to uninstall VIS 2012. Please wait for its automatic removal procedure.
 -
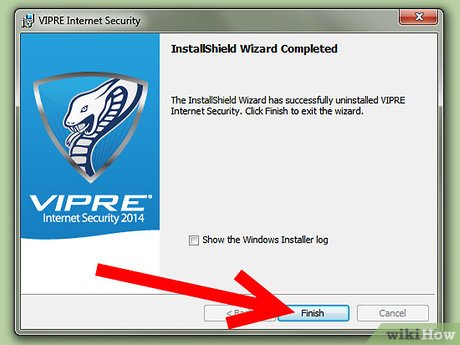 Click Finish from VIS.
 -
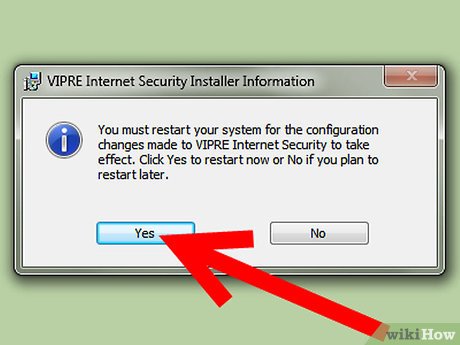 Ensure you've saved your other stuff, click on Yes from VIS Installer Information to restart your Windows 7 PC.
Method 2 of 2:
Clean VIS leftover files and registry entries
-
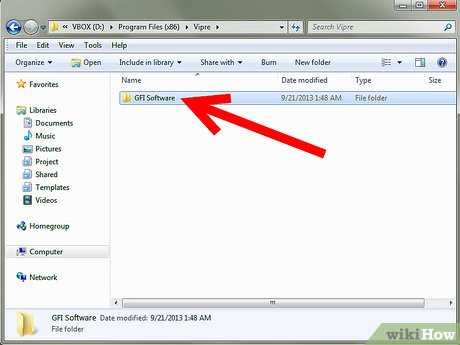 Search and delete related items in hard drive.
 -
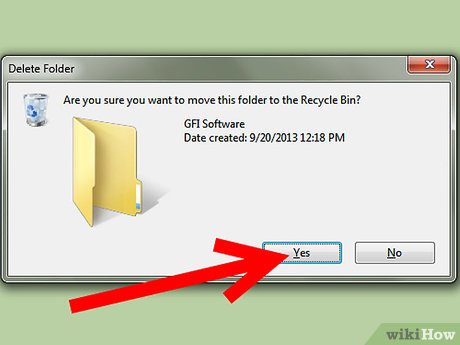 Select Yes from Delete Folder.
 -
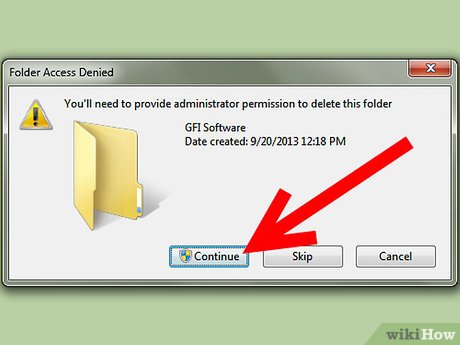 Go on clicking on "Continue" button on "Folder Access Denied".
 -
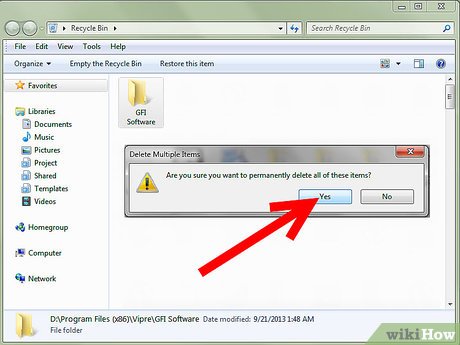 Open up Recycle Bin, click on "Empty the Recycle Bin" button on top. Select Yes from Delete Folder.
 -
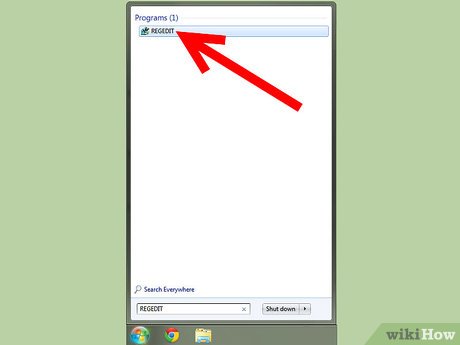 Type "regedit" in Windows Search application. Run Registry Editor listed on top of that menu.
 -
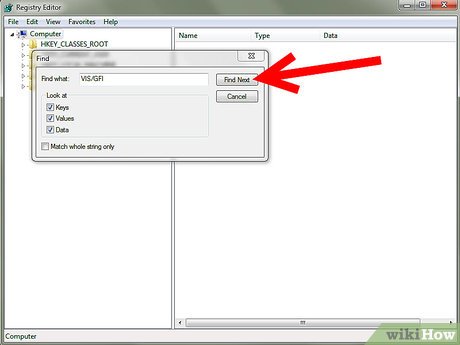 At least, you first backup the registry files via running the Export command. Search and delete VIS/GFI values left in Registry Editor.
Was this article helpful?
Your feedback helps us improve.
Related Articles
 How to Uninstall G Data InternetSecurity 20123 minutes read
 How to Uninstall Kaspersky Internet Security 20152 minutes read
 Top 10 best Antivirus software in early 2018 for Windows 102 minutes read
 Ways to uninstall Internet Explorer 8 on Windows XP / Vista / 74 minutes read
 How to Uninstall McAfee Internet Security8 minutes read
 How to Completely Uninstall Internet Explorer4 minutes read
Reader Comments 0
Sign in with email or Google to join the discussion.