How to turn on and off the self-adjusting feature of screen brightness on Windows 10
Laptop computers using Windows 10 operating system are equipped with sensors (sensors) that measure the light around the environment to set the appropriate screen brightness to help protect the eyes. That is why when we bring the laptop into the dark system, the system will automatically reduce the screen brightness and the opposite of the strong light area.
Table of Contents
Laptop computers using Windows 10 operating system are equipped with sensors (sensors) that measure the light around the environment to set the appropriate screen brightness to help protect the eyes. That is why when we bring the laptop into the dark system, the system will automatically reduce the screen brightness and the opposite of the strong light area. In this article, the Software Tips will guide you how to turn on, turn off the feature to adjust the screen brightness on Windows 10.

1. How to turn on and off the self-adjusting feature of brightness in Settings
Step 1: You proceed to open the Start Menu and enter Settings to open.

Step 2: Then, you select the System section to set up the system.

Step 3: At the Display tab , you will have the option of Change brightness automatically when lighting changes (Automatically change when the ambient light changes) .

If you want to turn it off, uncheck this box and vice versa if you want to turn it on.
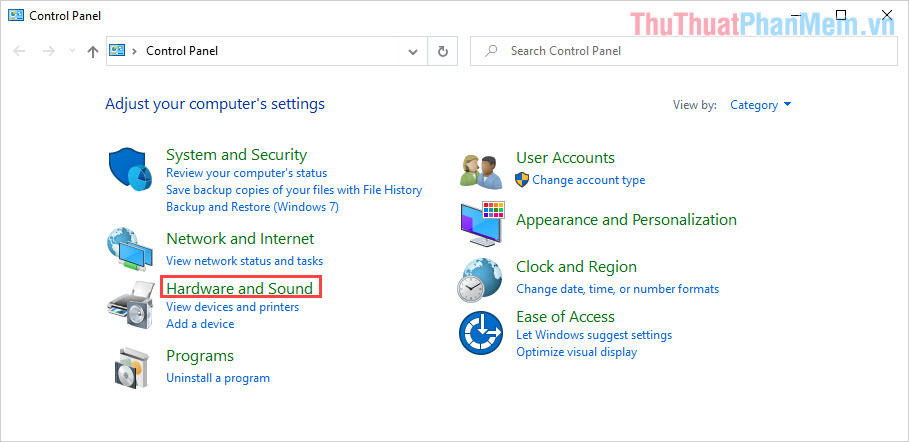
2. How to enable and disable the brightness adjustment feature in the Control Panel
Step 1: You proceed to open MenuStart and enter Control Panel to open.

Step 2: Then, you go to Hardware and Sound to set up hardware related items.
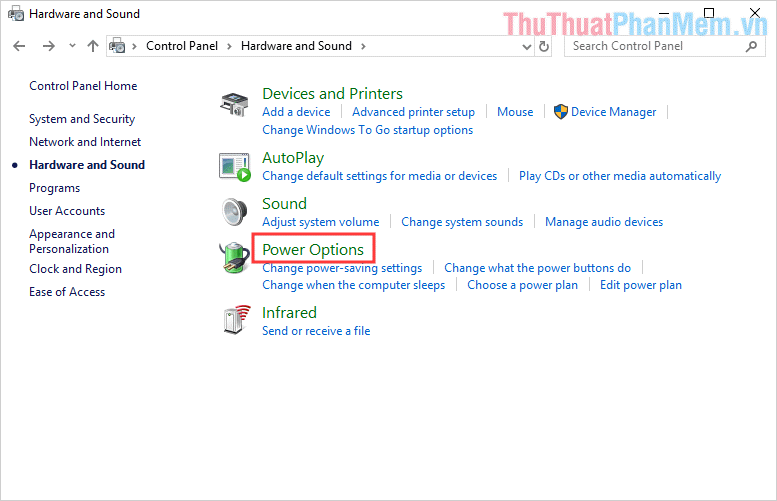
Step 3: Continue, select Power Options .
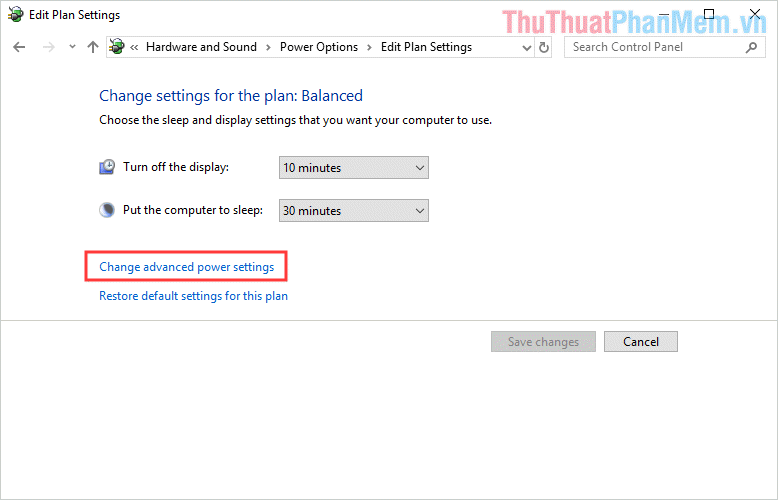
Step 4: Continue to select Change advanced power settings .
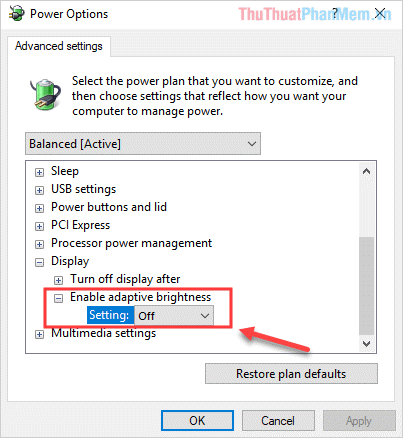
Step 5: Here, you scroll down and select Settings to see the expanded items. Then you can select the On / Off position Enable adaptive brightness to enable / disable automatic brightness adjustment on Windows 10.
3. How to enable and disable the automatic brightness adjustment in Sevices
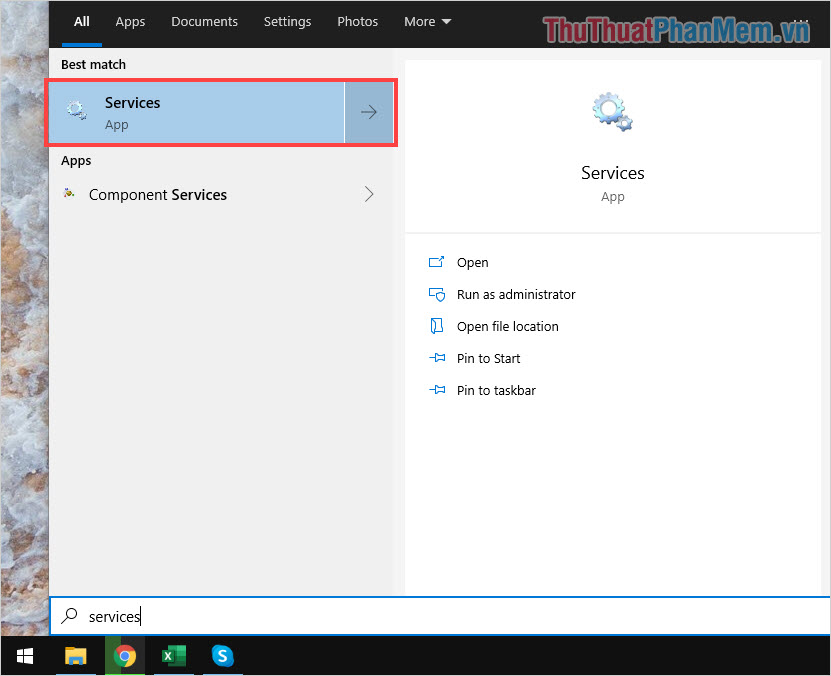
Step 1: You proceed to open the Start Menu and enter Services to open.
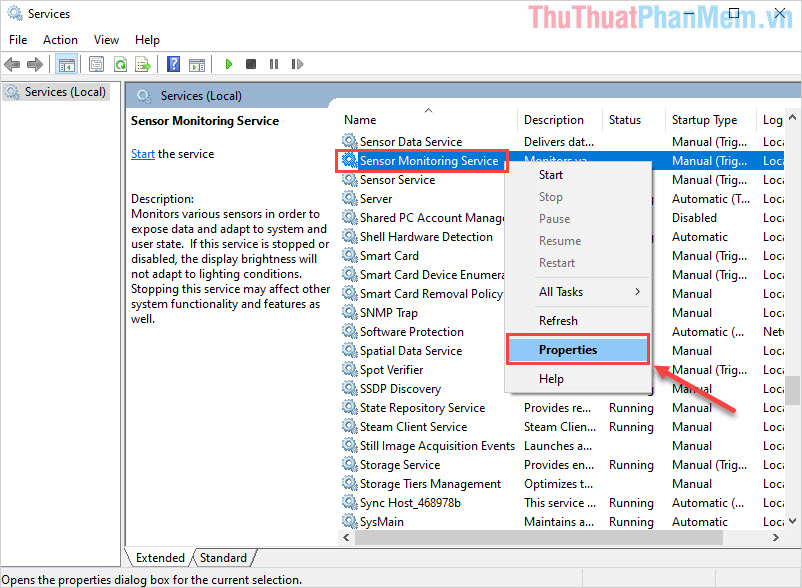
Step 2: Scroll down to find Sensor Monitoring Sevive and right-click and select Properties .
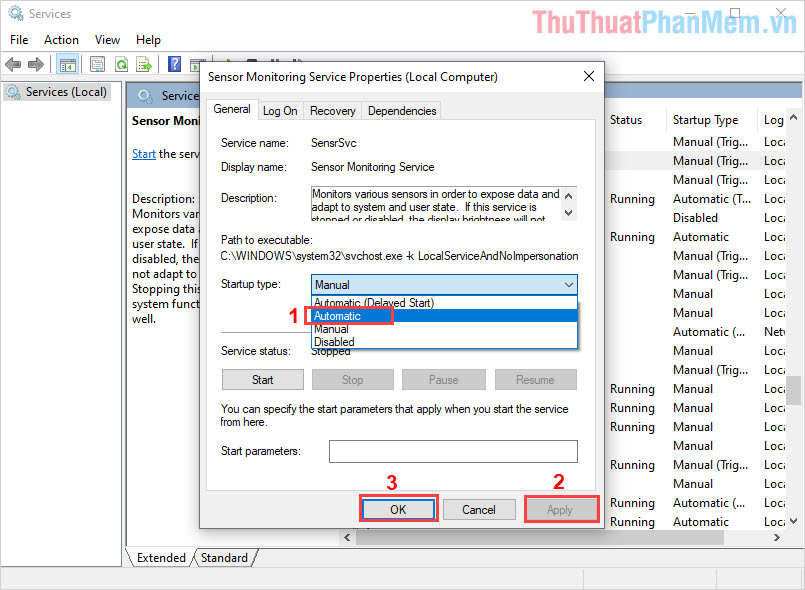
Step 3: Finally, you can choose one of the following 03 settings:
- Automatic: Automatic
- Manual: On
- Disable: Off
Once setup is complete, you select Apply -> OK to complete.
In this article, Software Tips have shown you how to turn on / off the automatic brightness adjustment feature on Windows 10. I wish you success!
Was this article helpful?
Your feedback helps us improve.
Related Articles
 How to change screen brightness on Windows 10 for laptops and PCs.5 minutes read
 Adjusting the screen brightness on an HP laptop.4 minutes read
 How to adjust screen brightness in Windows 112 minutes read
 Fix the error of not adjusting screen brightness on Windows 103 minutes read
 Turn off Windows 10 screen brightness auto-adjustment4 minutes read
 How to turn off the automatic screen brightness change feature (Auto Brightness) on Windows 113 minutes read
Reader Comments 0
Sign in with email or Google to join the discussion.