Table of Contents
This guide explains how to resolve Error 0x80070422 in Windows 10, starting with the most likely causes and moving through practical troubleshooting steps.
1. Restart network setup
One of the top solutions to dealing with 0x80070422 error is to reset the network connection because this is the component that easily generates the error.
Step 1: You proceed to open MenuStart and enter Network .

Step 2: Then, you select Reset Now to reset network settings on Windows 10.

2. Set up Windows Update Service
Windows services also use network connectivity and they are also a common component of the error 0x80070422.
Step 1: You proceed to open MenuStart and enter Run .

Step 2: Then, you enter services. msc and press Enter to open.

Step 3: Next, you scroll down and find Windows Update and Right-click and select Properties .

Step 4: Finally, turn the Startup type to Automatic and click Apply -> OK to finish.

3. Activate Network List Service again
Step 1: You proceed to open MenuStart and enter Run .

Step 2: Then, you enter services. msc and press Enter to open.

Step 3: Next, you scroll down to find Network List Service and Right-click to select Restart .

4. Turn off IPv6 of network settings
Step 1: You proceed to open MenuStart and enter Settings to open.

Step 2: Then, you select the Network & Internet section to set up the network.

Step 3: Next, select Change adapter options to change network options.
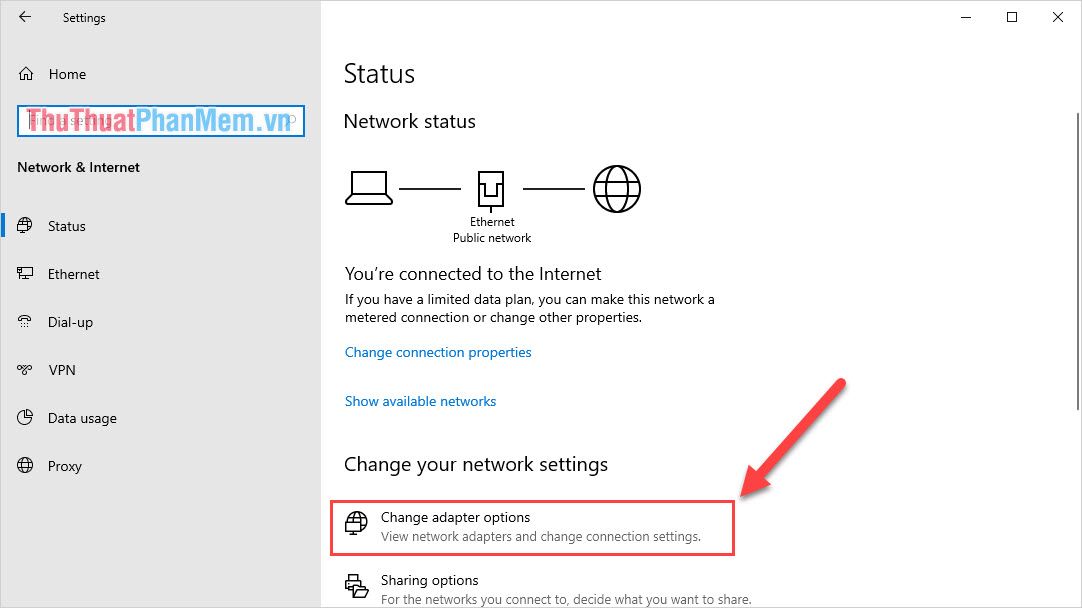
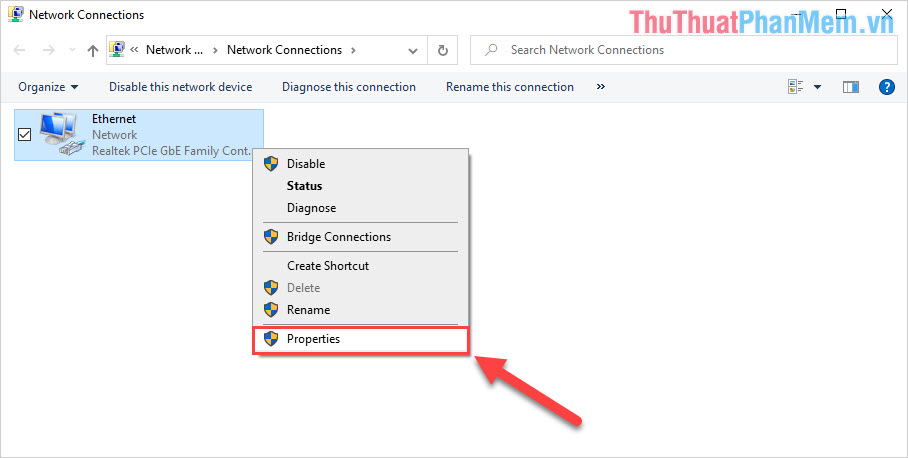
Step 4: At this time, the list of network connections on your computer will be displayed. You right-click on the network connection you are using to select Properties .
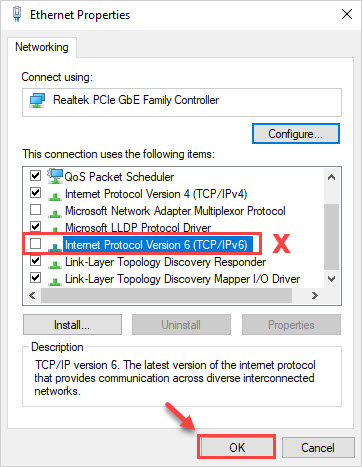
Step 5: Finally, you go to Internet Protocol Version 6 (TCP / IPv6) to turn them off.
5. Use the debugger on Windows 10
If the above methods do not help you overcome the error 0x80070422, then you must resort to the error repairer on Windows 10.
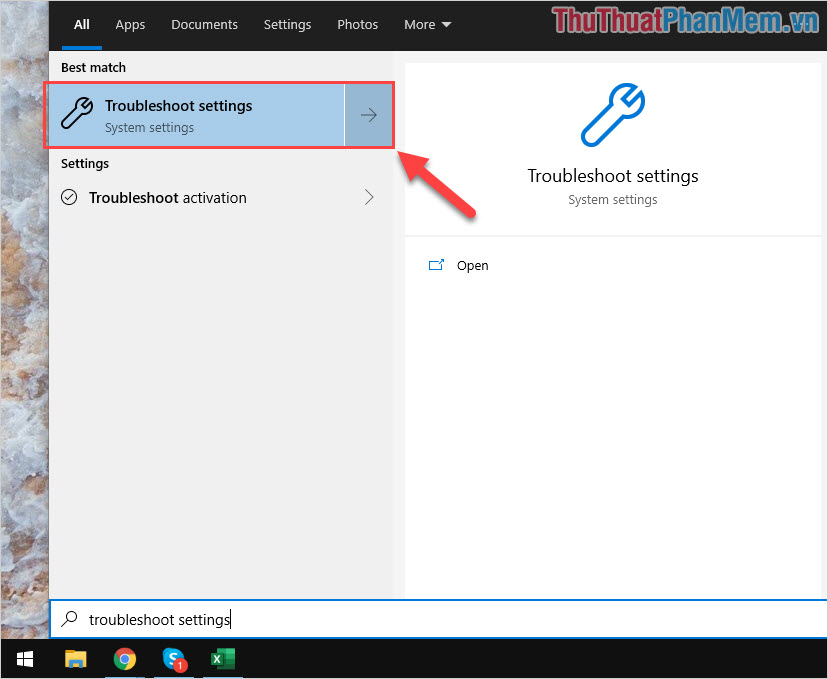
Step 1: You proceed to open MenuStart and enter Troubleshoot settings to open error correction settings.
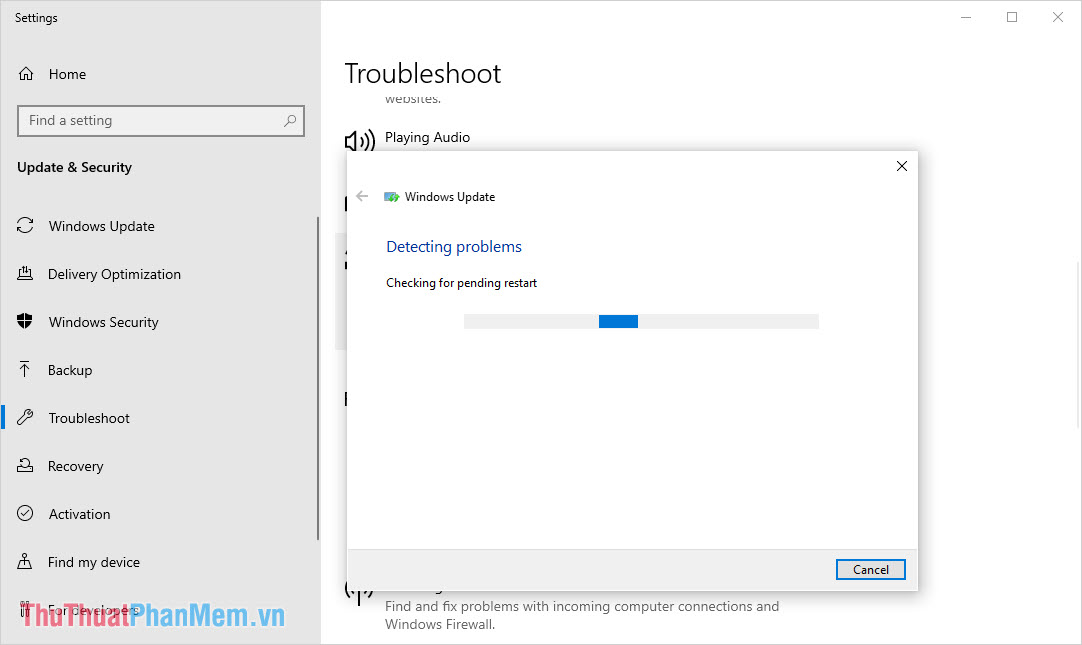
Step 2: Then, you go to Windows Update and select Run the troubleshooter .

Step 3: The system will run and automatically fix errors so please wait!
In this article, Software Tips showed you how to fix error 0x80070422 on Windows 10. I wish you success!
FAQ
What usually causes Error 0x80070422 in Windows 10?
The cause may involve incorrect settings, outdated software, damaged files, permission problems, device compatibility, or a temporary system issue.
What should I try first to resolve Error 0x80070422 in Windows 10?
Restart the affected app or device, install pending updates, verify settings and connections, and follow the troubleshooting steps in order.
How can I prevent the issue from returning?
Keep software updated, maintain backups, avoid interrupted installations, and review system or device settings after major changes.
Related Articles
 How to Fix Error 0x80070422 in Windows 10, Fix Error 0x8007042211 minutes read
 How to Fix 'This App Can't Run on Your PC' Error on Windows6 minutes read
 How to Fix 'an Operating System Not Found' Error on Windows 103 minutes read
 Steps to Fix Error 0x8004fc12 on Windows 115 minutes read
 How to Fix VPN Error 6195 minutes read
 Why Do Your Windows Updates Keep Failing (It's Not the Internet)6 minutes read
Reader Comments 0
Sign in with email or Google to join the discussion.