How to turn off Update Win 11 permanently, block the latest update 2024
Turning off Windows 11 updates not only helps you control your computer flexibly but also avoids unwanted annoyances. To do this, you can use Services, Group Policy Editor or perform fine-tuning steps through Registry Editor
Table of Contents:
1. Turn off Windows 11 update using Services.msc.
2. Turn off Windows 11 updates using Group Policy Editor.
3. Turn off Windows 11 update while updating via Settings.
4. Stop updating Windows 11 using Registry Editor.
5. Some questions when turning off Update Win 11.
1. How to turn off Windows 11 update via Services.msc
Discover how to use Services.msc to customize update services and prevent them from running automatically. Leverage the power of Services.msc to gain full control and maintain your Windows 11 PC the way you want it
Step 1: Press the Windows + R key combination to open the Run dialog box.
Step 2: Enter services.msc and press Enter to open the Services window .
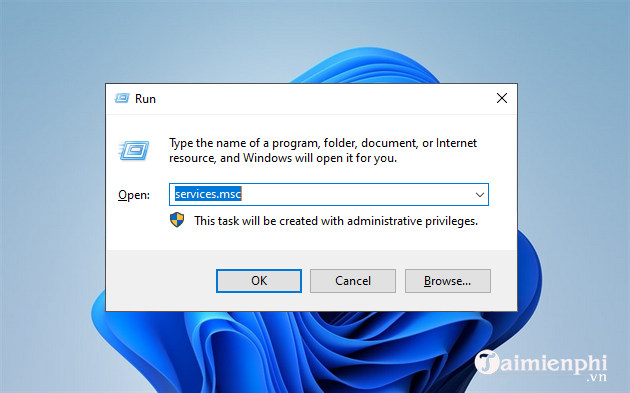
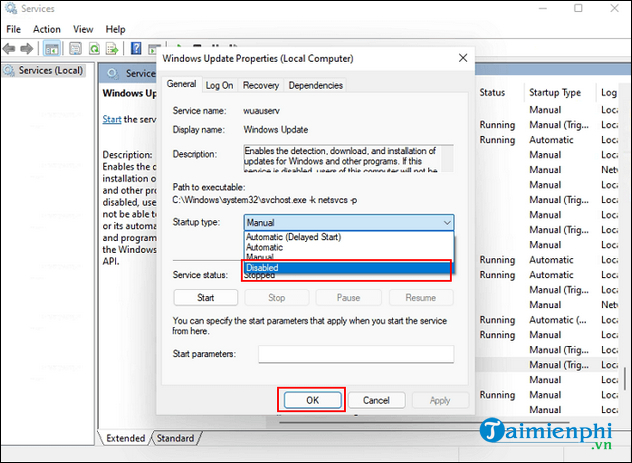
Step 3: Find Windows Update from the list of services and click the Stop button.
Step 4: In the Startup Type section , select Disabled from the drop-down menu. Then, click the OK button to save changes.
Besides, if you update Windows 11 to a new version and encounter errors, you can also uninstall the new update and return to the old version to wait for the errors to be fixed.
2. Turn off Windows 11 updates using Group Policy Editor
If you have ever turned off Windows 10 updates using Group Policy Editor, you probably know how to do it, but for newbies, this is not easy, specifically as follows:
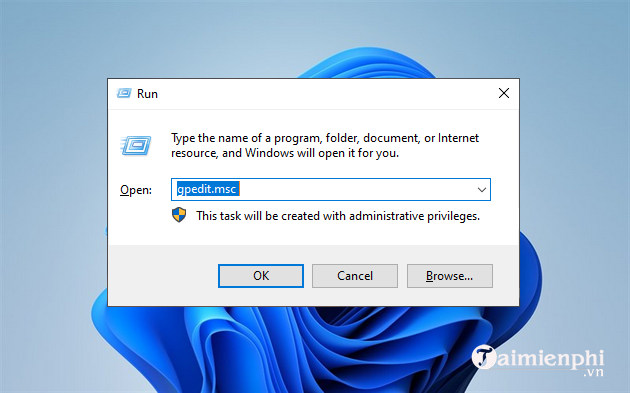
Step 1: Press the Windows + R key combination to open the Run dialog box.
Step 2: Enter gpedit.msc and press Enter to open the Group Policy Editor window .
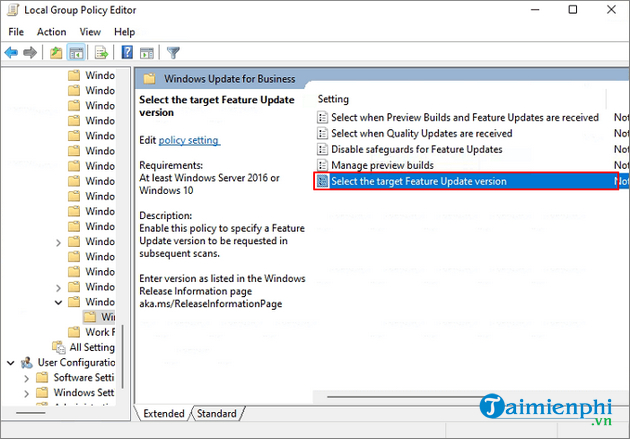
Step 3: In the Local Group Policy Editor window , go to Local Computer Policy > Computer Configuration > Administrative Templates > Windows Components > Windows Update > Windows Update for Business.
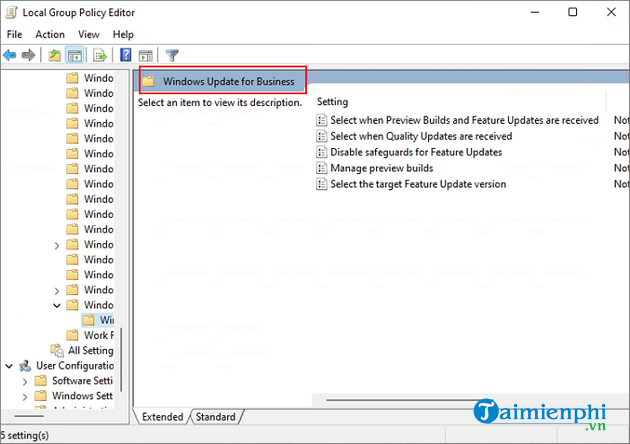
Step 4: Double click on the setting Select the target feature update version.
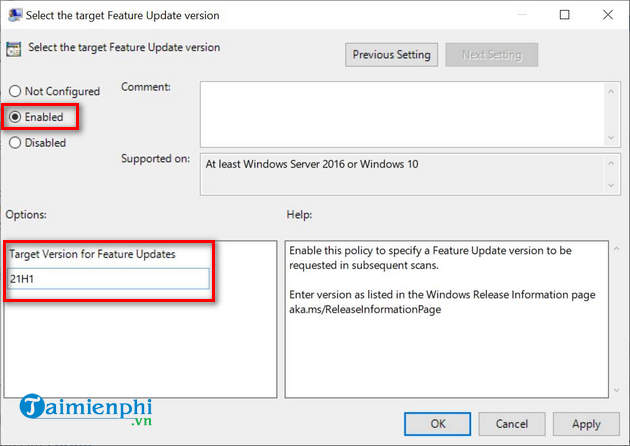
Step 5: Select Enabled and enter 21H1 in the Target Version for Future Updates field. Click OK to save changes.
3. How to turn off Windows 11 update while updating
Another way to turn off Windows 11 updates is to pause weekly updates. You do the following:
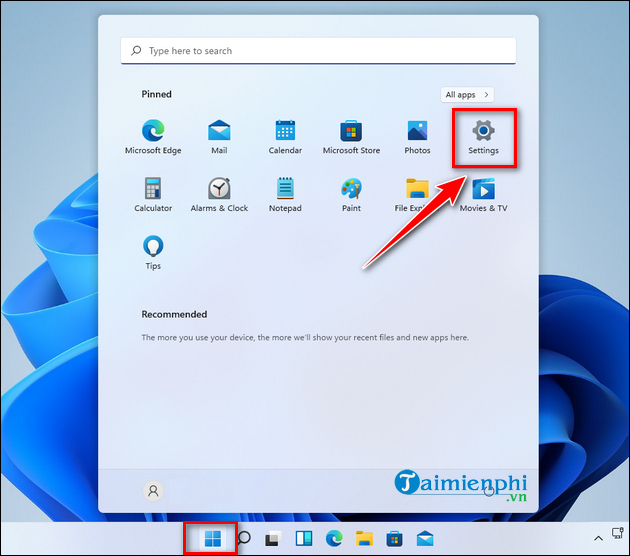
Step 1: Click on the Windows icon on the taskbar and select Settings or press the Windows + I key combination to open Settings.
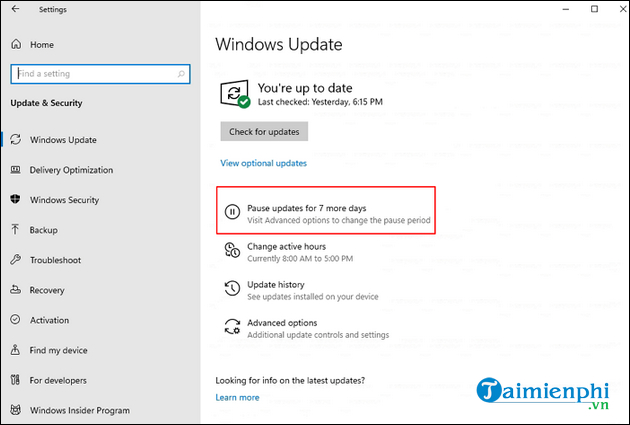
Step 2: Select Update & Security and click on the Pause updates for 7 days option .
4. How to turn off Windows 11 updates using Registry Editor
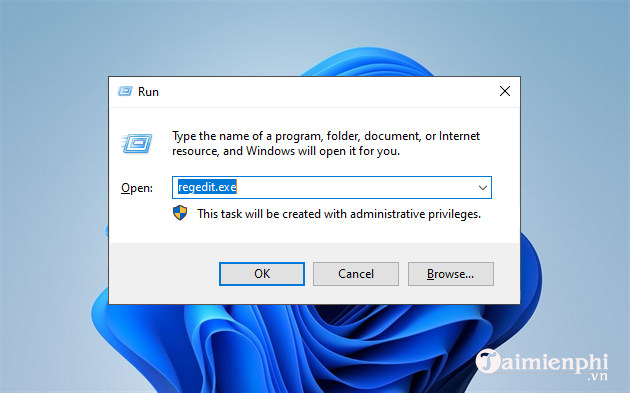
Step 1: Press Windows + R to open the Run dialog box .
Step 2: Enter regedit.exe and press Enter to open the Registry Editor window .
Step 3: Go to HKEY_LOCAL_MACHINESOFTWAREPoliciesMicrosoftWindowsWindowsUpdate.
Step 4: Set the DWORD (32-bit) value to 1.
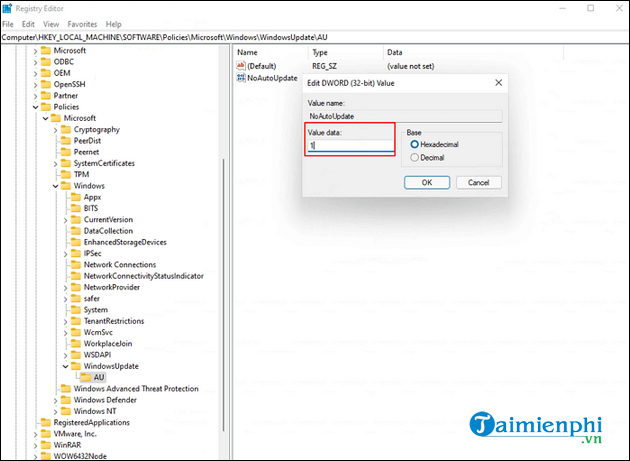
If this value does not exist, right-click Windows Update and select New > Dword (32-bit) Value . Then set the value of TargetReleaseVersionInfo to 21H1 .
- Note: You should backup your Registry settings before repairing to restore to the original state if you encounter an error.
5. Some questions when turning off Windows 11 Update
5.1. How to safely turn off Windows 11 updates?
To turn off automatic updates on Windows 11, you can go to "Settings," select "Windows Update," then adjust the options in the "Advanced options" section to schedule updates or turn them off.
5.2. What risks are there when turning off Windows 11 updates?
Turning off updates can put your computer at security risk, as you won't receive new security and bug fixes from Microsoft, increasing your risk of malware or virus attacks.
5.3. Is there any way to keep the system safe and secure while still turning off Windows 11 updates?
You can increase your security by using third-party security software, maintaining a strong firewall, and browsing the web safely. However, this is no substitute for updating the operating system.
5.4. How to control and schedule direct updates instead of auto update Windows 11?
In the "Windows Update" section of "Settings," you can select "Change active hours" to specify how long the system should not update automatically. You can also select "Advanced options" to control update options.
5.5. Is there any effect on the performance and stability of the system when turning off Windows 11 updates?
Turning off updates can reduce system performance and stability because you'll miss out on important improvements, patches, and security. Operating systems can become outdated and vulnerable to attacks.
So, TipsMake has shared with you some ways to turn off and pause Windows Update on Windows 11. If you have any contributions or questions, don't hesitate to leave your comments in the comments section below the article. .