How to install Windows 11 23H2 on an unsupported computer
With the trick of installing Windows 11 23H2 on a non-supported computer, every user has the opportunity to use modern features and advanced tools in Microsoft's latest update.
Microsoft's official Windows 11 23H2 download link
Using Windows 11 23H2, users will have an upgraded experience with many feature improvements such as improved window management, integrated Snap Layouts feature, taking screenshots with Sticky Notes, creating images with Copilot , etc. . Besides, version 23H2 also brings security breakthroughs such as integrating Windows Hello, improving digital layer security to help protect personal information and user data. Immediately access the Win 11 23H2 download link below and follow the instructions to experience the great upgrades of this OS on your device right away.
- Link to download Windows 11 23H2 here.
Instructions for installing Windows 11 23H2 on unsupported computers
* Note : Installing Win 11 23H2 on an unsupported computer may encounter problems such as hardware incompatibility, operating system instability and security risks. Therefore, make sure you have backed up important data before proceeding with the installation and only do it if you are really confident in your ability to handle problems that may arise.
1. Install Windows 11 23H2 without using 3rd party software
Step 1: Open Notepad, paste the code below into the file => Save file.
Windows Registry Editor Version 5.00
[HKEY_CURRENT_USERSOFTWAREMicrosoftPCHC]
"UpgradeEligibility"=dword:00000001
[HKEY_LOCAL_MACHINESYSTEMSetupLabConfig]
"BypassTPMCheck"=dword:00000001
"BypassSecureBootCheck"=dword:00000001
"BypassRAMCheck"=dword:00000001
"BypassStorageCheck"=dword:00000001
"BypassCPUCheck"=dword:00000001
"BypassDiskCheck"=dword:00000001
Step 2: Change the extension of the just saved Notepad file from .txt to .reg .
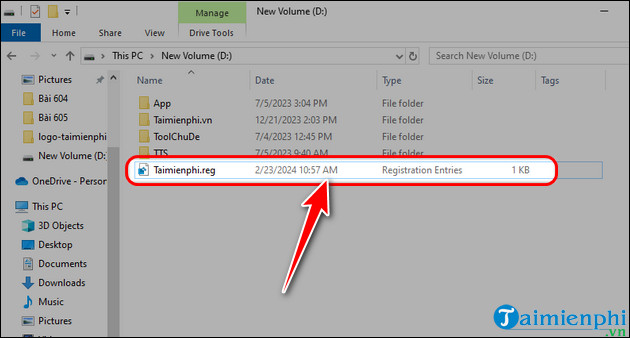
Step 3: Download the official Windows 11 23H2 IOS file from Microsoft's website.
-Access the Windows 11 23H2 download link above => Click [Link File 1].
- Launch the downloaded file to create the Windows 11 USB Boot installer.
Step 4: Copy the .reg file just created above to your bootable USB.
Step 5: Restart the computer, enter USB boot and follow the installation instructions on the screen.
Step 6: When you see the error message that your computer is not qualified, open Notepad .
- In Nodepad , click File => Select Open => Go to USB Boot drive.
- In the file type display options section, select All Files from the list.
- Find the .reg file you just created above => Right click on the file => Select Merge .
- Click to confirm changes => Close Notepad .
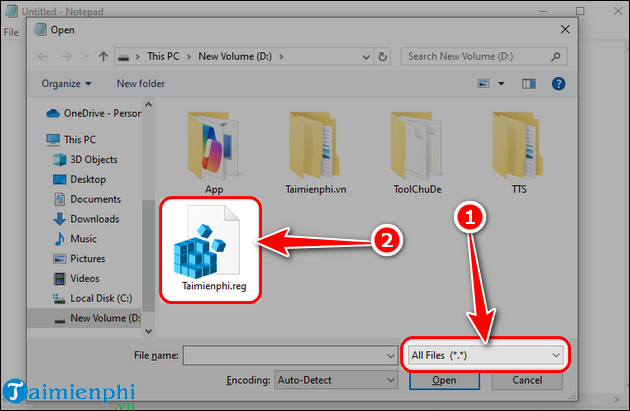
Step 7: Go back close the error message and try again.
Step 8: You will now be asked to accept the license terms.
Step 9: Continue installing Windows 11 23H2 like installing Windows normally.
2. Use third-party software to install Win 11 23H2 on a computer that does not support it
Step 1: Download Windows 11 23H2 from Microsoft's official website according to the link above => Click [Link File 1] .
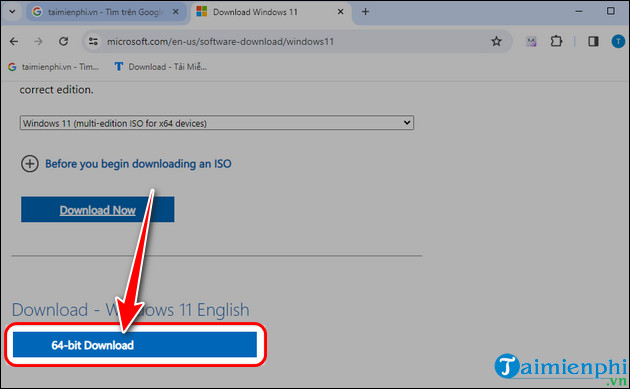
- In the Download Windows 11 Disk Image section , select the Windows 11 version => Click Download Now.
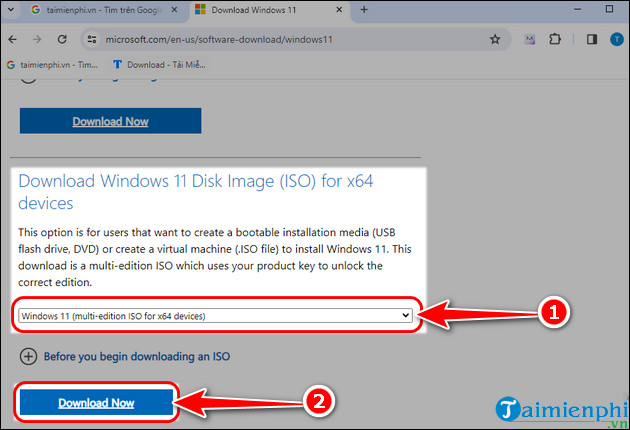
- Select display language English (US) => Press Confirm .
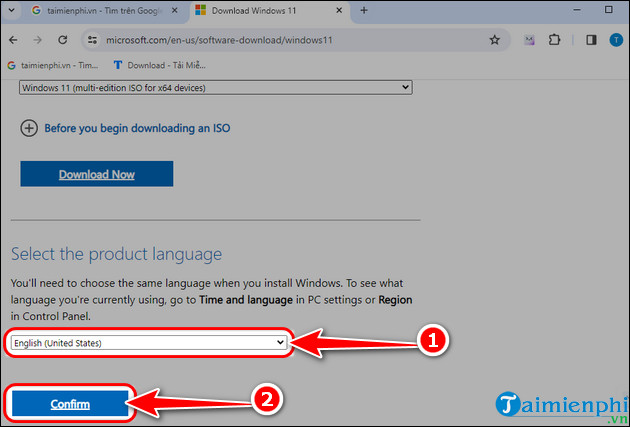
- Select 64-bit Download and wait a few minutes for the file download to complete.
Step 2: Use Rufus software to create a Windows 11 installer with the downloaded ISO file.
Step 3: Restart your computer.
Step 4: Go to USB boot, select Install Windows 11 in the Select setup option section .
Step 5: Click I don't have a product key => Select Windows 11 version .
Step 6: Accept the terms => Choose where to install Windows 23H2 preview.
Step 7: Click Install to start installing Windows 11 23H2 on unsupported computers.
Windows 11 24H2 version is now available, the latest update of Win 11 was just introduced by Microsoft a few days ago, bringing a series of new features including Sudo. The way to install on a computer that does not support is completely similar to the 23H2 version, just download the Windows 11 24H2 ISO and follow the instructions above to enjoy this new version of Microsoft on your PC.
Above are all instructions for downloading and installing Windows 11 23H2 on a non-supported computer to help you quickly experience new improvements in features, security and performance in the simplest and most economical way, instead of Have to spend a large amount of money to upgrade equipment. Wishing you success!
You should read it
- ★ Ghost Windows 11 23H2 NoSoft and Full Soft, Update November 2023
- ★ The first information about Windows 11 23H2 (Sun Valley 3) appeared
- ★ Download Ghost Windows 11 23H2 update 2024
- ★ File Explorer could be the reason you don't want to upgrade to Windows 11 23H2
- ★ Does iTunes not work on Windows 10? This is how to fix it