How to change, prolong the delay of updating on Windows 10?
On Windows 10 Profesional , Enterprise and Education versions, users are allowed to "postpone" updates (update), so users will not have to download the update for a while. You can use Local Group Policy to set a different " delay " than the default time.
Microsoft divides Windows updates into three broad categories:
- Update security to fix and fix major vulnerabilities. You cannot delay security updates.
- Update new features and significantly update existing features. When you delay the update using the regular Windows Update interface, the update features will not be downloaded within 60 days. Using Group Policy, you can specify an update delay of up to 180 days.
- Quality updates (quality update) are like traditional operating system updates, including minor, important security fixes, and driver updates (driver updates). When you delay the update using the Windows Update interface, the quality update process (quality update) is not downloaded within 35 days by default. Using Group Policy, you can set the delay time up to 30 days.
Note that if you are using Windows 10 Home version, you cannot delay the update.
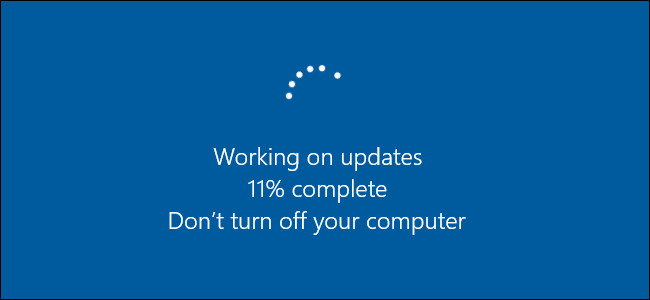
Change the time to update updates on Windows 10
Before you begin, keep in mind that the Local Group Policy Editor is quite a powerful tool, so if you have not used the tool ever, you should take the time to consult how to use the tool.
First open the Local Group Policy Editor by clicking Start , then entering gpedit.msc into the Search box and then press Enter .

On the Local Group Policy Editor window, in the left pane you navigate to the key:
Computer Configuration => Administrative Templates => Windows Components => Windows Update => Defer Upgrades and Updates .
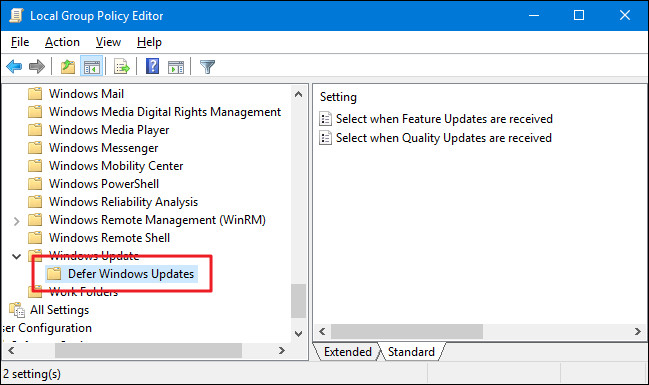
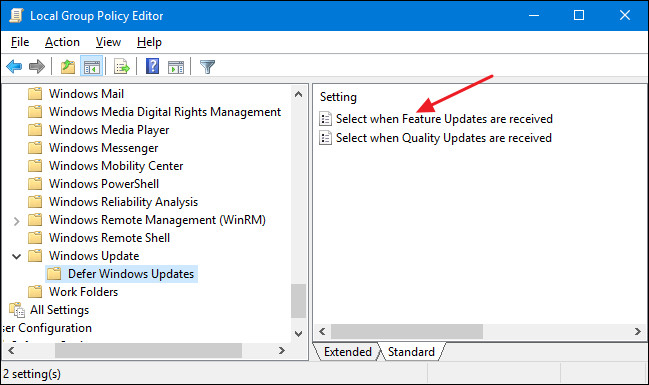
In the right pane, find and double-click the setting named ' Select when Feature Updates are received ' to open the Properties window.
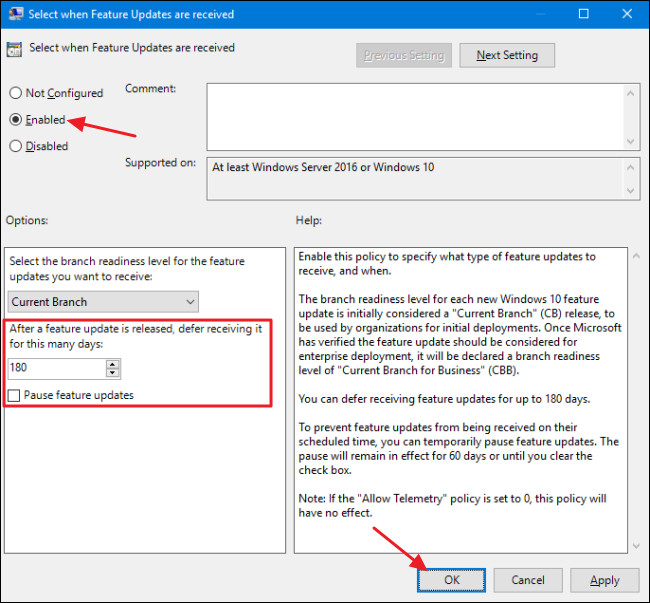
On the Select when Feature Updates window is received Properties, click Enabled. If you want to delay the update process (update), enter any number, maybe up to 180 days in the frame " After a feature update is released, defer receiving it for this many days ".
Alternatively, you can select the ' Pause feature updates ' option to delay the update (update) within 60 days or wait until you clear the check box. Using the pause feature is basically the same as using the regular update (update) feature on the Windows Update interface but the difference is that you can reopen the Local Group Policy Editor window and quit If you want to finish updating the update (update) and want to update the updates (update).
Also on the window there are other options that you can use to get feature updates. The ' Current Branch ' option is updated when Microsoft allows the use of available features.
The ' Current Branch for Business' option is updated when Microsoft feels they are ready for the business to deploy. If you want to update the features sooner, select 'Current Branch'. If you want to delay the new feature for as long as possible, select ' Current Branch for Business .'
After completing the setup process, click OK .
Back in the Local Group Policy Editor main window, double-click the setting named ' Select when Quality Updates is received ' to open the Properties window.
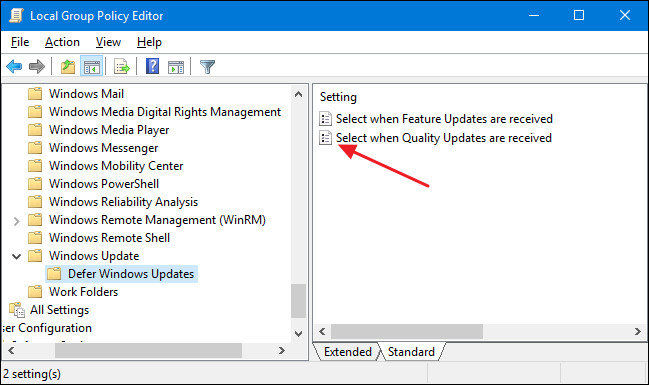
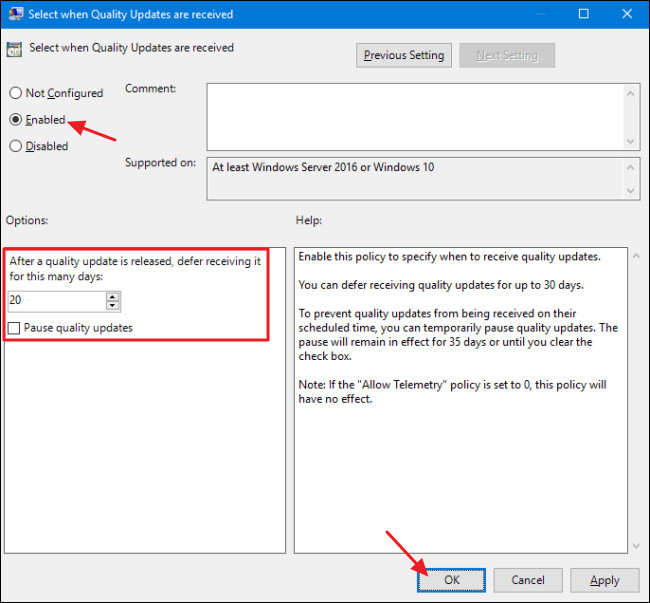
On the Properties window, click on the Enabled option. Note that there is no option for quality updates (quality update).
You can set the number of days to post a real update up to 30 days. Using the pause feature is like using the option to postpone updates on the Windows Update interface. It will pause the update within 35 days or until you come back and uncheck the option.
After setting the options, click "OK".
Finally close the Local Group Policy Editor window again. No need to restart your computer, the settings will be applied immediately.
Refer to some of the following articles:
- 2 ways to disable automatic Update (update) on Windows 10
- Windows Update crashes, this is what you need to do
- What to do when Windows Update crashes 0% on Windows 7/8/10?
Good luck!
You should read it
- ★ Turn off the Win 10 update, stop Windows 10 from updating automatically
- ★ How to update Win 7, update Windows 7 to the latest version
- ★ How to hide Windows Update on Windows 10
- ★ Windows Update crashes, this is what you need to do
- ★ Windows Update Blocker 1.6 - Download Windows Update Blocker here