Computer Tips : How to record Windows 11 screen video with Xbox Game Bar
Xbox Game Bar is an extremely useful solution for screen recording on Windows 11 built in. However, the Xbox Game Bar does not have a screen recording function for user actions when interacting with the File Explorer.
However, this software can still serve most tasks and user needs well, especially when you want to record a game or a bug appears on your computer.
How to record Windows 11 screen video
To record the Windows 11 screen, readers perform the following steps:
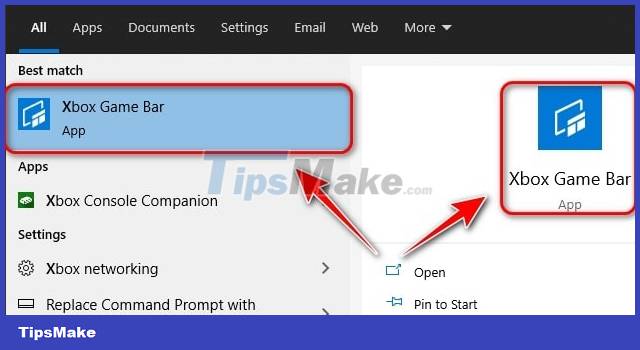
Step 1: Open the Xbox Game Bar app from the File Explorer file manager or from the Start menu.
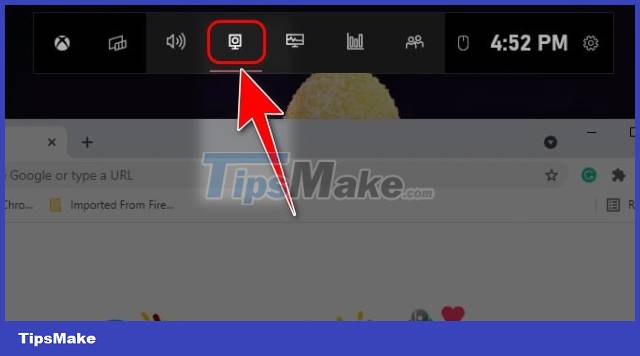
Step 2: Next, activate the Xbox Game Bar's toolbar with the Windows + G key combination and click the "Capture" button on the toolbar that opens.
Step 3: You can optionally use the recording feature during screen recording or not by clicking the "Mic" button in the Capture menu or using the Windows + Alt + M key combination.

Step 4: After setting up the mic, click the "Start Recording" button in the Capture menu or use the Windows + Alt + R key combination to start or stop the screen recording.

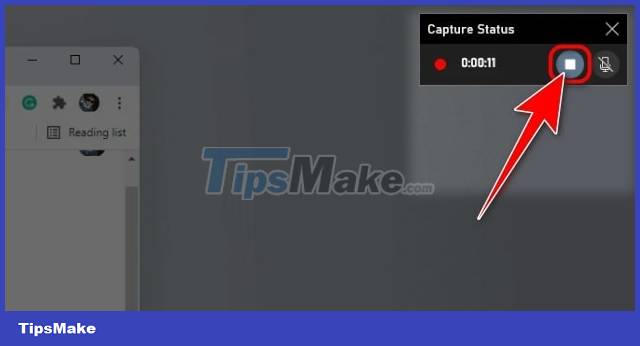
During Windows 11 screen recording, the Capture Status panel will be minimized and displayed in the right corner of the computer screen.
Step 5: When you want to end the screen recording process, click the "Recording button" button in the Capture Status toolbar or use the Windows + Alt + R key combination.
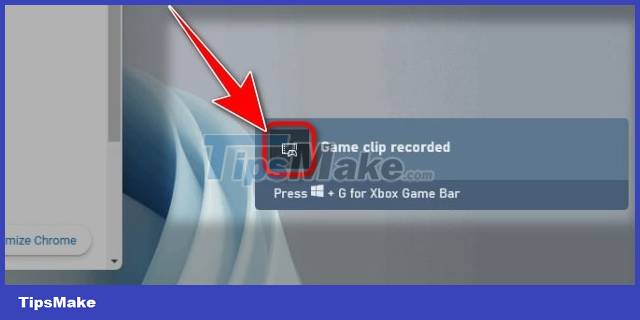
Step 6: After the screen video recording has stopped, a video notification window has been successfully saved on the computer. Click on the icon as shown in the image to see a list of screen recording videos made by Xbox Game Bar.
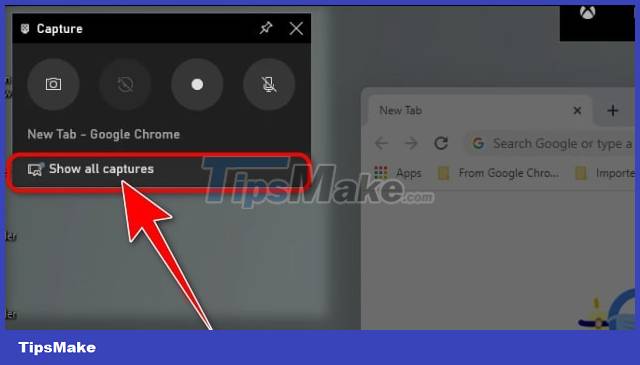
Or you can also click the Show all captures button in the Capture toolbar to open the Gallery view (collection) interface of the Xbox Game Bar.
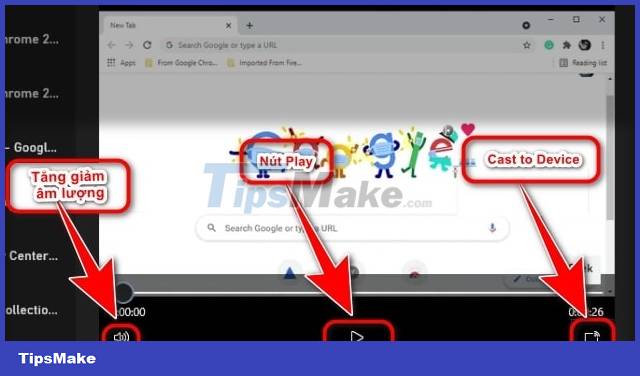
Step 7: In the Gallery view window, you can preview your screen recording video by clicking the Play button. You can also adjust the volume of the video through the volume icon, as well as play the video through another screen by clicking the Cast to Device button.
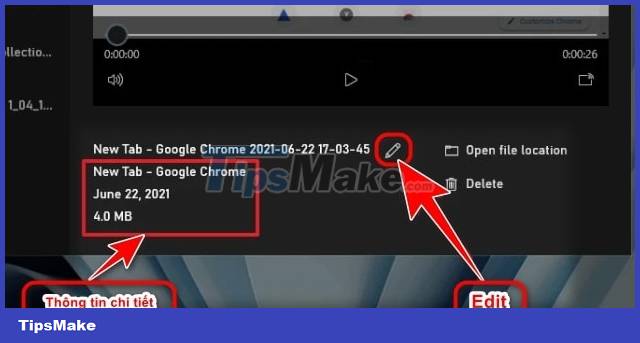
Step 8: To change the name of the screen recording video file, click the "Edit" button right below the video preview frame. Other information such as the date the video was recorded, the name of the application recorded, and the video file size are also displayed directly below.
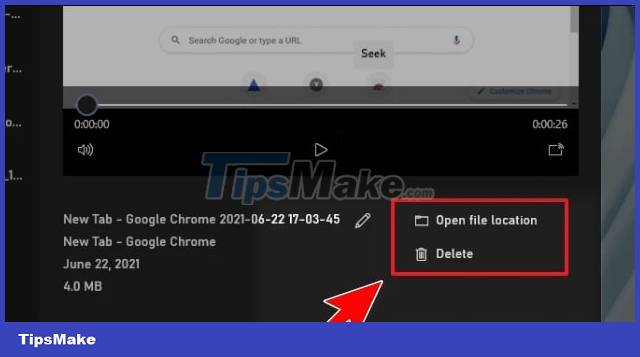
Step 9: To know where to save the video on the computer, click the Open file location option or delete the screen recording video by clicking the Delete option.
In addition, people can also use the Xbox Game Bar tool to take screenshots of Windows 11 computers:
Above are the steps to record Windows 11 computer screen videos with the Xbox Game Bar application. In addition, you can also use some 3rd party screen recording software if you find it easier and more convenient to use than Xbox Game Bar.