Table of Contents
This updated guide examines Click: How to Record Your Computer Screen and organizes the essential facts, background, and practical takeaways in clear American English.
Method 1of 3:
On Windows
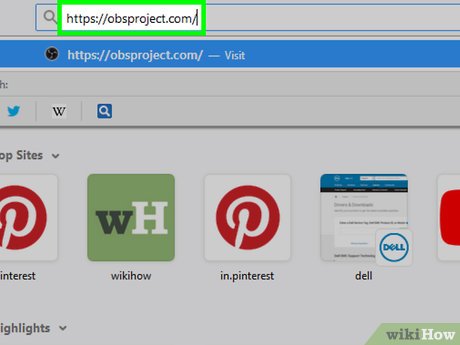 Download screen recording software. Open Broadcast Software (OBS) Studio and Bandicam are popular options. Since there isn't a built-in screen-recording utility in Windows, you'll need to install screen recording software if you want to record your desktop or multiple running programs at once.
- If you only want to record gameplay or a specific app, you can instead use the Game Bar app in Windows 10 Creator's Update.
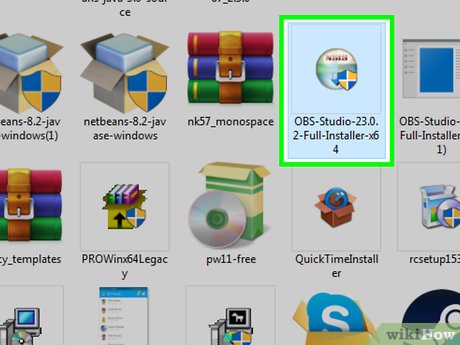 Install OBS Studio. Double-click the OBS Studio installer file (you'll find it in your browser's default downloads location), click Yes when prompted, click Next , click I Agree , click Next , uncheck the plugin box if you don't want OBS in your browser, and click Install .
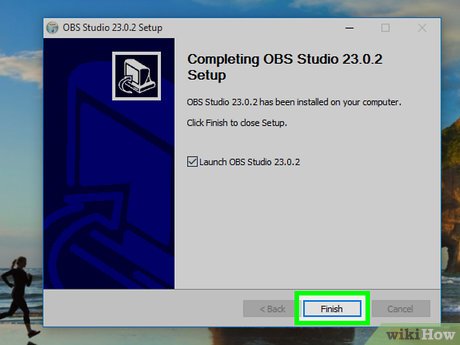 ClickFinishwhen prompted. It's in the bottom-right corner of the window. Doing so will complete the installation and open OBS Studio.
- You can also open OBS Studio by click Start
 , typing inobs studio, and clicking OBS Studio at the top of the Start window.
- You can also open OBS Studio by click Start
 ClickOKwhen prompted. This accepts the OBS Studio terms of use and opens the OBS Studio window.
 ClickYeson the "Auto-Configuration Wizard" window. This will bring up a window. To complete the setup wizard:
- Check the "Optimize just for recording" box.
- Click Next
- Click Next
- Click Apply Settings
- If you prefer to set your own settings, click No instead.
 Add your computer's desktop as a source. Click the + icon below the "Sources" heading, click Display Capture or Game Capture , click OK at the bottom of the "New Capture" window, and click OK at the bottom of the subsequent window.
 ClickStart Recording. It's in the bottom-right corner of the OBS Studio window. Doing so will prompt OBS Studio to begin recording your screen's contents.
- You can stop the recording by clicking Stop Recording in the bottom-right corner of OBS Studio.
 Fix the OBS Studio "Failed to start recording" error if needed. In some cases, you'll see an error that says "Starting the output failed. Please check the log for details" in a pop-up window. To fix this error:
- Click OK on the error message.
- Click Settings on the lower-right side of the OBS Studio window.
- Click Output in the upper-left side of the Settings window.
- Click the "Encoder" drop-down box.
- Click Software (x264) in the drop-down menu.
- Click Apply , then click OK
Method 2of 3:
On Mac
 Open Spotlight
 . Click the magnifying glass-shaped icon in the top-right corner of the screen.
 Typequicktimeinto Spotlight. This will search your Mac for the QuickTime app.
 ClickQuickTime. It should be the top search result in the Spotlight search. Doing so will open QuickTime.
 ClickFile. This menu item is in the top-left corner of your Mac's screen. A drop-down menu will appear.
 ClickNew Screen Recording. It's near the top of the File drop-down menu. Clicking this prompts a "Screen Recording" bar to open.
 Click the "Record" button. It's the red and silver circular button at the bottom of the Screen Recording bar. Doing so brings up a screen selection box.
- You can also click ∨ to the right of the recording button to prompt a drop-down menu with microphone options and the option to enable or disable alerts for mouse clicking in the recording.
 Click anywhere on the screen. This will prompt QuickTime to begin recording your entire screen's contents.
- Alternatively, you can click and drag the selection box to surround a section of your screen and then click the "Record" button again to record only the surrounded section.
- To stop recording, click File in your Mac's menu bar, then click Stop Recording in the drop-down menu.
Method 3of 3:
Using the Game Bar on Windows
 Open Start
 . Click the Windows logo in the bottom-left corner of the screen.
 Open Settings
 . Click the gear-shaped icon in the lower-left side of the Start window.
 ClickGaming. It's the Xbox logo on the Settings page.
- Not all Windows computers have this option. If you haven't updated to the Creator's Update and/or you don't have a supported video card, you won't be able to screen-record with the Game Bar.
 ClickGame bar. You'll find this tab in the upper-left side of the page.
 Enable game recording. Click the
 Off switch below the "Record game clips, screenshots, and broadcast using Game Bar" heading at the top of the page. It will switch to
 On . You should now be able to record the screen from within games.
- You can add your own keyboard shortcut for game recording in the text field below the "Stop/start recording" heading.
 Open a game that you want to record. You can also open an app or program that you want to record, though you cannot record the desktop with Game Bar and you can't switch apps whilst recording.
 Press⊞WinandGat the same time. This keyboard combination launches the Game Bar.
 Check the "Yes, this is a game" box. It's in the Game Bar notification at the bottom of the screen. Doing so will open the Game Bar itself at the bottom of the screen.
 Begin recording your gameplay. Click the red circle icon on the game bar, or press⊞Win+Alt+R. Windows will start recording your gameplay.
- You can click the square icon on the game bar to stop recording, or you can use the⊞Win+Alt+Rshortcut again.
FAQ
What is Click: How to Record Your Computer Screen about?
It provides a structured overview of click, explains the main context, and highlights practical takeaways for readers.
Why does this topic matter?
Understanding the main concepts helps readers evaluate the issue, avoid common mistakes, and make better-informed decisions.
How should readers use this information?
Use the guidance as a practical starting point, confirm details that may have changed, and follow current product, safety, or security recommendations.
Related Articles
 How to Record Windows 10 Computer Screen Videos Quickly5 minutes read
 How to Record Computer Screen and in Detail8 minutes read
 How to Rotate Computer Screen13 minutes read
 Recording the Computer Screen with Sound Is Simple3 minutes read
 20+ Ways to Record Computer Screen, Record Laptop Screen25 minutes read
 How to Record Your iPhone Screen and Audio Is Super Easy6 minutes read
Reader Comments 0
Sign in with email or Google to join the discussion.