Excel 2016 - Lesson 3: How to create new and open existing spreadsheets
How to create Excel files on a computer is not difficult. Below are detailed instructions on how to create Excel files and open spreadsheets for beginners..
Microsoft Excel is a long-known spreadsheet software and is still very popular today thanks to its great and useful features.
In the previous part in the Excel 2016 section, TipsMake.com helped you get acquainted with Microsoft Excel and learn about OneDrive. Today, we continue to share with you how to create new and open existing spreadsheets in Excel 2016 . We invite you to consult!
Introducing Excel 2016 spreadsheets
Excel files are called Workbook files in Excel. Whenever you need to start a new project in Excel, you will need to create a new workbook file. There are several ways to start working with a workbook spreadsheet in Excel. You can choose to create a new spreadsheet - either a blank spreadsheet or a pre-designed template - or open an existing spreadsheet .
Watch the video below to learn more about how to create new and open existing spreadsheets in Excel 2016 :
About OneDrive
Whenever you open or save a spreadsheet, you'll have the option to use OneDrive , which is an online file storage service included in your Microsoft account. To enable this option, you will have to sign in to Office . To learn more, visit our Excel 2016 Complete Guide (Part 2): Learn about OneDrive.

Create a new blank Excel 2016 spreadsheet
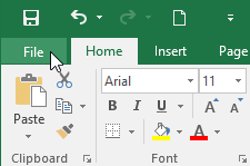
1. Select the File tab . Backstage view will appear.

2. Select New , then click Blank workbook .

3. A new blank spreadsheet will appear.
Open an existing Excel spreadsheet
In addition to creating new spreadsheets, you also need to open a previously saved spreadsheet. To learn more about saving spreadsheets, please refer to our article Complete Excel 2016 Guide (Part 4): How to store and share spreadsheets.
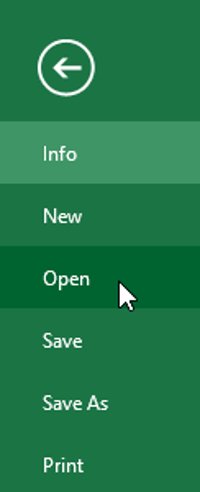
1. Navigate to Backstage view , then click Open .
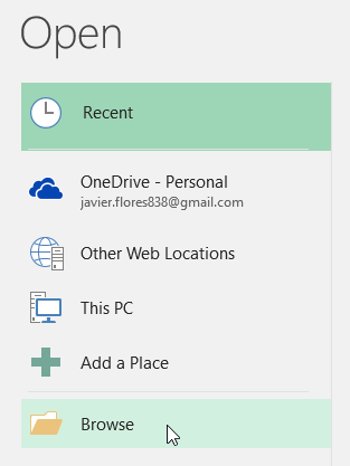
2. Select Computer , then click Browse . Additionally, you can select OneDrive to open files stored on your OneDrive.
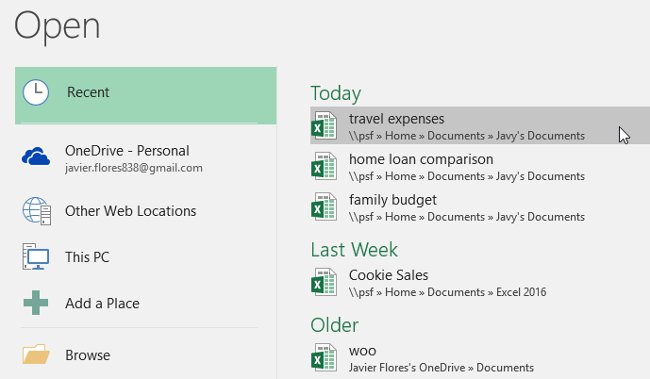
3. The Open dialog box will appear. Locate the folder and select the spreadsheet, then click Open .

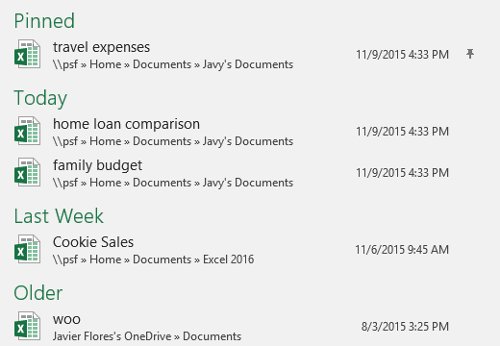
- If you recently opened the desired spreadsheet, you can browse recent spreadsheets instead of searching for the file.
Pin an Excel spreadsheet
If you often work with the same spreadsheet, you can pin it to Backstage view for faster access.
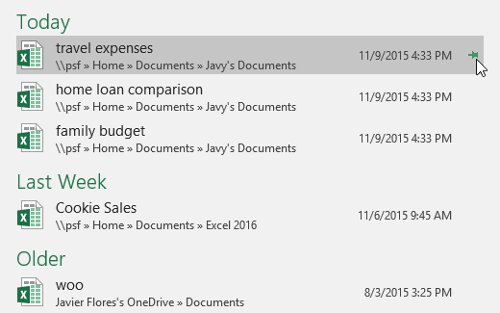
1. Navigate to Backstage view , then click Open . Your recently edited spreadsheets appear.

2. Hover over the spreadsheet you want to pin. A pin icon will appear next to the spreadsheet. Click on the pin icon ( as shown ).
3. The spreadsheet will be in Recent Workbooks . To unpin the spreadsheet, simply click the pin icon again.
Using existing Templates (Template)
Templates are pre-designed spreadsheets that you can use to quickly create a new spreadsheet. Templates often include custom formatting and predefined formulas, so they can save you a lot of time and effort when starting a new project.
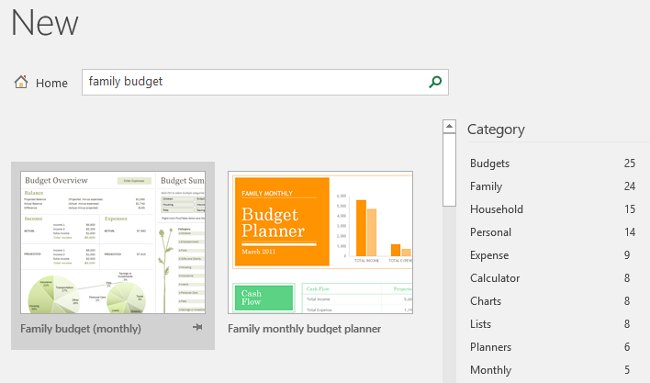
Create a new spreadsheet from the template
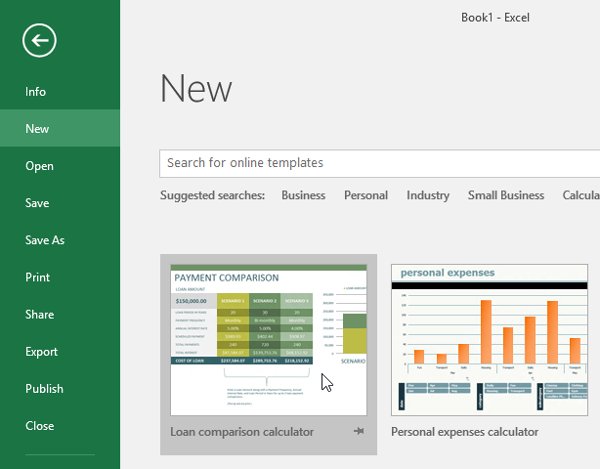
1. Click the File tab to access the Backstage view .
2. Select New . Several templates will appear under the Blank workbook option .
3. Select a sample to review.
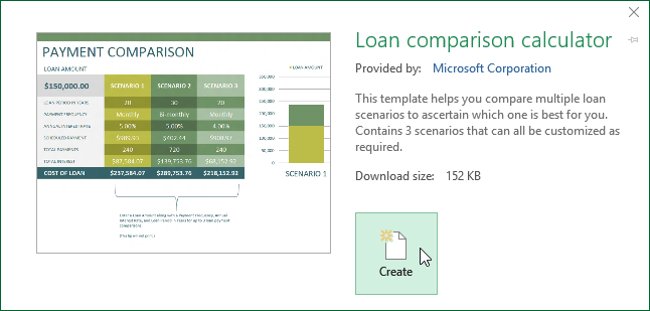
4. A preview of the template appears with additional information about how to use the template.
5. Click Create to use the selected template .
6. A new spreadsheet will appear with the selected template.
- You can also browse templates by category or use the search bar to find a specific template board.
- It's important to note that not all templates are created by Microsoft. Many templates are created by third-party vendors and even individual users, so some templates may work better than others.
Compatibility Mode
Sometimes you need to work with spreadsheets that were created in previous versions of Microsoft Excel, such as Excel 2003 or Excel 2000 . When you open these types of spreadsheets, they will appear in Compatibility Mode .
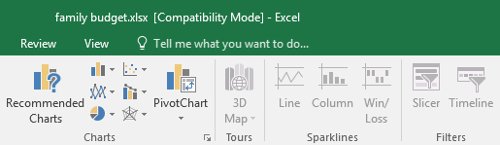
Compatibility mode disables certain features, so you can only access commands found in the program that was used to create the spreadsheet. For example, if you open a workbook created in Excel 2003, you can only use tabs and commands found in Excel 2003.
In the image below, you can see that the spreadsheet is in Compatibility Mode , indicated at the top of the window to the right of the file name. This will disable some Excel 2016 features and they will be grayed out on the Ribbon toolbar.
To exit Compatibility Mode , you need to convert the spreadsheet to the current version type. However, if you collaborate with others who only have access to a previous version of Excel, it's best to leave the spreadsheet in Compatibility Mode so that the formatting remains unchanged.
To convert a spreadsheet
If you want access to all Excel 2016 features, you can convert your spreadsheet to the 2016 file format .
Note that converting a file may change the original layout of the spreadsheet.
1. Click the File tab to access Backstage view.

2. Locate and select the Convert command .
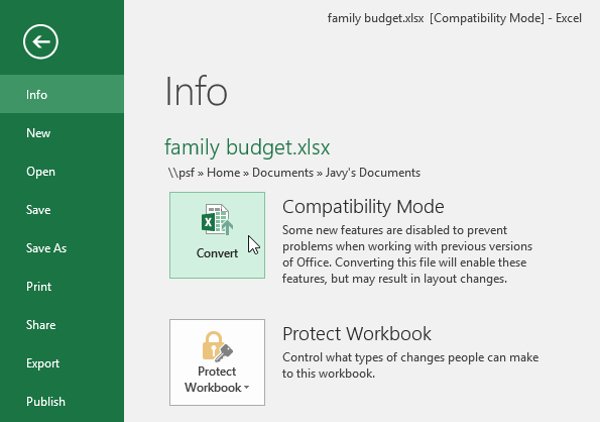
3. The Save As dialog box will appear. Select where you want to save the spreadsheet, enter a file name for the spreadsheet, and click Save .
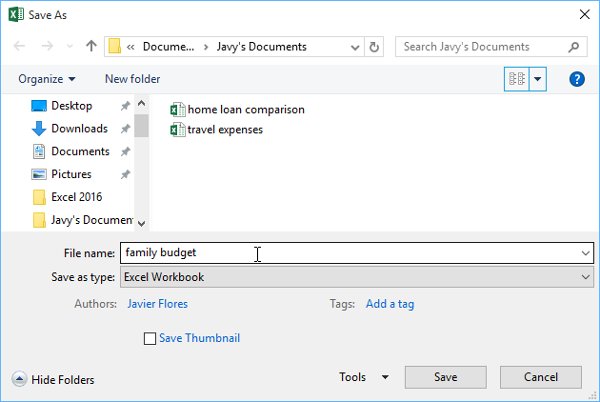
4. The spreadsheet will be converted to the latest file type.
AutoRecover
Excel automatically saves workbooks to a temporary folder while you're working on them. If you forget to save changes, or if Excel crashes, you can restore the file using the Excel AutoRecover feature.
To use AutoRecover:
- Open Excel 2016. If autosaved versions of files are found, the Document Recovery panel will merge.
- Click to open an existing data. This workbook will be restored.
Note: By default, Excel AutoSaves will automatically save every 10 minutes. If editing a workbook takes less than 10 minutes, Excel may not support AutoSaved.
If you don't see the file you need, view all AutoSaved files from the Backstage viewer. Just go to File > Info > Manage Workbooks > Recover Unsaved Workbooks . Here, you can set up the necessary auto-recovery options.
Have fun!