How to install OpenSSH on Windows 10
Now you can use OpenSSH on Windows 10 to connect to remote servers using SSH without installing third-party tools. This article will show you how to install the OpenSSH client on Windows 10..
Now you can use OpenSSH on Windows 10 to connect to remote servers using SSH without installing third-party tools. This article will show you how to install the OpenSSH client on Windows 10.
If you are a network administrator, developer or web host in the cloud, you may have used tools like Putty on Windows 10 to connect to the server using Secure Shell (SSH). This tool works well but now you no longer need to rely on third-party tools because the Fall Creators Update update now has an OpenSSH version.
What is Secure Shell? SSH is a network protocol similar to Telnet and FTP that allows users to transfer data from one computer to another, but unlike other protocols, it transmits information securely using encryption. . OpenSSH is a popular application in the Linux community because it allows connecting and managing a remote server using the SSH protocol as if you were sitting in front of it.
In this tutorial, we will look at the steps to install OpenSSH on a computer running Windows 10 Fall Creators Update update using the Settings "Optional features" application and installing the Ubuntu distribution.
How to install OpenSSH using Settings
Installing the OpenSSH package directly into Windows 10 allows you to use the Command Prompt to connect a remote server using SSH as if this is an original component of Windows.
Step 1: Open Settings.
Step 2: Click Apps.
Step 3: Click Apps & features .
Step 4 : In " Apps & features ", click on the Manage optional features link .

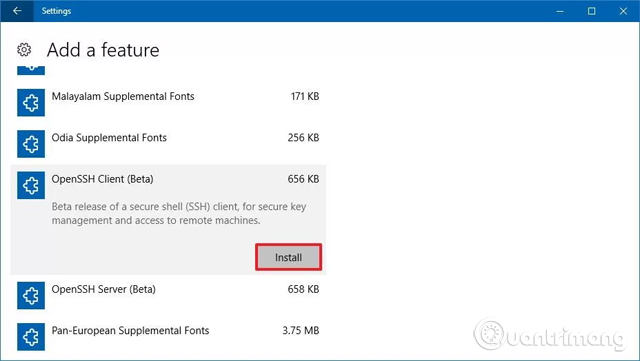
Step 5: Click the Add a feature button .

Step 6: Select the OpenSSH Client option.
Step 7: Click the Install button.
After completing the above steps, the Linux-based OpenSSH application will be installed on Windows 10. You can boot the client by launching a Command Prompt session and running the ssh command to use OpenSSH.
How to install OpenSSH using Ubuntu
Alternatively, you can install the Ubuntu distribution for Windows 10 that has OpenSSH. (Users will use the same command using Command Prompt on Windows 10 or using Ubuntu console)
Install Windows Subsystem for Linux
Step 1: Open Start.
Step 2: Search for Windows Features in the results and click Turn Windows features on or off .
Step 3: Select the Windows System for Linux option .
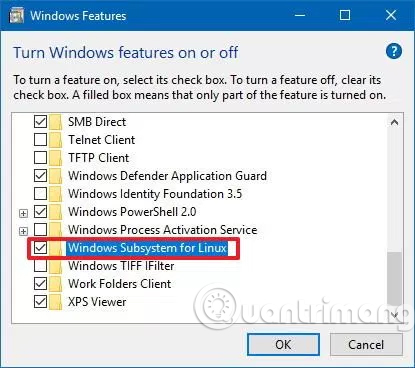
Step 4: Click OK .
Step 5: Click Restart now .
After restarting the computer, you can proceed to install Ubuntu on Windows 10.
Install Ubuntu on Windows 10
Step 1: Open Microsoft Store .
Step 2: Search for Ubuntu .

Step 3: Click the Install button.
After completing the above steps, users do not need to take any further steps because OpenSSH is already installed on Ubuntu. You can start the tool by starting Ubuntu from the Start menu, and then simply run the ssh command to use OpenSSH.
I wish you all success!
See more:
- How to activate and use SSH commands on Windows 10
- 5 features in SSH server you may not know
- VPN and SSH: Which method is more secure?