How to install Ubuntu in parallel with Windows using USB
Installing Ubuntu in parallel with Windows 7 and 8 with USB will help users not to waste time writing files to disk, running on many different computers.
Table of Contents
Windows users can still run the operating system versions of the computer at the same time or run two different operating systems, such as running Ubuntu in parallel on Windows. There are many ways we can install Ubuntu on a Windows computer, such as installing with USB.
Paralleling Ubuntu on Windows 7 or Win 8 using USB will be more compatible, because USB can be run on many other computers with a CD, depending on the computer. These two operating systems will run completely independently and do not affect each other. If Windows fails, you can still use Ubuntu and vice versa. The following article will guide you how to install Ubuntu on Windows using USB.
- Instructions to install Ubuntu directly from the hard drive
- Instructions for installing Ubuntu on VMware Workstation - Part 1
- How to install Ubuntu and still keep Windows
1. Instructions to install Ubuntu in parallel with Windows
Before installing Ubuntu, you need to prepare a 2GB USB or higher and plug it into your computer. Then download fie.ISO to install Ubuntu under the link below.
- https://www.ubuntu.com/download/desktop
Download the Universal USB Installer software according to the link below.
- Download the Universal USB Installer software
During installation, turn off all antivirus programs on your computer.
Step 1:
First, start the USB Installer software on your computer, click the I Agree button to agree to the installation terms.

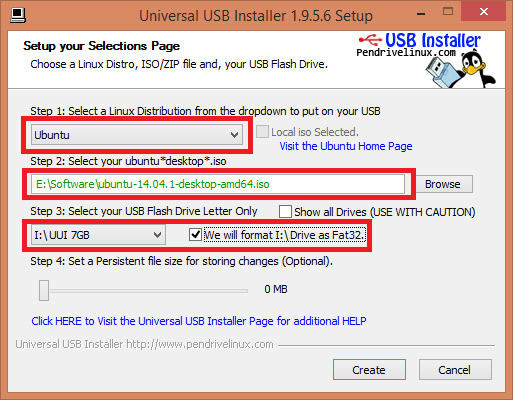
Step 2:
In the new interface that appears, Step 1 select Ubuntu, Step 2 click Browse to find the folder where the .iso file is installed and Ubuntu has been downloaded previously. Step 3 select the USB name you are using, tick on We will format .
Click on the Create button to get the software to boot USB.
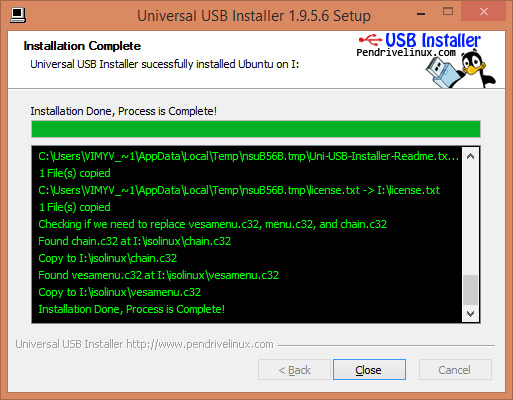
Step 3:
When the Boot USB process is complete, click Close to close the USB Installer software interface.
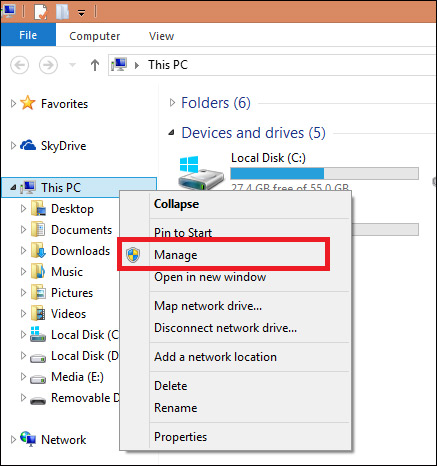
Step 4:
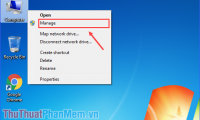
Next we proceed to the Ubuntu partition on the computer. Right-click My Computer or This PC and select Manage .
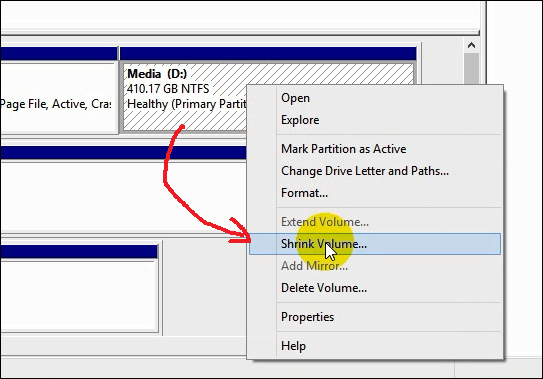
Switch to the new interface and click on Disk Management to display the list of drives as well as the drive information. Here, find an empty drive to install Ubuntu about 15GB.
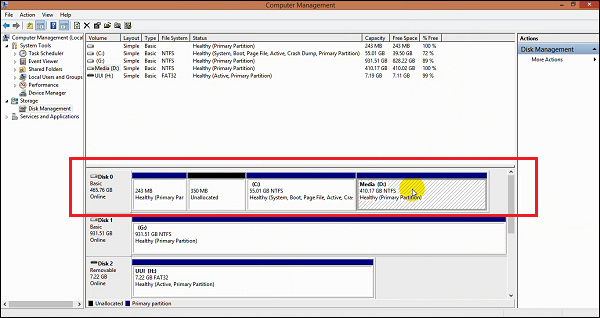
Right-click on the selected drive and press Shrink Volume . to create an empty partition used to install Ubuntu.
Step 5:
New interface appears. At the Enter the amount of space to Shrink in MB section , enter the volume of the Ubuntu partition. The capacity of about 20GB is fine. If the drive still has a lot of capacity, you can pick up as much as possible. Click Shrink .
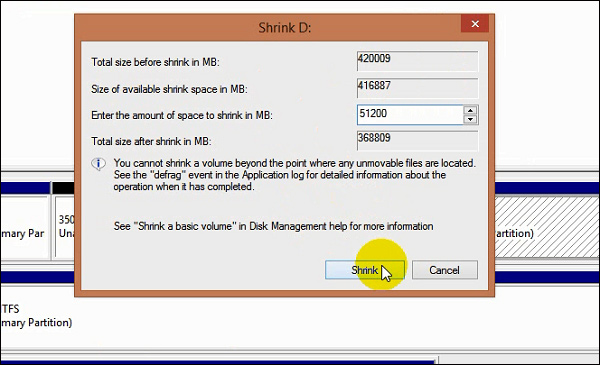
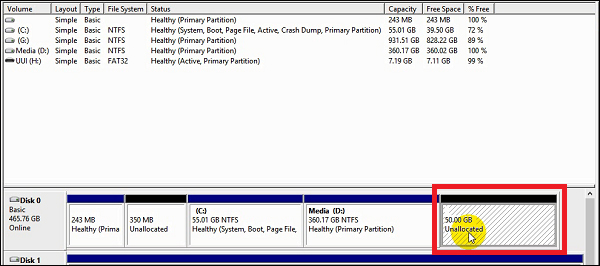
The drive partition will be partitioned empty with the entered capacity.
Step 6:
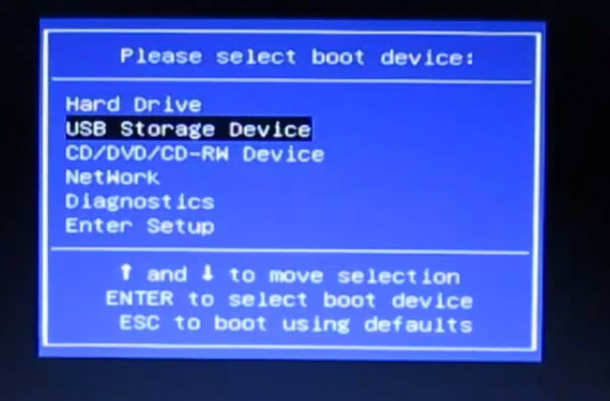
Plug the booted USB into the computer and then press the Boot Options access shortcut. Shortcuts will depend on different brands. Read the reference to access the BIOS interface below.
Instructions for entering BIOS on different computers
In the interface select the boot device, press USB Storage Device to select the USB device.
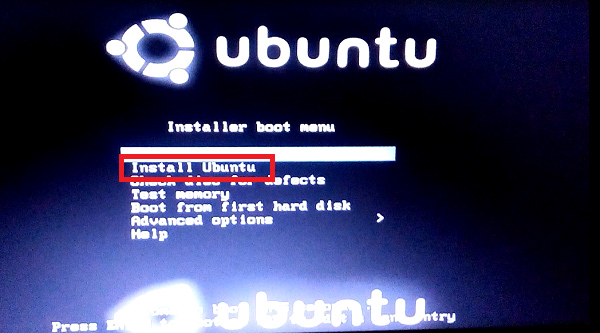
New interface appears and select Install Ubuntu to install Ubuntu on Windows.
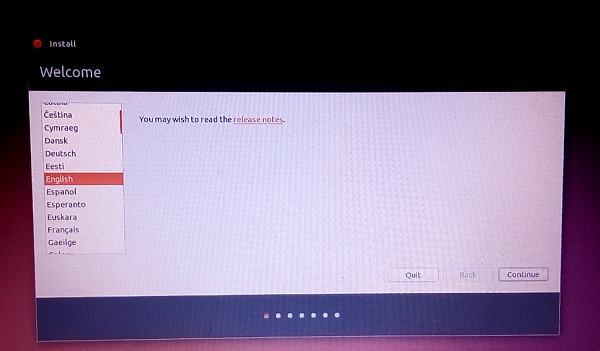
Step 7:
Silk selects the language then press Contiune.
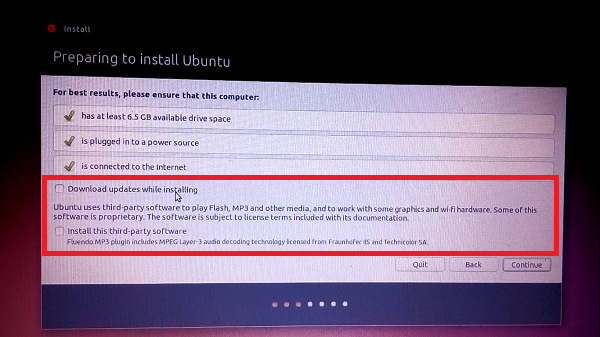
In this new interface, users will have the Download updates while installing option to update Ubuntu during this installation process and Install this third-party software to install additional 3rd party software. Click on option 2 and click Continue to continue.
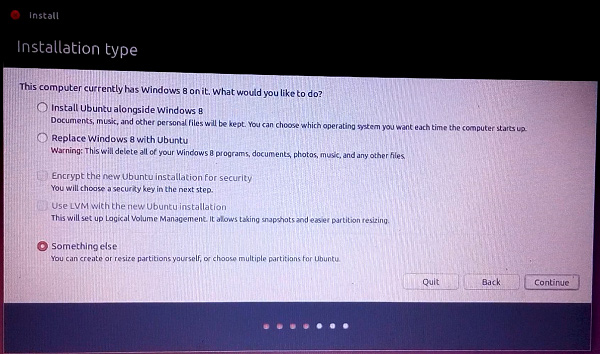
Step 8:
In the Installation type interface, users will have the Install Ubuntu option with Windows 8 to install Windows but not separate, or Replace Windows 8 with Ubuntu to completely replace Windows 8, delete all data on Windows.
To install in parallel and completely separate from Windows, click on Something else and click Continue.
Step 9:
In the next interface, you will see the empty disk partition that the user created earlier, click on the partition and then click the plus sign .
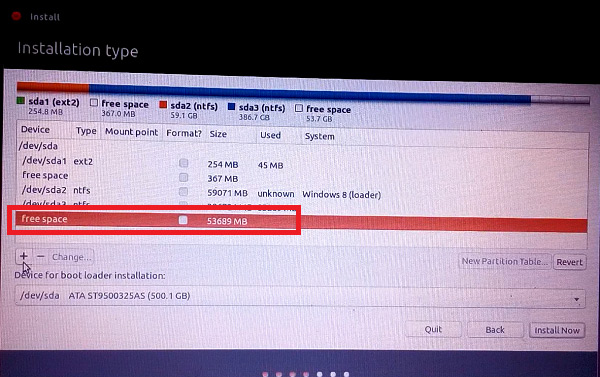
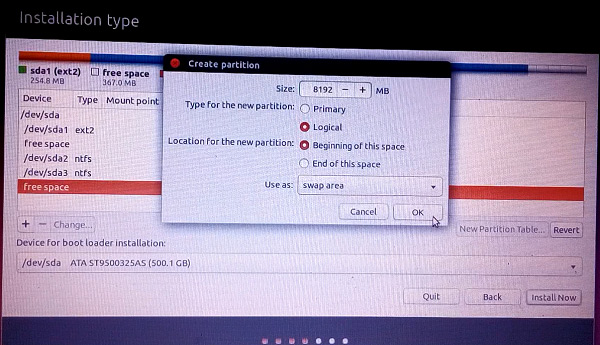
Step 10:
Appears the Create partition interface to create a Swap partition for Ubuntu to support RAM. To be able to use, you should choose the volume of Swap partition twice the amount of RAM .
In the Type for the New partition section select Logical, the Localtion for the new partition section, select Beginning of this space and the Use as section select Swap area and then click OK.
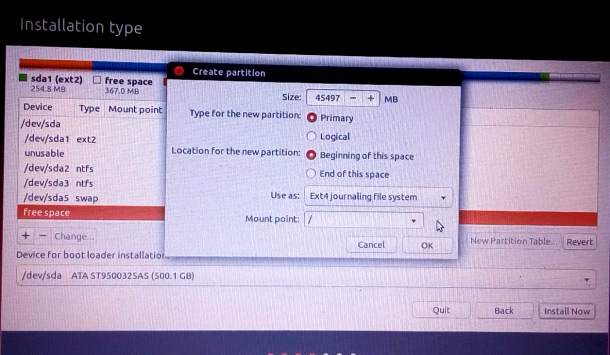
Step 11:
The result will be the newly created swap partition, click on the empty partition and click on the plus sign .

Also appear partition interface. The Size section stays the same, the Type for the new partition section select Primary, the Location for the new partition section select Beginning of this space, the Use as section select Ext4 journaling File sytem and the Mount point section select / then click OK.
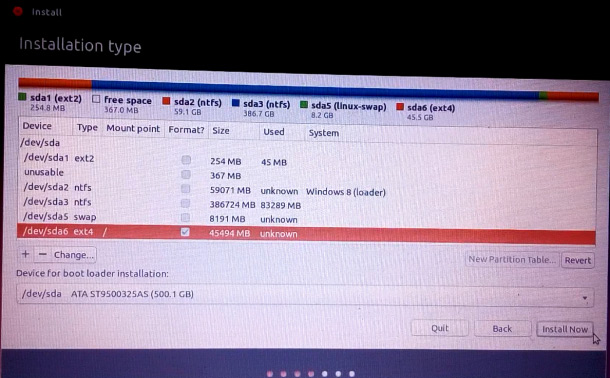
Step 12:
The newly created partition with Type is ext4 , click on it and select Install now .
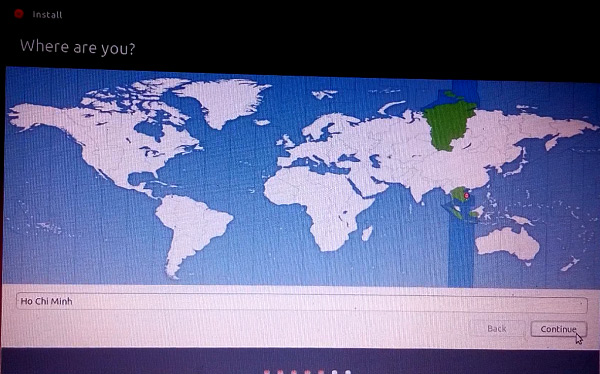
Step 13:
Click on the location of the current location and click Continue to continue.
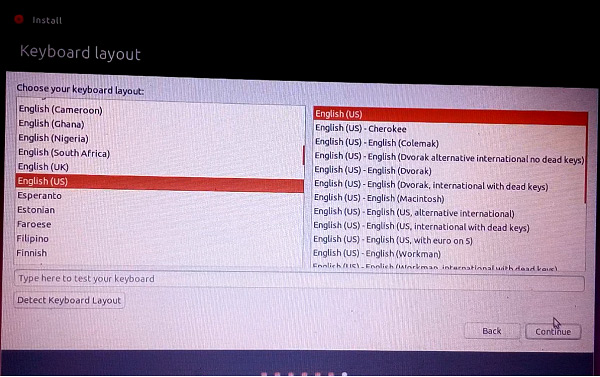
Step 14:
Select the keyboard language as English and also click Continue to continue.
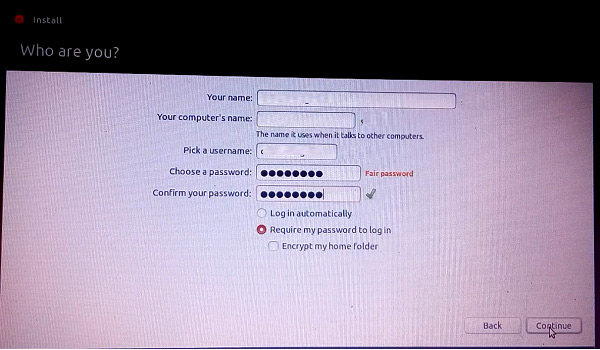
Step 15:
Enter the basic personal information required in this new interface and click Continue.
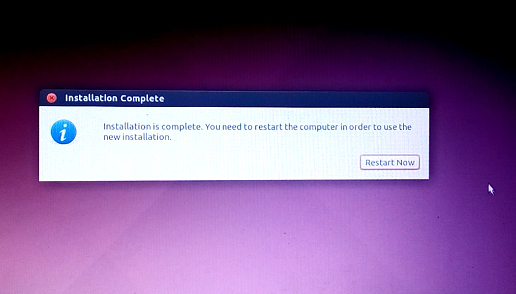
Step 16:
The Ubuntu installation process will automatically take place. When this process is completed the user will receive a message to restart the computer. Click Restart now to restart.
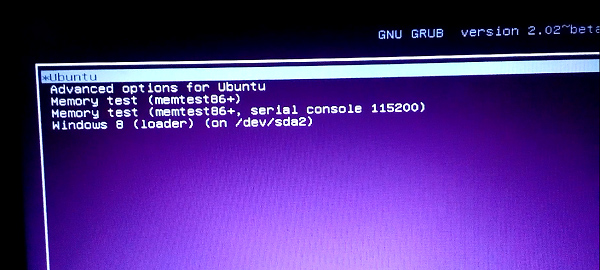
Note , when the installation is completed and every time you restart the computer, Ubuntu will show up first. To get into Windows, quickly choose Windows 8 (loader) or other Windows operating systems.
2. How to run Windows before Ubuntu
By default Ubuntu will be booted first compared to Windows. If you want to prioritize running Windows first, you need to take some extra steps.
Step 1:
First download the EasyBCD software according to the link below and proceed with the installation on the computer. This is the software that will set and edit boot menus on Windows, Mac and Linux.
- Download EasyBCD Windows software
Step 2:
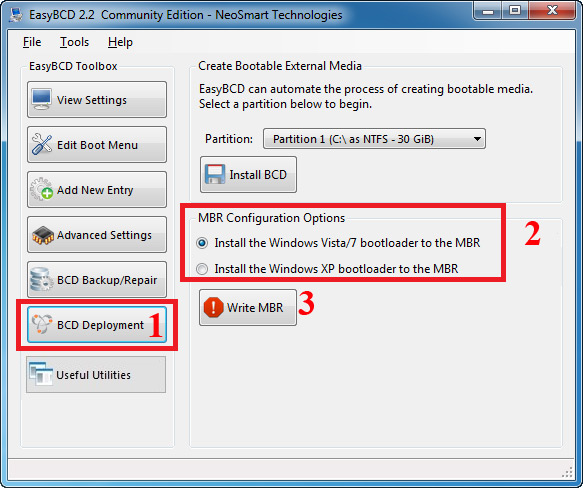
In the software interface click on the BCD Deployment item, we will see there are two options. If it is Windows XP, select Install the Windows XP bootloader to the MBR, from Windows 7 or later, select Install the Windows Vista / 7 bootloader to the MBR, then click Write MBR.
Step 3:
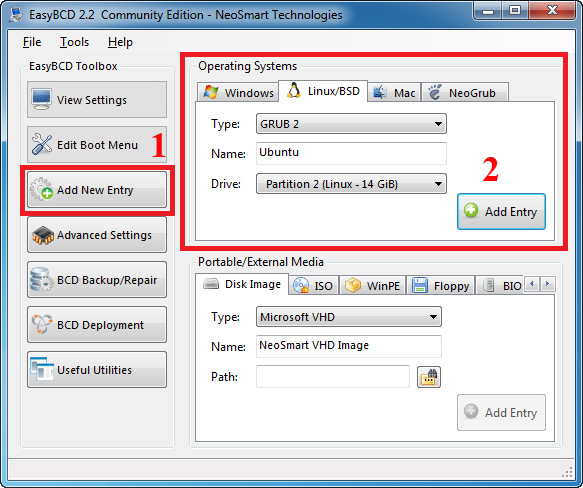
Click on Add New Entry then look to the right of the Linux / BSD section, type Type select GRUB 2, Ubuntu entry name for easy identification, Drive select the main partition of Ubuntu with recognition of Linux letters.
Click the Add Entry button below.
Step 4:
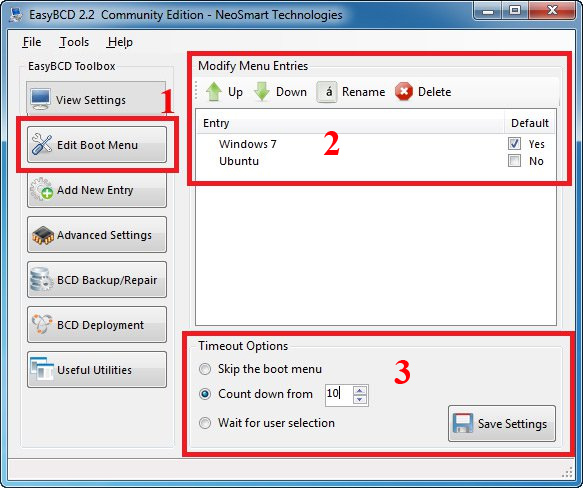
Click on Edit Boot Menu will see the list of operating systems available on the computer. To start Windows first , select Yes .
The TimeOut Options section has 3 options:
- Wait for user selection: displays the list of operating systems at startup to select.
- Count down from: displays the list of operating systems to select during the number of seconds entered. If the time is over, the computer will automatically boot into the operating system and click Yes above.
- Skip the boot menu: the computer will boot directly into the default operating system.
Finally click Save Settings to save the changes.
See more:
- Instructions on how to install Windows 7 from the HDD
- Instructions for installing Windows 7 from DVD
- Instructions for installing Ubuntu in pictures
I wish you all success1
Was this article helpful?
Your feedback helps us improve.
Related Articles
 Ways to install Ubuntu on Windows, run in parallel or run separately12 minutes read
 How to install Ubuntu operating system in parallel with Windows 109 minutes read
 How to install Ubuntu on a VMware virtual machine3 minutes read
 How to install Ubuntu 26.04 LTS on a PC or laptop9 minutes read
 Instructions to install Windows 10 in parallel with Windows 76 minutes read
 How to Install Ubuntu Linux Without CD (Windows)13 minutes read
Reader Comments 0
Sign in with email or Google to join the discussion.