Table of Contents
This guide explains how to insert WordArt Objects in Excel, with clear steps, practical tips, and important checks before you begin.
WordArt objects are indispensable in Excel sheets. It is a tool to help your spreadsheet more diverse and rich, attracting readers. To insert a WordArt object, follow these steps:
Step 1: Go to the Insert tab -> Text -> WordArt -> choose a style template for WordArt:

Step 2: Enter the text to create WordArt:

To create a complete WordArt, you need to do the following:
Step 3: Select the Style for WordArt : Click on the WordArt object -> Format -> Quick Styles -> choose the appropriate Style for WordArt.

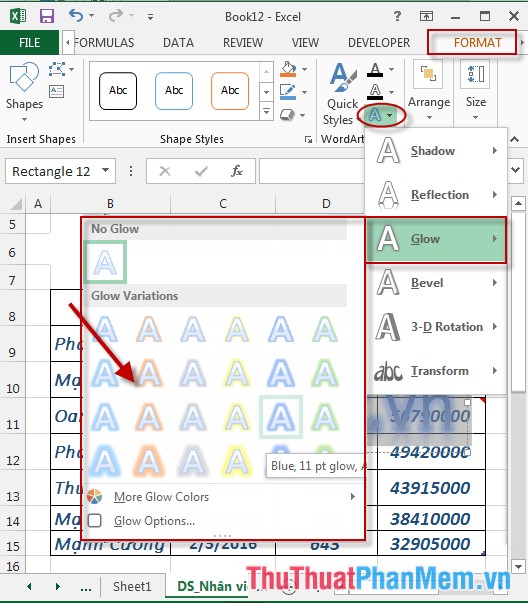
Step 4: Select effects for text: Click on WordArt object -> Format -> click Text Effect icon -> choose effect for text:
Step 5: Select the border color for the text: Click on the WordArt object -> Format -> click the Text Outline icon -> choose the border color for the text:

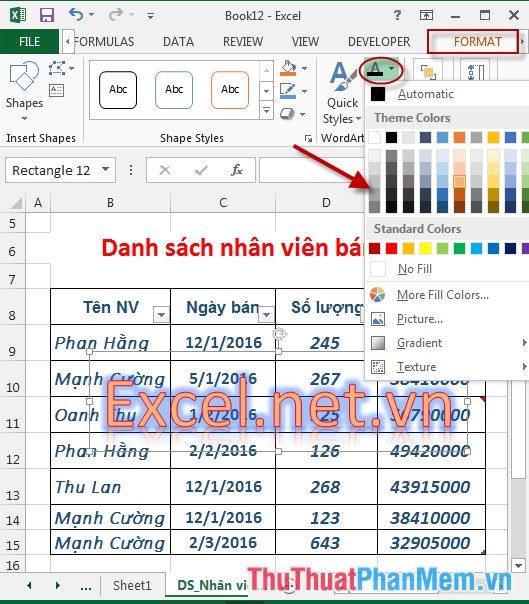
Step 6: Select the color for the text: Click on the WordArt object -> Format -> click the Text Fill icon -> choose the color for the text:
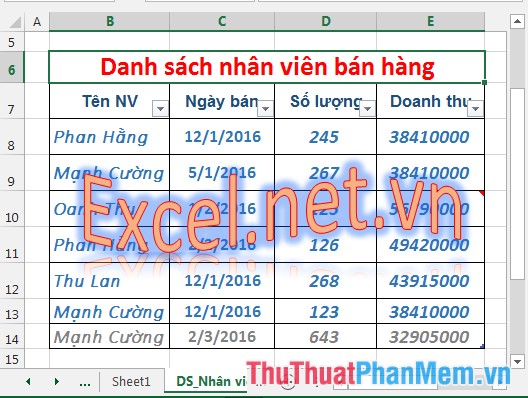
- After inserting and editing WordArt the results are:
Above is a detailed guide on how to insert WordArt objects in Excel 2013.
Good luck!
FAQ
What should I know about Insert WordArt Objects?
Focus on the key features, requirements, limitations, and practical use cases explained in this guide.
How do I get the best results with Insert WordArt Objects?
Follow the recommended steps, use current software or information, confirm compatibility, and review settings before major changes.
Are there any risks or limitations?
Potential limitations depend on compatibility, data quality, cost, privacy, support, and how the product or method is used.
Related Articles
 How to Insert Wordart in Excel: Insert Wordart Excel4 minutes read
 Insert Image Object in Excel3 minutes read
 Word 2013 Complete Guide (Part 18): How to Insert Text Box and11 minutes read
 How to Insert Watermark in Excel: Practical Guide6 minutes read
 How to Insert a SmartArt Object in Excel3 minutes read
 MS Excel 2007 - Lesson 9: Insert Images and Graphics into a3 minutes read
Reader Comments 0
Sign in with email or Google to join the discussion.