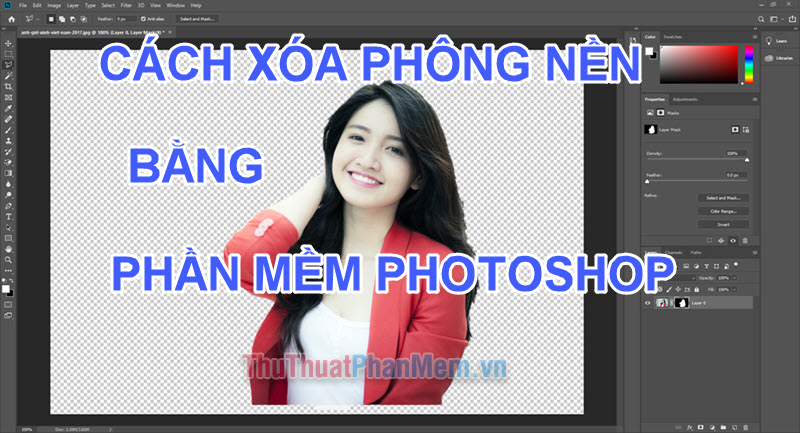
How to delete photo backdrops in Photoshop
You want to make yourself or something stand out in an image by clearing the background or blurring the background but don't know how to do it when using Photoshop. In this article, TipsMake.com will help you perform the removal of photo backgrounds with Pho software
Table of Contents
You want to make yourself or something stand out in an image by clearing the background or blurring the background but don't know how to do it when using Photoshop. In this article, TipsMake.com will help you perform the removal of photo background in Photoshop software quickly and effectively.
Method 1. Blur the background
For those of you who want to make yourself stand out from the surroundings by blurring them. We are going to work with Photoshop through the Polygonal Lasso Tool
Step 1 : Open the Photoshop software and open the image you want to delete the font by selecting File → Open or Ctrl + O

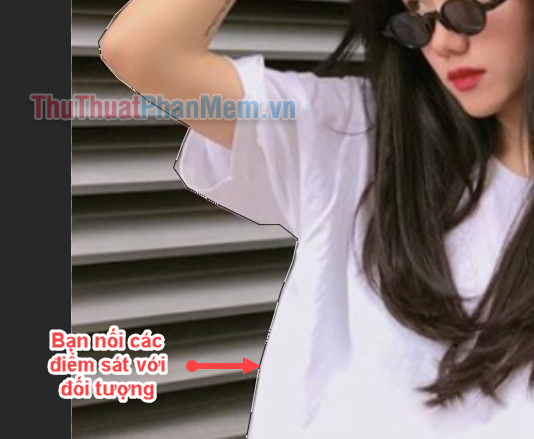
Step 2 : On the left toolbar of Photoshop software, select the Polygonal Lasso Tool

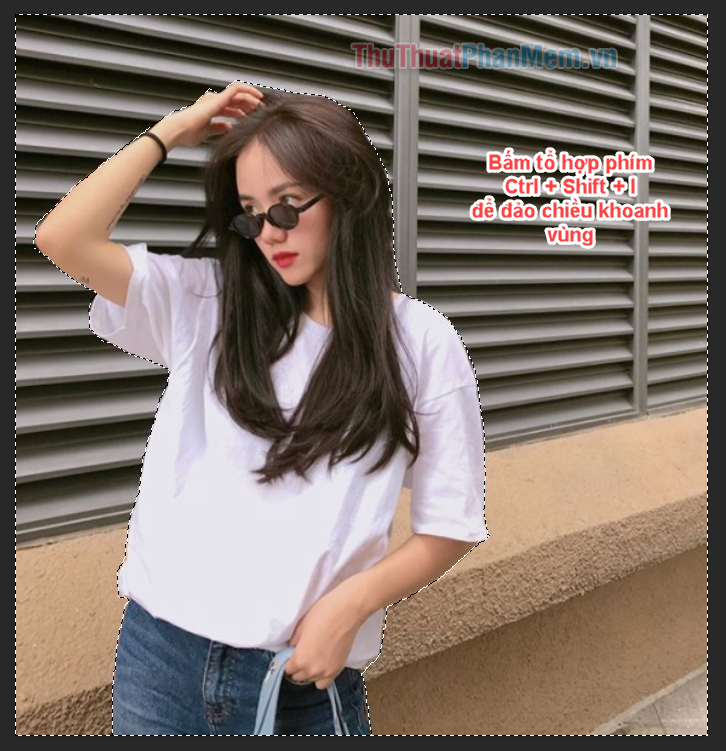
Step 3 : Then you make the area of the object you want to highlight by drawing lines around the object. You should draw as close to the object, the later the picture will be beautiful.
The keyboard shortcuts you can use in this step are:
- Atl + mouse scroll : To zoom in or out of images to help you localize more easily
- Hold Space (spacebar): To make moving photos
- Shift + left mouse button : To be able to localize 2 non-adjacent objects on the image.
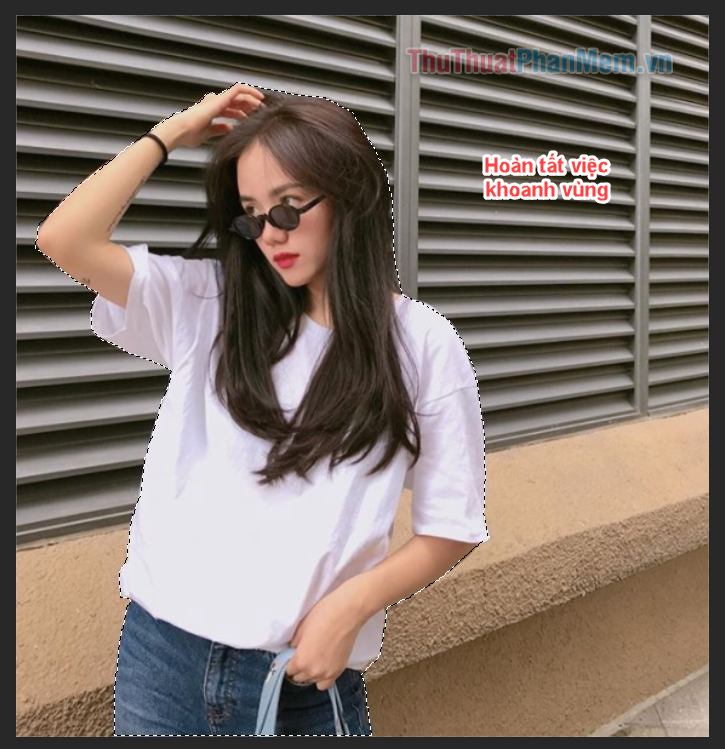
After finishing
Tip : In the latest version of Photoshop 2019, the software has additional functions that can help users to personalize. By selecting the Select tool→ select Subject .
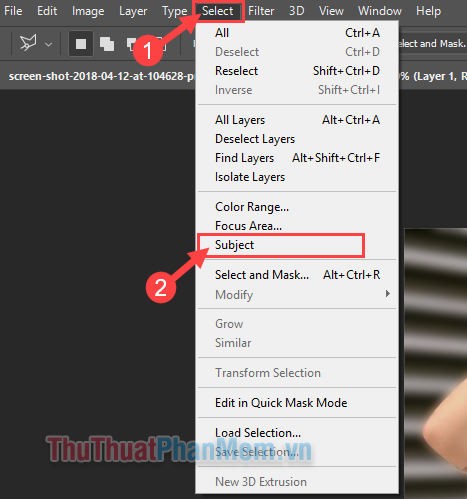
Of course, self-made machines can sometimes cause many images to be zoned exactly as we have them. But for photos with a clean layout, the image color is not too colorful, the Subject is also very effective.
Step 4 : Now you press Ctrl + Shift + I or Shift + F7 to reverse the area. In other words, it is a delineated background.
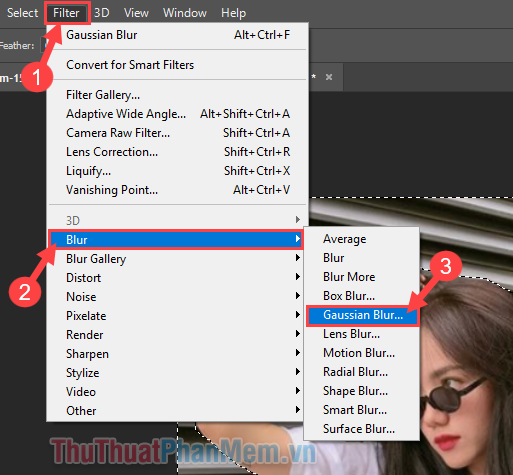
Step 5 :
(1) Select Filter on the toolbar.
(2) Select Blur.
(3) Select Gaussian Blur.
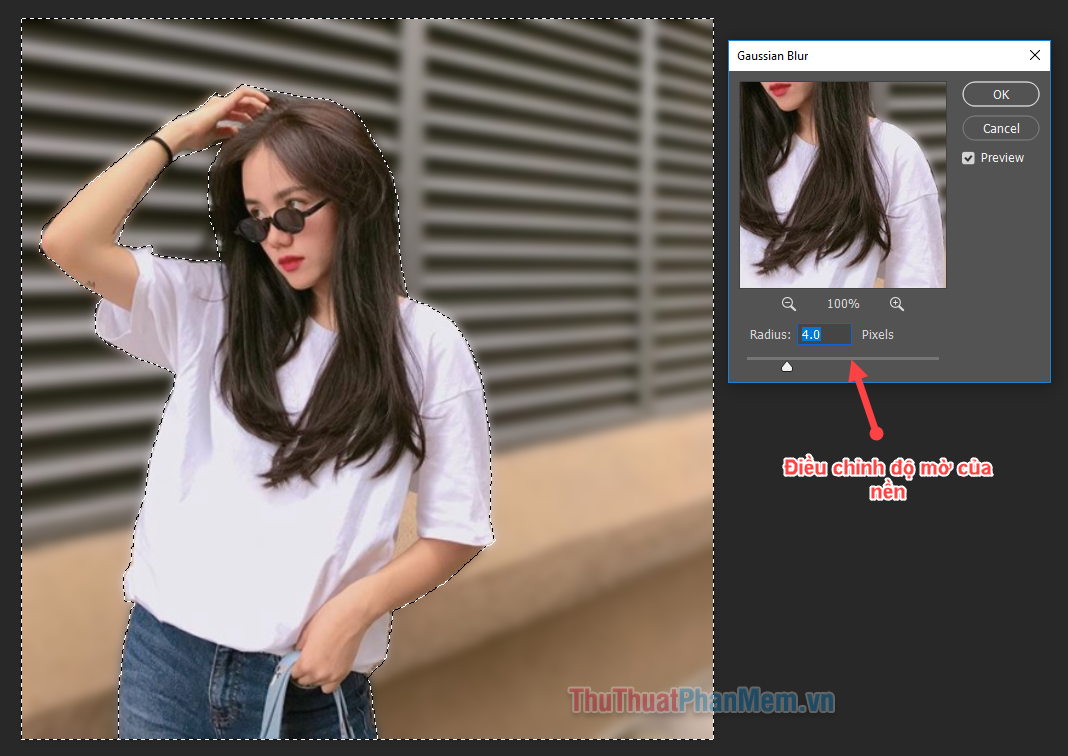
Step 6 : Here the Gaussian Blur appears, you can customize the level of background blur. Thehigher the Radius , the more blurred the background and the more prominent the subject. Then choose OK to finish the job.
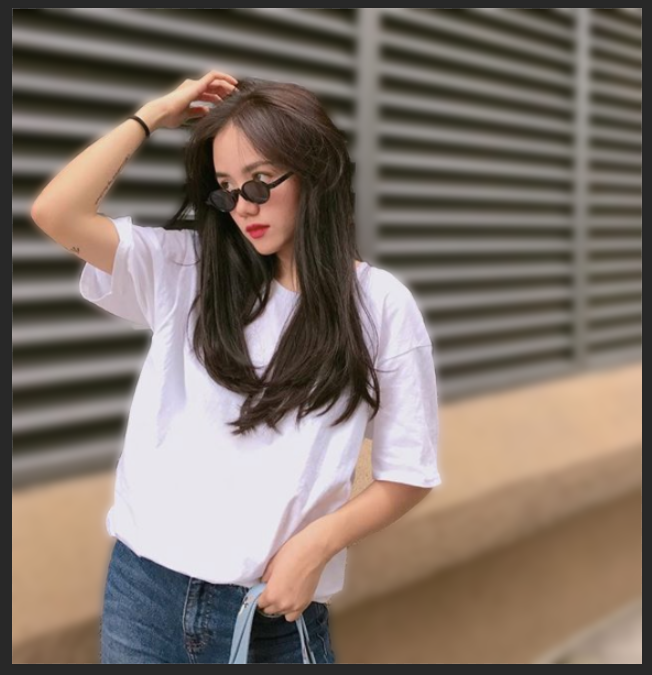
And this is the result:
Method 2: Clear the background
Step 1 : Similarly, you proceed to localize the object manually or use the Subject tool of the software for Photoshop 2019.

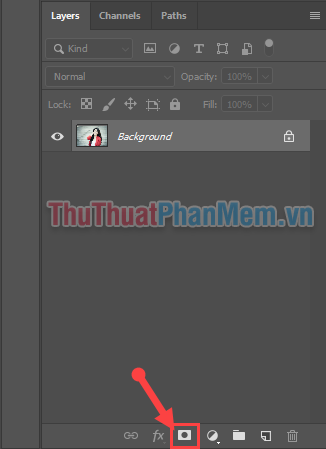
Step 2 : Next in the tool panel on the right of the software, select Add a mask .
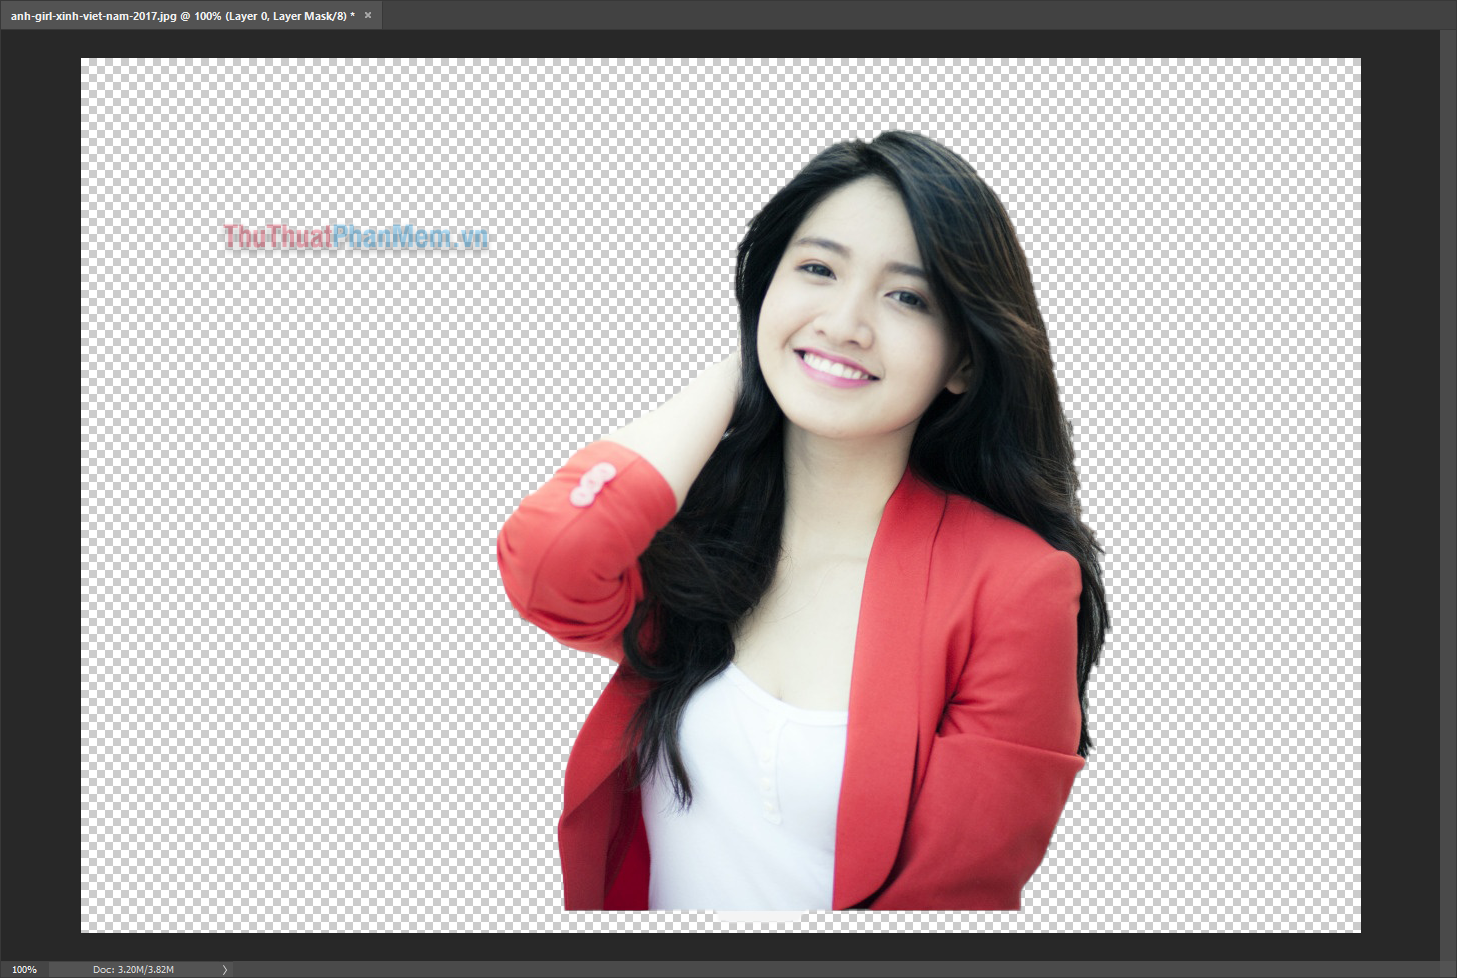
And the result is that the background has completely disappeared.
Finally you save the image in PNG format for the best image quality. I wish you successful implementation!
Was this article helpful?
Your feedback helps us improve.
Related Articles
 How to delete photo backdrops online3 minutes read
 How to use Photoshop CS5 - Part 9: Delete complex backgrounds in Photoshop5 minutes read
 'Magically' photo wallpaper removal apps you should try6 minutes read
 Simple way to delete photo backdrops11 minutes read
 How to erase text on photos using Photoshop simply4 minutes read
 How to delete a person from a photo in Photoshop2 minutes read
Reader Comments 0
Sign in with email or Google to join the discussion.