How to use Photoshop Fix delete excess details in photos
Adobe is known for its powerful and professional photo editing software. For those who only need basic use, or professional photographers, Adobe products are fully responsive. And Adobe's image editing applications also give users useful photo editors.
Adobe Photoshop Fix is one such application. Photoshop Fix provides us with a lot of photo editing tools, including the ability to delete details, areas of images that do not want to appear in the image. So how to delete the extra details on the image with Photoshop Fix? Operations using Photoshop Fix will be guided by the Network Administrator in the article below.
Photoshop Fix deletes objects in images
- Download the Android Fix Android app
- Download Photoshop Fix iOS
Step 1:
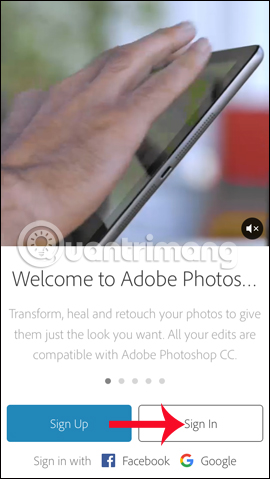
After downloading the Photoshop application Fix the link above, we start the application. In the first interface, the application will require users to login to the Adobe account .
If you already have an account, click Sign in , otherwise click Sign up to register. The Adobe account registration process is very simple, you just need to enter your username, email address, password, date and time to complete. The application also supports login via Facebook or Google.

Step 2:
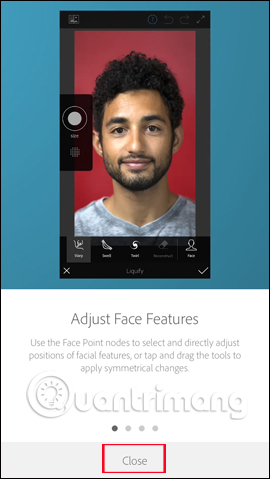
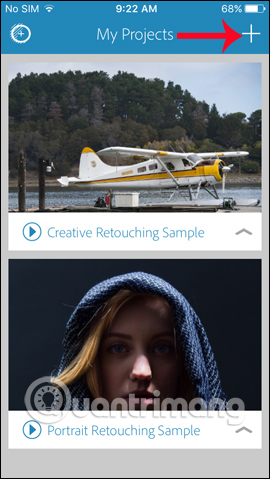
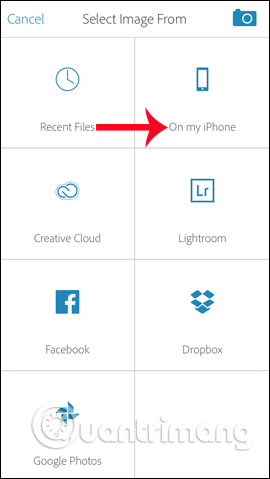
Go to the application introduction interface, click Close to close the interface. At the main interface of the application, click the plus icon to add a photo. A list of image stores that Photoshop Fix supports appears.
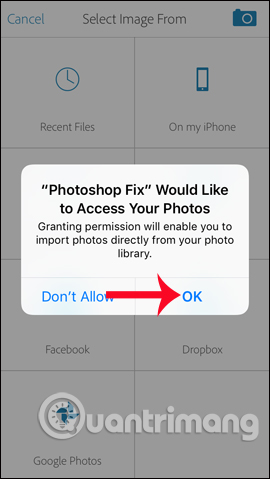
To get the images available, we click On my iPhone . The application will ask the user to allow access to the album on the device , press OK .
Step 3:
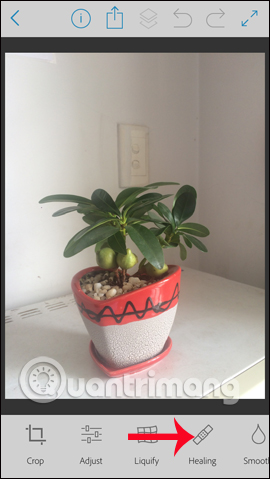
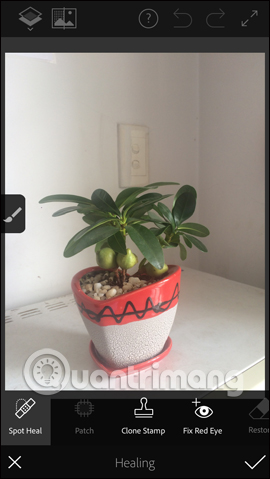
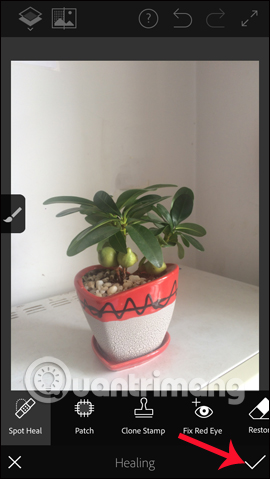
After selecting the image you want to remove the extra details, you will be redirected to the image editing interface. To delete the excess object in the image, click on the Healing feature . At the object removal interface, users will have some customizations for their images.
Step 4:
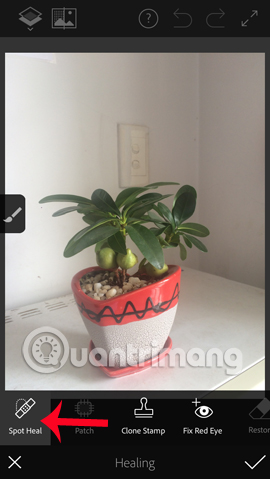
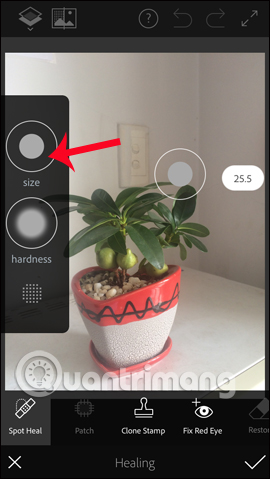
First of all, click the Spot Heal item to open the custom blur mode bar. You'll see two adjustments, Size and Hardness . Users can change blurring areas for redundant details in images. Click and hold the Size item, then scroll up and down on the screen to resize the roadblock.
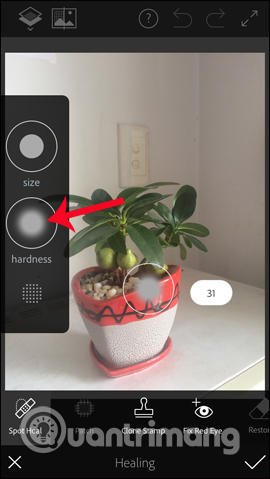
Next to Hardness, we also keep and move up and down to change the lightness of the area to be blurred.
Step 5:
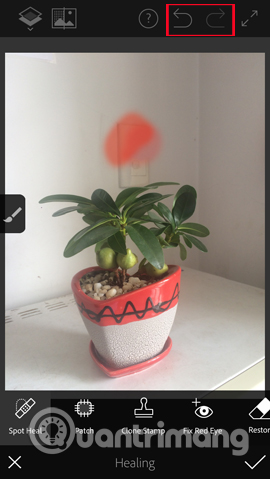
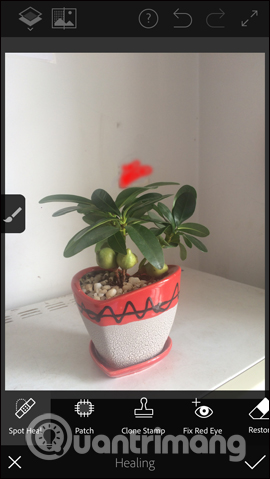
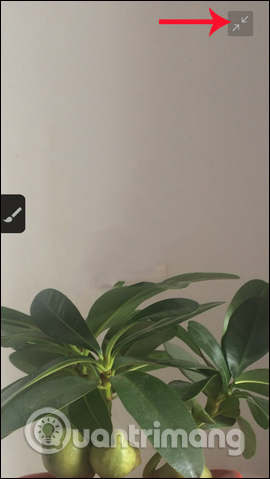
Now you need to highlight the details you want to hide in the image. The object will automatically be deleted in the image. To enlarge the image for easy editing, click the 2-way arrow.
This requires user ingenuity to fill the area around the object to be deleted. In case you want to return to the operation, we click on the 2-way arrow icon in the top right corner.
Step 6:
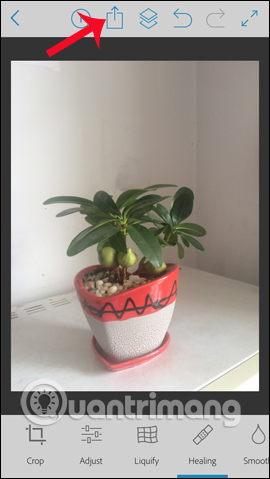
After completing the editing steps, click the tick icon on the right end of the interface. We click on the sharing icon at the top of the interface.
Step 7:
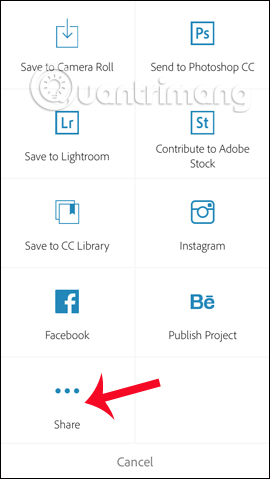
Photoshop Fix application supports you to download photos to the device (Save to Camera Roll), share on Adobe applications, or share on Facebook and Instagam social networks.
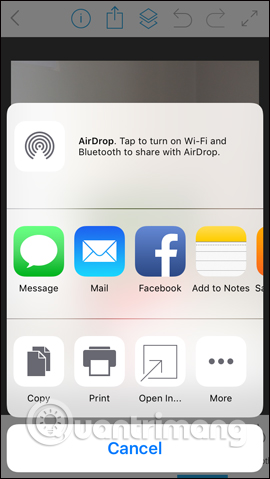
In case you want to expand the options, click on Share . Users will have a number of applications to share images such as Mail, send messages, Zalo, .
Overall, Photoshop Fix has the ability to handle images professionally, with high efficiency. If users manipulate and handle carefully during the deletion process, it is not easy to immediately recognize the edited image. If you need a dedicated photo editor application, do not ignore the Adobe Photoshop Fix application.
I wish you all success!