How to Use Remote Desktop in Windows 7
This wikiHow teaches you how to enable and use Remote Desktop on two Windows 7 computers. Remote Desktop is a built-in Windows 7 feature which allows you to control one computer from another over the Internet. In order to use Remote...
Table of Contents
Part 1 of 4:
Enabling Remote Desktop
-
 Make sure that you meet the criteria for enabling Remote Desktop. In order to turn on Remote Desktop, you must be on an account that has administrator privileges, and the account must have a password enabled.
 -
 Open Start. Click the multicolored Windows logo in the bottom-left corner of the screen. The Start menu will pop up.
-
 Click Control Panel. It's on the right side of the Start menu. Doing so opens the Control Panel window.
 -
 Set the "View by" option to "Large icons". Click the "View by:" drop-down box in the upper-right side of the Control Panel window, then click Large icons in the resulting drop-down menu.
- If you already see "Large icons" next to the "View by:" heading, skip this step.
-
 Click System. It's a heading near the bottom of the window.
- You may have to scroll down to see this option.
-
 Click Remote settings. This link is in the upper-left corner of the window. Doing so opens a new window.
 -
 Check the "Allow Remote Assistance connections to this computer" box. It's at the top of the new window.
- If you don't see this option, first make sure you're on the right tab by clicking Remote at the top of the window.
- Skip this step if the box is already checked.
-
 Check the "Allow connections from computers running any version of Remote Desktop" box. It's in the middle of the pop-up window. Doing so allows you to connect to this computer from any computer that runs Remote Desktop (e.g., a Windows 10 computer) in the future.
- Skip this step if this box is already checked.
-
 Add more users if necessary. If you want to allow Remote Desktop access to another user account on the target computer, do the following:
- Click Select Users….
- Click Add.
- Click Advanced….
- Click Find Now.
- Scroll down in the pane at the bottom of the window and double-click the name of the user you want to add.
- Click OK on the top two open windows.
-
 Click OK. It's at the bottom of the window. Doing so saves your settings and enables Remote Desktop on your target computer.
Part 2 of 4:
Allowing Remote Desktop in Firewall Settings
-
 Click Control Panel Home. This link is in the upper-left corner of the window. Doing so takes you back to the main Control Panel window.
- If you closed Control Panel, re-open it before proceeding.
-
 Click Windows Firewall. It's in the list of Control Panel options.
 -
 Click Allow an app or feature through Windows Firewall. This link is in the top-left corner of the page.
 -
 Click Change settings. It's at the top of the page, just above the list of programs in the middle.
 -
 Scroll down and check the "Remote Desktop" box. You'll find it in the "R" section of the list of programs. Doing so will allow Remote Desktop through the Windows Firewall.[1]
 -
 Click OK. It's at the bottom of the window. This saves your changes.
Part 3 of 4:
Finding the Target Computer's Address
-
 Consider setting a static IP address. This is optional, but recommended. A static IP address won't change when your router disconnects or your computer reconnects to the network, meaning that the IP address you find now will work in the future; failing to do this means you'll need to find the IP address of the target computer whenever you want to connect to it. To set a static IP address, you'll need to go into your router's settings:[2]
- Find your router's IP address.
- Go to your router's IP address in a web browser and log in with your router's credentials if prompted.
- Find the list of currently connected computers and select your computer.
- Make the IP address static by clicking the lock icon or similar.
- Wait for your router to finish rebooting.
-
 Open a web browser. On the target computer, click or double-click the app icon for a web browser (e.g., Chrome).
 -
 Open WhatIsMyIP. Go to https://www.whatismyip.com/ in the target computer's web browser.
 -
 Find your public IP address. Next to the "Your Public IPv4 is" heading at the top of the page, you'll find your target computer's public IP address.
 -
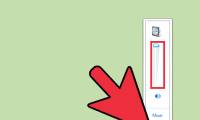
 Log out of the target computer. Click Start, click theicon in the bottom-right corner of the Start menu, and click Log off. At this point, you're free to proceed with connecting to your target computer with a different Windows 7 computer.
Part 4 of 4:
Connecting via Remote Desktop
-
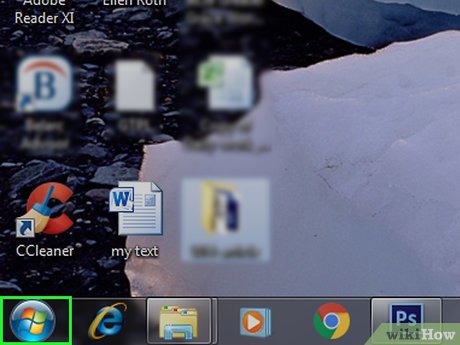
 Open Starton a different computer. Click the Windows logo in the bottom-left corner of the screen.
-
 Click the search bar. It's at the bottom of the Start window.
 -
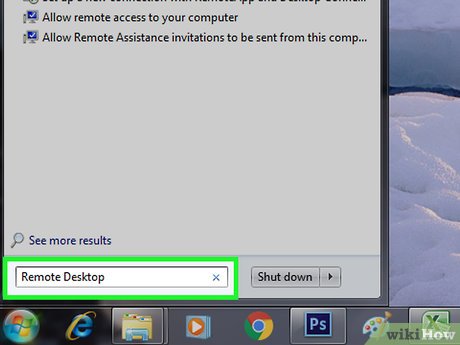
 Search for Remote Desktop. Type in remote desktop to do so. You should see a list of results appear in the Start window.
 -
 Click Remote Desktop Connection. This should be the top result in the Start menu. Doing so opens the Remote Desktop window.
- You may instead just click Remote Desktop here.
-
 Enter the IP address of the target computer. Click the "Computer" text box in the middle of the Remote Desktop window, then type in the target computer's public IP address.
 -
 Click Connect. It's at the bottom of the window.
 -
 Enter the login credentials for the target computer. When prompted, type in the administrator name and password for the account on which you enabled Remote Desktop.
- If you added another user to Remote Desktop, you can enter their credentials instead to access their account.
-
 Click OK. It's at the bottom of the window. Doing so connects your computer to the target computer, though it may take several minutes for the connection to finalize; once you see the other computer's desktop appear in Remote Desktop, you're free to peruse your remote computer as you please.
Was this article helpful?
Your feedback helps us improve.
Related Articles
 Instructions for activating and using Remote Desktop on Windows 10 computers4 minutes read
 How to enable and use Remote Desktop on Windows 114 minutes read
 6 ways to disable Remote Desktop on Windows 117 minutes read
 How to Hear Audio from the Remote PC when Using Remote Desktop5 minutes read
 The difference between Remote Desktop (RDP) and VPN6 minutes read
 Instructions for using Remote Desktop on Windows 82 minutes read
Reader Comments 0
Sign in with email or Google to join the discussion.