6 ways to disable Remote Desktop on Windows 11
Applications like AnyDesk and TeamViewer support similar remote desktop connectivity with a more intuitive user experience.
However, if you don't often use the Windows Remote Desktop feature to connect to your computer, it's best to disable it. This guide will list all the methods to disable Remote Desktop feature on Windows 11 computer.
How to disable Remote Desktop on Windows 11
You can turn off Remote Desktop from Control Panel, Settings app, using Command Prompt or Registry Editor. Furthermore, you can even create a batch file and run it directly from the desktop.
1. Using the Settings app
You can quickly disable the Remote Desktop feature on your system using the Settings app. Here's how to do it:
1. Press Win + I to launch the Settings application.
2. In the System section , scroll down and click the Remote Desktop option .
3. Then, click the toggle next to the Remote Desktop option to turn it off.

4. Windows will prompt you to confirm your decision. Click the Disable button and exit the Settings app.
2. Using the Control Panel
Although Microsoft is trying to move most of the Control Panel options to the Settings application, the transition is not complete. So you can still disable the Remote Desktop feature using the Control Panel. Follow these steps:
1. Press Win + R to launch the Run command box. Type control and press Enter key.
2. Control Panel will launch. Click the System and Security option .
3. Navigate to the System section and click the Allow remote access option .
4. Then, select Don't allow remote desktop connections to this computer and click the Apply button .

5. Finally, click the OK button to complete the changes and close the Remote Desktop tool.
3. Use Registry Editor
You can manually generate a registry key to disable the Remote Desktop feature on your system. However, tweaking the Registry is risky and you should always remember to make a backup of the Registry before making any changes. Even if things go downhill, you can always import a backup and get the system working properly again.
Follow these steps to disable Remote Desktop using Registry Editor::
1. Press Win + R to launch the Run command box. Type Regedit in the text input area and press the Enter key to launch the utility.
2. Now, go to the address bar at the top of the Registry Editor window, paste the following path, and press the Enter key:
HKEY_LOCAL_MACHINESYSTEMCurrentControlSetControlTerminal Server3. Once you are in the Terminal Server key, look for the DWORD value fDenyTSConnections. If not, right-click and select New > DWORD (32-bit) Value .
4. Name the newly created key fDenyTSConnections and do not capitalize.
5. Double-click the DWORD fDenyTSConnections value and change the Value Data to 1 . Keep Base as Hexadecimal .

6. Finally, click the OK button and exit Registry Editor.
7. Restart the system to allow the changes to take effect.
4. Use Windows Firewall
You can block Remote Desktop from the list of allowed applications in Windows Firewall. Then even if the feature is active on your system, no other computer will be able to connect to it. Here's how to do it:
1. Press Win + R to launch the Run command box. Type control firewall.cpl in the text box and press the Enter key.
2. On the Windows Defender Firewall page, click the Allow an app or feature through the Windows Defender Firewall option .
3. Click the Change settings button . Scroll down and uncheck the Remote Desktop and Remote Desktop (WebSocket) options in the list.

4. Click the OK button and exit the Control Panel window.
5. Using Command Prompt
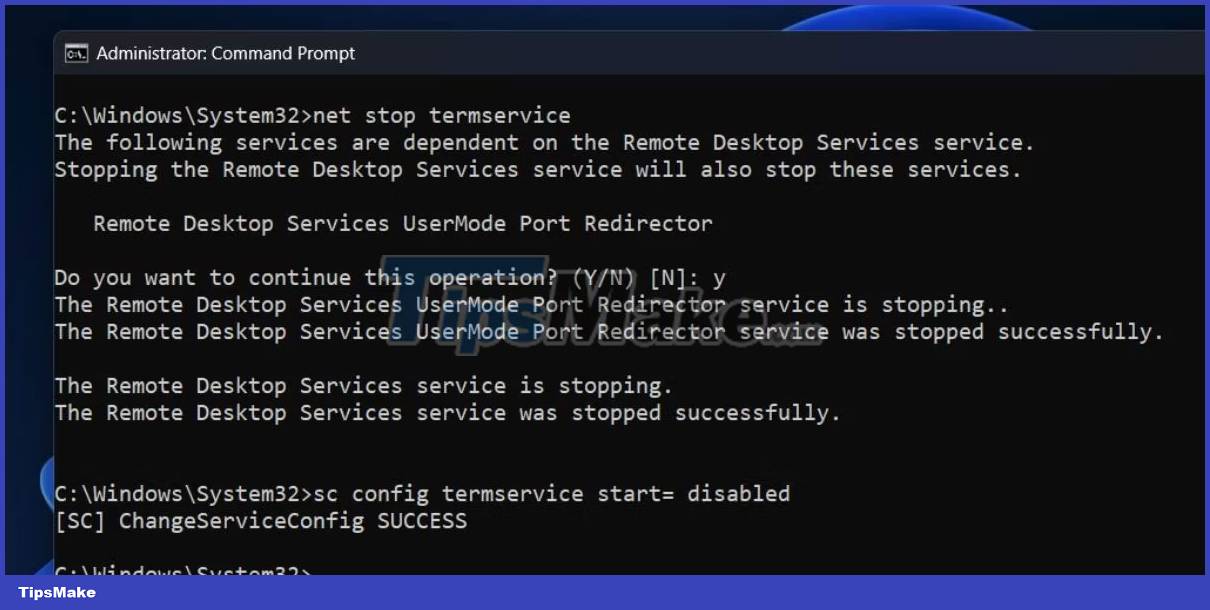
You can use the Command Prompt to turn off Remote Desktop without navigating to the Control Panel or the Settings app. Follow these steps:
1. Press Win + X to open the Power User Menu. Find the Terminal (Admin) option from the list and click on it.
2. In the Command Prompt window, type the following command and press the Enter key :
net stop termservice3. Type Y and press Enter to stop Remote Desktop and its related services.
4. Then type the following command and press Enter key.
sc config termservice start= disabled 
5. After the command executes successfully, type exit to close the Command Prompt window.
6. Use batch files
Batch files are an easier way to enable or disable Remote Desktop. You can save it on your desktop and run it when you no longer need this feature to work on your system. Here's how to do it:
1. Press Win + D to switch to the desktop.
2. Right-click on the Desktop and select New > Text Document .
3. Open a blank text file and paste the following code:
@echo off powershell.exe Set-ItemProperty -Path 'HKLM:SystemCurrentControlSetControlTerminal Server' -name "fDenyTSConnections" -value 1 
4. Press Ctrl + Shift + S to open the Save as option . Name the file RD.bat and keep the File Type as All Files . Now, click the Save button .
5. Press Win + D to switch to the desktop and right click on the RD.bat file. Select the Run as administrator option from the context menu.
6. The batch file will launch PowerShell, execute the disable command, and close automatically. You do not need to intervene.
Remote Desktop should only work when you need this feature. You can use the Settings app or Control Panel to disable this feature. Alternatively, you can edit registry values or disable the application from Windows Firewall. Finally, you can create and run a batch file if you want to disable this feature with just one click.