Unlock hidden features on Windows 10 with some Registry tricks
On Windows 10, there are a number of hidden features that users cannot access these hidden features in the usual way. The only way to access these features is to use the Registry Editor.
Note:
Before doing so, you must back up the current system status. The easiest way is to create a System Restore point.
On Windows 10 you can activate the system restore point by entering Restore into the Search box on Start, then select Create a restore point , select a drive, and then choose Configure . Next select Turn on system protection => Max Usage => OK.

How to open the Windows Registry
Since all edits need to use the Windows Registry, you need to know how to access the Registry. Perform the Windows + R key and type the registry in the Run dialog box and click OK to open the Windows Registry.
- How to open the Registry Editor on Windows
1. Switch to the Dark Theme interface
Dark Theme interface helps users protect eyes, not eyestrain. Windows 10 provides users with many ways to activate the Dark Theme interface. One of those ways is to use the Registry.
First open the Registry. Press Windows + X key combination to open the Run command window, then type regedit into it and press Enter.
Alternatively, enter the Regedit command into the Search box on the Start Menu. Select Yes when asked to confirm permissions.
In the Registry Editor window, navigate to the key:
HKEY_LOCAL_MACHINESOFTWAREMicrosoftWindowsCurrentVersionThemes
Next right-click the Themes select New => Key and name the key Personalize.
The next step is to right-click Personalize and choose New => DWORD (32-bit) . Name this DWORD as AppsUseLightTheme and set the AppsUseLightTheme value to 0 in the Value Data frame .
Repeat the steps above but navigate to the key:
HKEY_CURRENT_USERSOFTWAREMicrosoftWindowsCurrentVersionThemesPersonalize
Next create a new DWORD (32-bit), name it AppsUseLightTheme and set the value in the Value Data frame to 0.
Finally log out and log back on Windows 10 to check.
2. Speed up the process of opening Windows 10 computers
If the process of opening your Windows 10 computer is slow, you can take some steps to speed up the process.
To do this, first open the Registry by pressing the Windows + X key combination to open the Run command window, then type regedit into it and press Enter .
Alternatively, enter the Regedit command into the Search box on the Start Menu. Select Yes when asked to confirm permissions.
On the Registry window, navigate to the key:
HKEY_CURRENT_USERSoftwareMicrosoftWindowsCurrentVersionExplorerSerialize
Next create a new value DWORD and name this value StartupDelayInMSec and set the value for value to 0.
If you want to return to the original settings, you only need to delete the Serialize key.
3. Disable login image
Every time you log in on Windows 10, on the login screen always displays a default image created by Microsoft.
Suppose if you don't like displaying the image you can proceed to disable it.
To do this, follow the steps below:
On the Registry window, navigate to the key:
HKEY_LOCAL_MACHINESOFTWAREPoliciesMicrosoftWindowsSystem
Next proceed to create a new DWORD value, name this value as DisableLogonBackgroundImage and set the value to 1.
4. Hide Onedrive on File Explorer
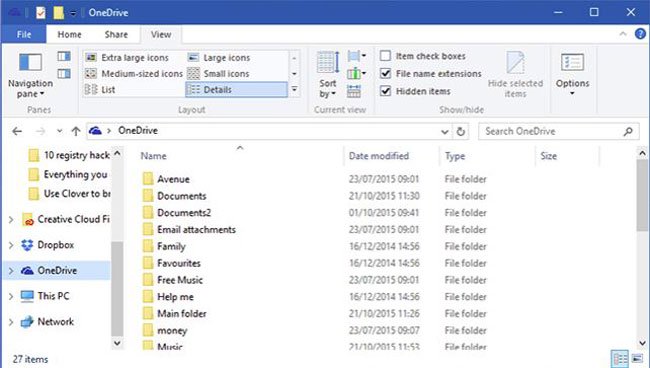
If you don't want to use Onedrive, you can proceed to hide Onedrive on File Explorer.
To hide Onedrive on File Explorer, on the Registry window, navigate to the key:
HKEY_CLASSES_ROOTCLSID {018D5C66-4533-4307-9B53-224DE2ED1FE6} Next find 'System.IsPinnedToNameSpaceTree' and double click on this option, set the value in the Value data frame to 0 to hide the Onedrive icon on File Explorer.
5. Increase the number of Taskbar Transparency
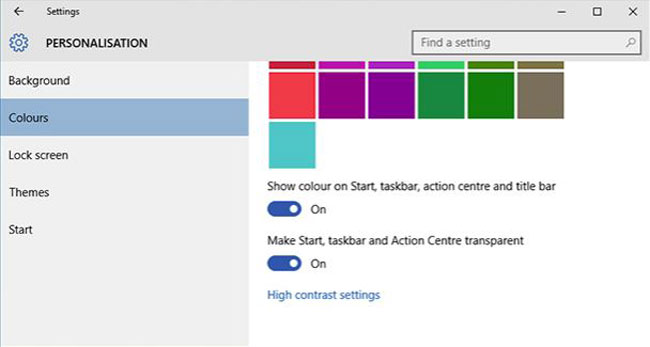
To do this, on the Registry window you navigate to the key:
HKEY_LOCAL_MACHINESOFTWAREMicrosoftWindowsCurrentVersionExplorerAdvanced
Next create a value DWORD and name this value UseOLEDTaskbarTransparency , set the value for UseOLEDTaskbarTransparency to 1 .
If you want to revert to the initial default setting, you only need to delete the DWORD value.
6. Activate Balloon-style notifications
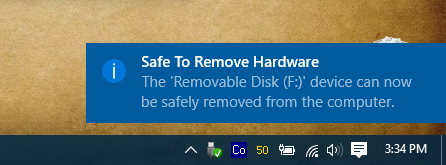
On Windows 10, the redesigned notification window is simpler and more modern with the "Balloon" notification type as in older Windows versions.
However, if you want to activate the "Balloon" notification type on Windows 10, follow the steps below:
On the Registry Editor you navigate to the key:
HKEY_CURRENT_USERSOFTWAREPoliciesMicrosoftWindowsExplorer
If you do not find the Key Policies, Microsoft, Windows and Explorer you can create these keys by right-clicking the Key before selecting New => Key and naming the keys respectively Policies, Microsoft, Windows and Explorer.
Next right click on the Explorer key select New => DWORD (32-bit) and name this new DWORD as EnableLegacyBalloonNotifications.
Right-click EnableLegacyBalloonNotifications, select Modify and set the value in Value Data to 1 .
Finally restart your computer.
7. Disable Action Center
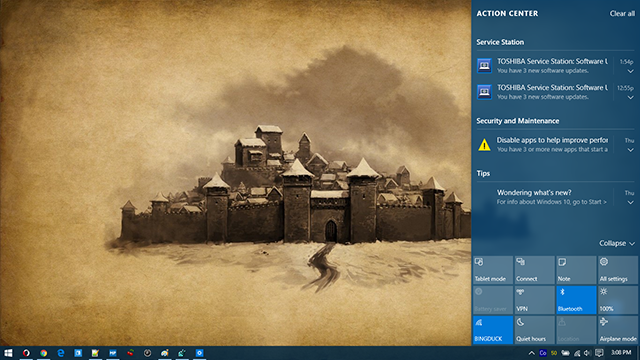
On the Registry Editor you navigate to the key:
HKEY_CURRENT_USERSOFTWAREPoliciesMicrosoftWindowsExplorer
If you do not find the Key Policies, Microsoft, Windows and Explorer you can create these keys by right-clicking the Key before selecting New => Key and naming the keys respectively Policies, Microsoft, Windows and Explorer.
Next right-click the Explorer key, select New => DWORD (32-bit) and name this DWORD as DisableNotificationCenter . Right-click DisableNotificationCenter, select Modify and proceed to set the value in Value Data to 1.
Finally restart your computer. Now Action Center has been disabled.
See also: 4 simple ways to disable (turn off) Action Center on Windows 10
8. Hide any folder in This PC
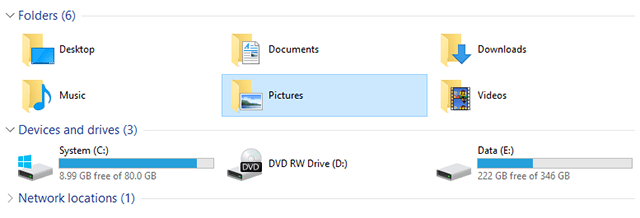
This PC is part of File Explorer that is retained from Windows 8.1, but the annoying thing is that there is no way to remove the default folders like Desktop, Documents, Downloads, Music, Pictures, Videos displayed in This PC .
However, if you want, you can still hide any folder in ThisPC.
To hide any folder in This PC, in the Registry Editor you navigate to the following link:
HKEY_LOCAL_MACHINESOFTWAREMicrosoftWindowsCurrentVersionExplorerFolderDescriptionsPropertyBag
Replace with one of the directories below:
- Desktop: {B4BFCC3A-DB2C-424C-B029-7FE99A87C641}
- Documents: {f42ee2d3-909f-4907-8871-4c22fc0bf756}
- Downloads: {7d83ee9b-2244-4e70-b1f5-5393042af1e4}
- Music: {a0c69a99-21c8-4671-8703-7934162fcf1d}
- Pictures: {0ddd015d-b06c-45d5-8c4c-f59713854639}
- Videos: {35286a68-3c57-41a1-bbb1-0eae73d76c95}
Under each PropertyBag key, you will see a value string named ThisPCPolicy.
By default ThisPCPolicy string is set to Show , you double-click it and select Hide to hide any folder in ThisPC.
9. Enhance virtual memory security (Virtual Memory)

When the computer runs out of RAM, Windows will use a portion of the hard drive's memory to convert it into virtual RAM. When you turn off Windows, this virtual memory remains on the hard drive.
If your computer is illegally intruded by strangers, virtual memory will cause incalculable hazards.
However, you can set Windows to delete this file whenever you turn off Windows. However, this method will take a long time to turn off Windows, depending on the size of the pagefile.sys file.
On the Registry Editor you navigate to the key:
HKEY_LOCAL_MACHINESYSTEMCurrentControlSetControlSession ManagerMemory Management
Right-click ClearPageFileAtShutDown and select Modify and set the value to 1.
Finally restart your computer.
10. Disable shaking feature to minimize
"Aero Shake" is a feature introduced in Windows 7 that allows you to minimize the window by taking a window and shaking it. If you want to disable this feature you need to access the Registry and navigate to:
ComputerHKEY_CURRENT_USERSoftwareMicrosoftWindowsCurrentVersionExplorerAdvanced
Here, right-click a blank space on the right panel and select New -> DWORD (32-bit) then name it DisallowShaking .
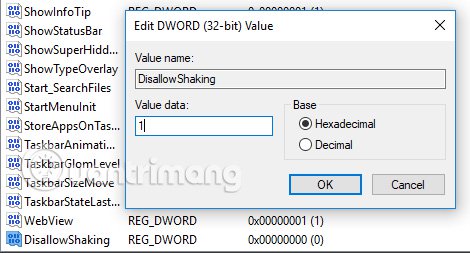
Double-click the newly created entry, then change the number in the Value box to 1 and click OK . Now the shake to zoom feature is gone.
- 50 Registry tricks to help you become a true Windows 7 / Vista "hacker" (Part 2)
11. Add the application to the context menu
The context menu is useful but to really control it, you need to create a registry key to add a specific application. We will add Notepad to the context menu, this is how to do it:
Step 1: Navigate to:
ComputerHKEY_CLASSES_ROOTDirectoryBackgroundshell
Step 2: In the shell folder, right-click and create a new key called Notepad , then in the Notepad folder, create a key called command . In the key command directory, right-click the Default string, and then in the Value box type notepad.exe .
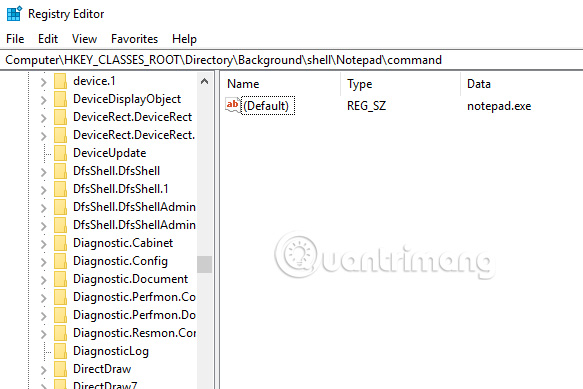
Then close the Registry Editor, right-click the desktop and you'll see Notepad appear right in the context menu.
- Add any application to the context menu in Vista
12. Change the distance between icons (Icon Spacing) on the desktop
In Windows 10, there is no easy way to adjust icon spacing on the desktop as in Windows 7. Now on Windows 10, if you want to change the Icon Spacing (Horizontal) or Icon Spacing (Vertical ), you must edit the registry.
Note: You need to log out and log back in after changing the values in the registry for the changes to take effect.
Open Registry Editor and navigate to the following registry key:
HKEY_CURRENT_USERControl PanelDesktopWindowMetrics 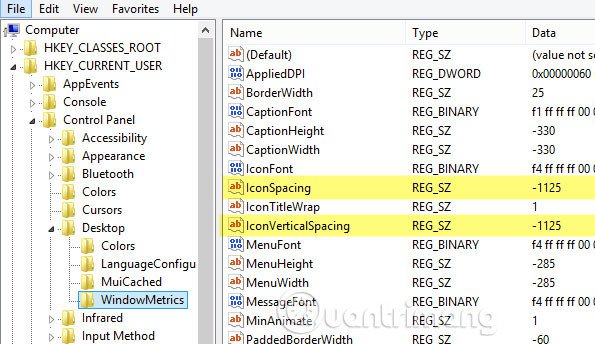
You will see two values here: IconSpacing and IconVerticalSpacing . By default the old value is -1125 . You can adjust horizontal spacing by changing the IconSpacing value to a range of -480 to -2730. The closer the value is to -480 the horizontal distance is less and the closer the value to -2750 the horizontal distance is wider.
Note, this is not really the distance between icons on the desktop, this is the distance of the box surrounding the icon on the desktop.
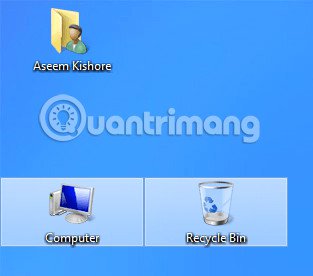
As seen above, the value of IconSpacing is changed to -2000, so the width of the box surrounding each icon will increase but the actual distance between icons plus the box is very small. If you reduce this value to -500, the text will be cut off.
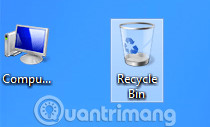
For some reason, the vertical distance works slightly differently. It doesn't really increase the area of the icon box, but it increases the actual distance between icons.

As you can see, the icons surrounding the icon are very small but the actual distance between the icons increases when changing the value to -2000 in IconVerticalSpacing.
13. Click on the last activity window
In case you open multiple Excel or Word application windows with another application like Chrome, when you return to work with Word or Excel, click on its icon in the taskbar, you will see the thumbnail image. of all active application windows. With this tip, when clicking on a program's icon with multiple windows open, it will go straight to the last activity window.
Of course, you can press Alt + Tab but this is useful if you prefer to use the mouse over the keyboard. The way to do it is to navigate to the following key:
HKEY_CURRENT_USERSOFTWAREMicrosoftWindowsCurrentVersionExplorerAdvanced
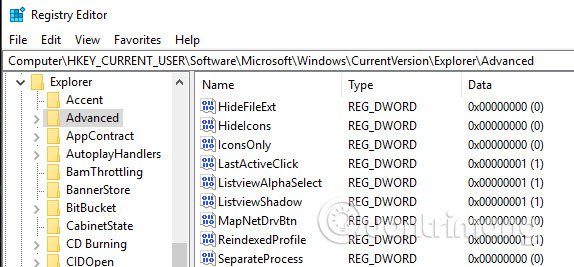
Then create a 32-bit Dword called LastActiveClick and set the value to 1.
14. Disable User Account Control
You cannot completely disable User Account Control through the traditional GUI interface. To actually turn it off, you must go to the registry or modify the local security policy. However, when disabling User Account Control you will not be able to run applications from the Windows Store (Universal app). Instead you will get the message ' This app can't open. App không mở được trong khi tài khoản User điều khiển bị bị tắt '.
If you still want to delete this feature, you need to change the value in the registry. To do so, navigate to the following registry key:
HKEY_LOCAL_MACHINESOFTWAREMicrosoftWindowsCurrentVersionPoliciesSystem
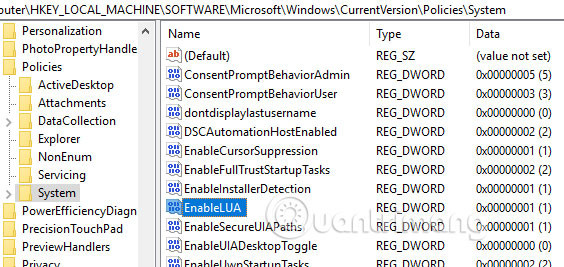
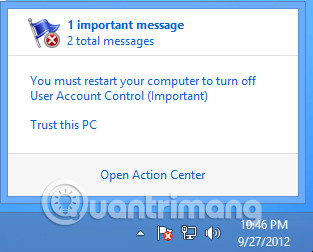
Find the EnableLUA key and change the value to 0. You will then receive a message from Action Center that requires restarting the computer to disable User Account Control.
15. Retrieve the file deletion confirmation dialog
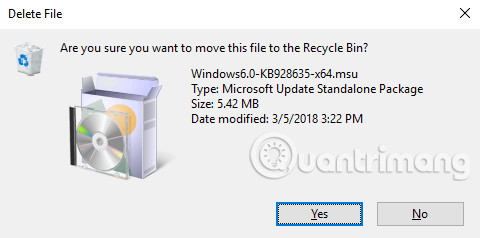
One missing feature in Windows 10 is the confirmation dialog that deletes files that we are familiar with in previous versions. To retrieve this dialog box, navigate to the following registry key:
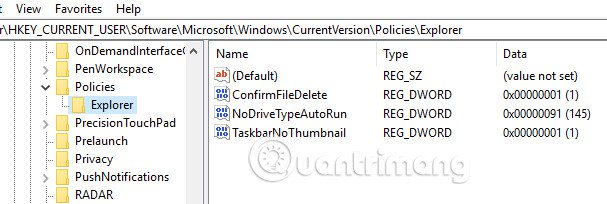
HKEY_CURRENT_USERSoftwareMicrosoftWindowsCurrentVersionPolicies
Create a new key under Policies called Explorer , then create a DWORD value and name it ConfirmFileDelete . Change the value to 1, if you don't need this dialog box, you can change this value to 0.
16. Change the Registered Owner
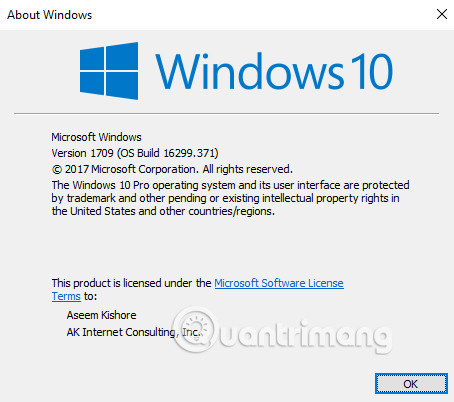
Although this is too old and useless, many people still like the ability to change the Registered owner in Windows to whatever they want. Fortunately, Microsoft still has the value stored in the registry key to help you change this.
HKEY_LOCAL_MACHINESOFTWAREMicrosoftWindows NTCurrentVersion
Under CurrentVersion , just find the RegisteredOwner and change it.
17. Display Windows version on desktop
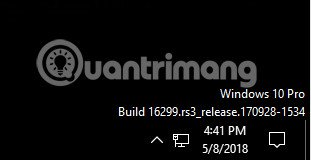
If you are running some copies of Windows 10 on multiple computers and virtual computers, you should enable the automatic display of Windows version on the desktop. Windows 10 has a registry key used to add the version to the desktop automatically. Navigate to the following key:
HKEY_CURRENT_USERControl PanelDesktop
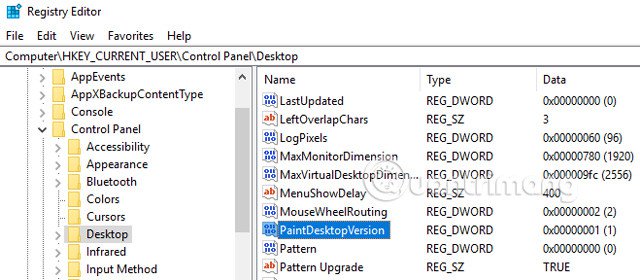
Find PaintDesktopVersion in the Desktop key and change the value from 0 to 1. The next time you log in, you will see the Windows 10 version number and the build number as shown above.
18. Change the width of the border around the window
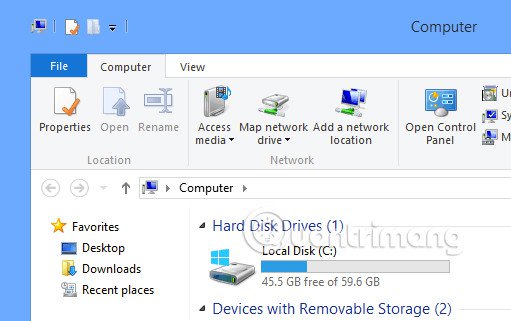
If you don't like the border size around all windows when you're on the desktop, you can change it by looking to the following key:
HKEY_CURRENT_USERControl PanelDesktopWindowMetrics
Find the key named BorderWidth and change it to any value between 0 and 50.
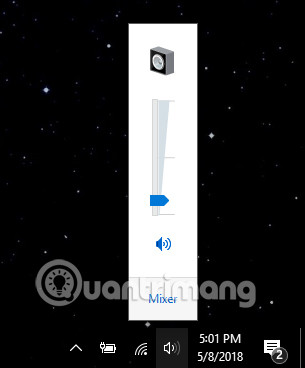
19. Use volume control as in Windows 7
If you don't like the new horizontal volume adjustment mode in Windows 10, you can regain the vertical volume control as in Windows 7. To do so, navigate to the following key:
HKLMSOFTWAREMicrosoftWindows NTCurrentVersion
Create a new key in the current version called MTCUVC and then create a new DWORD value inside MTCUVC called EnableMtcUvc , set it to a value of 0.
- How to manage and improve sound quality in Windows 10
Refer to some of the following articles:
- Outlook cannot send mail after upgrading Windows 10, this is a fix
- How to recover data from "Ghost" hard drive (or image) error / mistake
- How to enable / disable USB drive / port on Windows 7/8/10?
Good luck!
You should read it
- ★ How to disable Windows Registry on Windows 10
- ★ Block access to Registry Editor on Windows 10/8/7
- ★ Learn about the Windows Registry - Part I
- ★ 50 Registry tricks to help you become a true Windows 7 / Vista 'hacker' (Part 2)
- ★ 50 Registry tricks to help you become a true Windows 7 / Vista 'hacker' (Part 4)