How to design flyers in Word
Currently there are many professional software that can help you design leaflets for advertising. But professional software is often difficult to use and not popular with many users. You are not a professional, but you still want to design simple leaflets for personal advertising needs. So you can use Word to design flyers quickly.
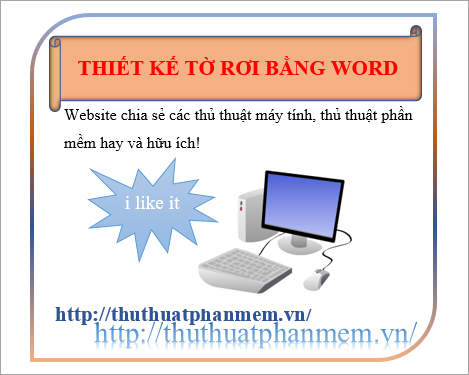
Here are two ways to design leaflets in Word, please follow along.
Method 1: Design leaflets quickly with available templates
If you can't design your own leaflets, you can use the flyer templates provided by Word. You do the following:
Step 1 : Open the Word application, on the interface, select File .

Step 2 : Select New in the left menu, enter the keyword flyer (flyer) in the search box and click the search icon. After Word loads the available leaflets, select the flyer template that suits your purpose.

You can also select categories in the Category section .

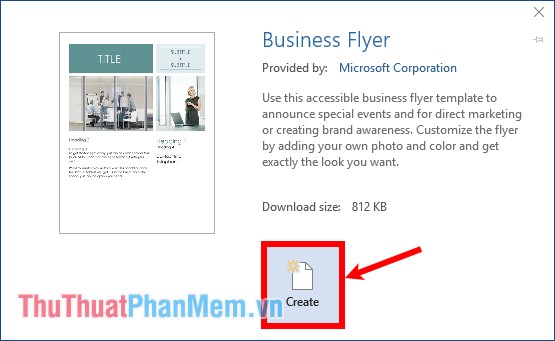
Step 3 : A brochure template appears, select Create to create a brochure template on Word page.
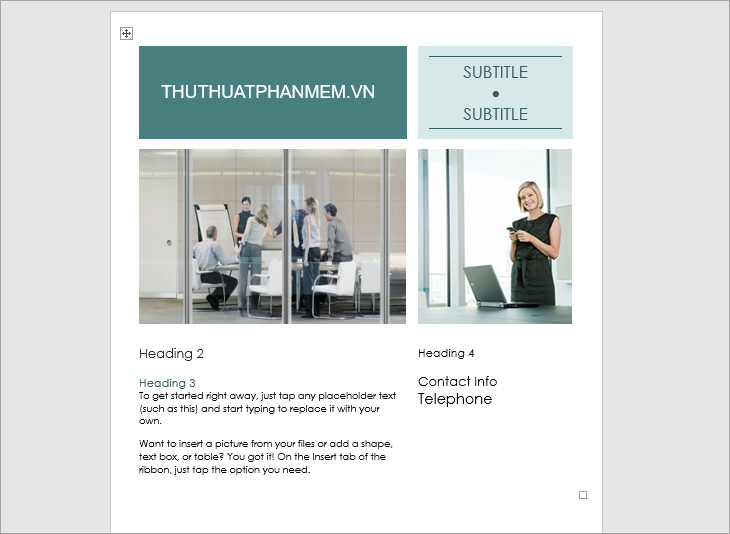
Step 4: At this time on your Word page will appear the flyer template you choose, you just need to edit the replacement content into the contents of the existing template accordingly.
Method 2: Design your own flyer using the tools in Word
If you have designed your own leaflets on paper, you can use the tools in Word to design leaflets on Word based on your own designs. How to do the following:
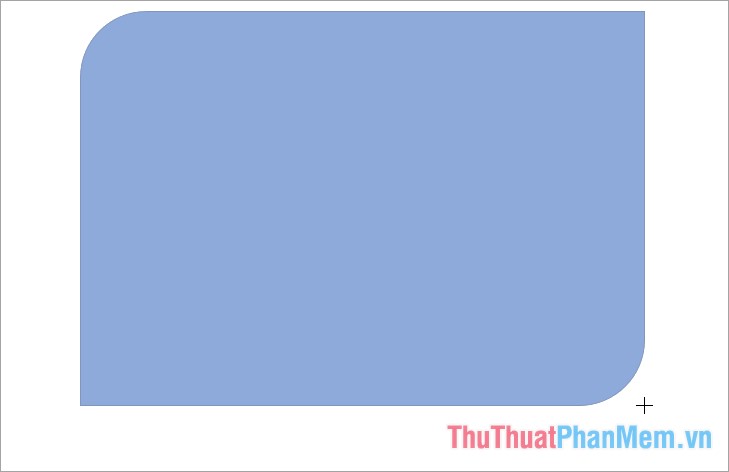
Step 1 : Open a new Word file, on the interface of Word page, you start making borders for your leaflet by selecting Insert -> Shapes -> selecting borders for arbitrary leaflets in Rectangles section .
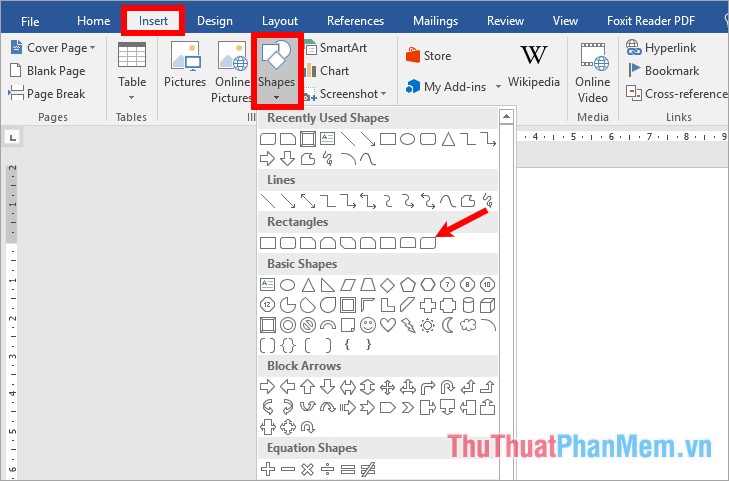
The mouse cursor turns to the + symbol and you start clicking to draw a border frame for the leaflet.
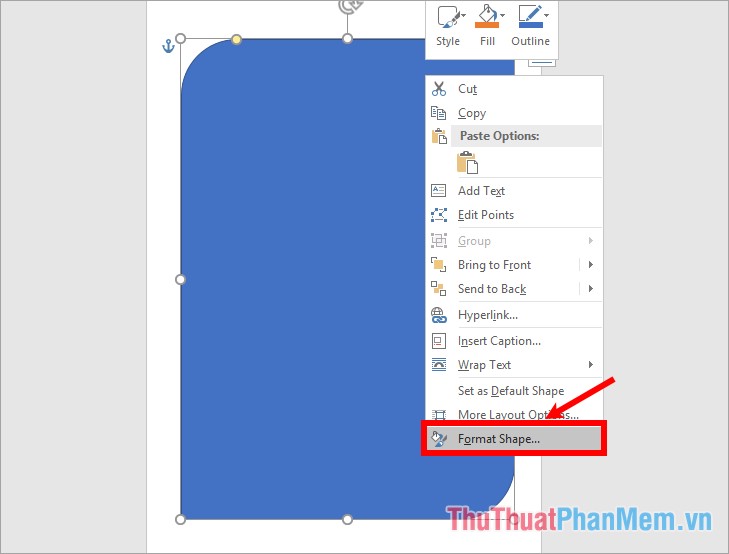
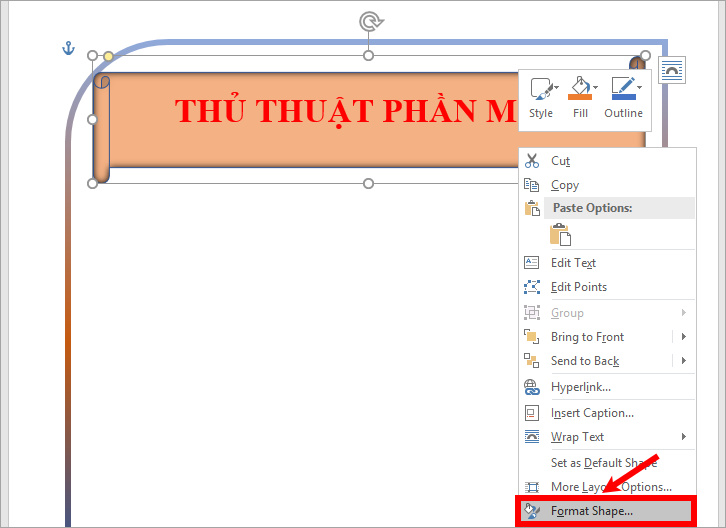
Step 2 : Next, right-click on the frame and choose Format Shape to edit the frame.
Step 3 : Appear the Format Shape part on the right, you can customize the Fill and Line sections .
1. Fill (background color of bricks)
In this section you have a lot of options:
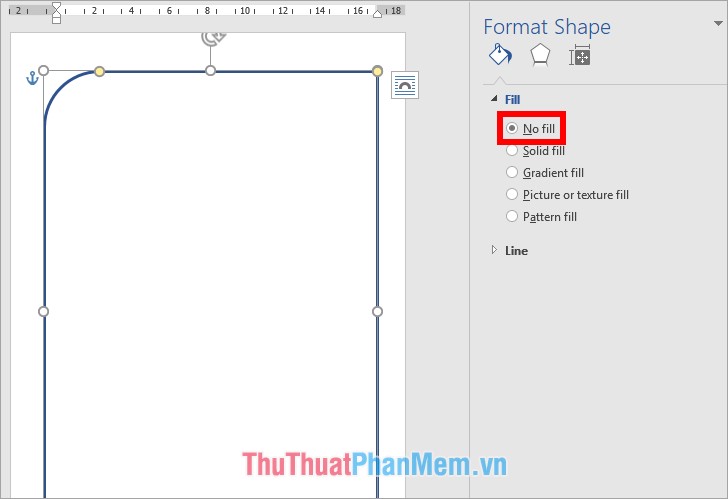
No fill: do not fill the background color.
Solid fill: use background color.
Gradient fill: use multiple background colors.
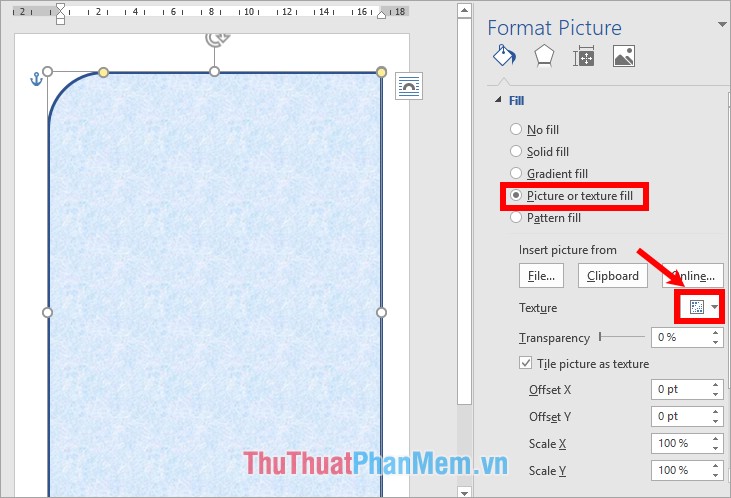
Picture or texture fill: background image or texture .
Pattern fill: use the available background styles.
For example, if you choose Picture or texture fill, you can select the image by selecting File , if you want to select only the textures, then click on the texture image next to the Texture box and select your image. want to shed background.
If you do not want to fill the background, then select No fill so the default background is white.
2. Line (border of bricks)
In the Line section you will set the borders for the bricks. You have 3 options:
No line: do not use borders.
Solid line: use color for border.
Gradient line: using a border with a mix of colors.
If you select the Gradient line , you need to select the positions of the icons in the Gradient stops section and choose the colors in the Color section .
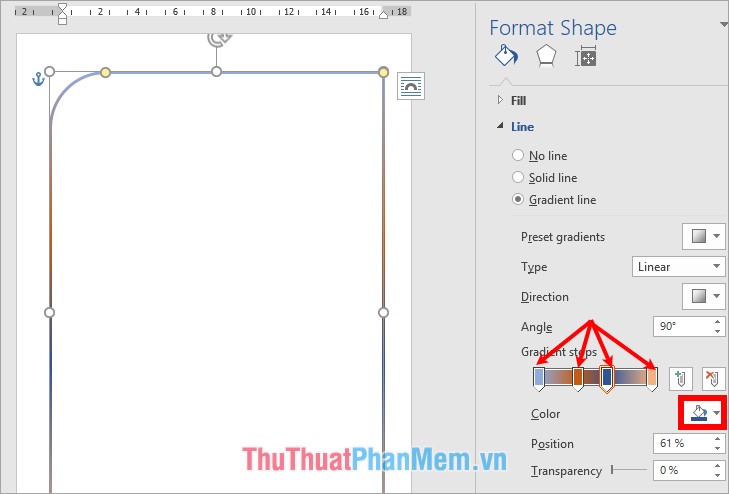
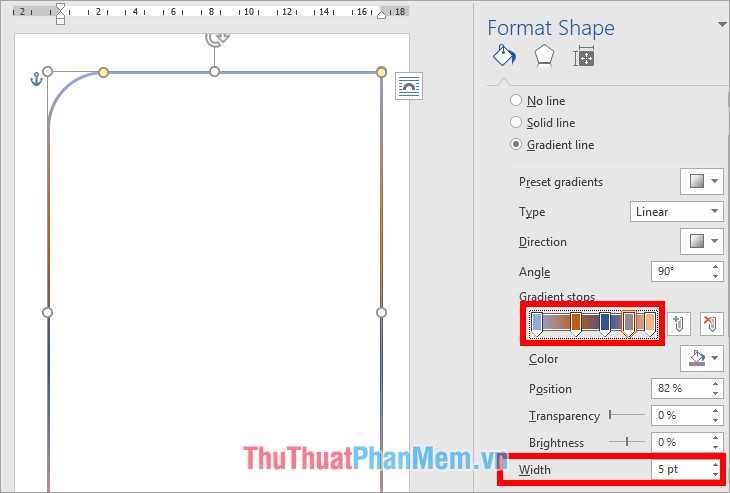
Hold the drag to the left and right to adjust the position for the border color in the Gradient stops , then adjust the border width in the Width section .
Step 4 : After you have completed the border frame for the leaflet, continue the contents. First, you need to design a title for the leaflet, you also select the shape in any Shapes section to highlight the title of the leaflet.
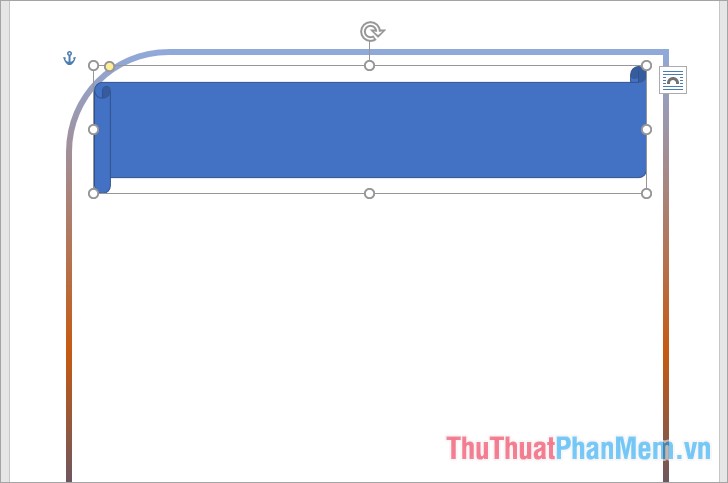
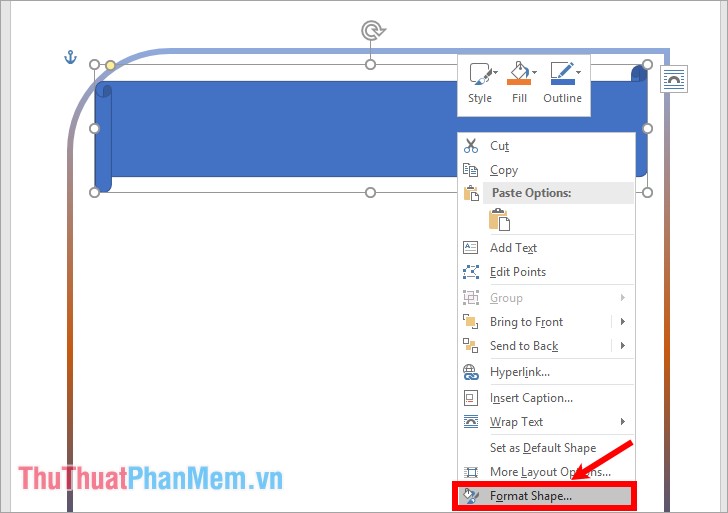
Right-click and choose shapes -> Format Shape, then edit the borders and fill the background color with similar shapes on step 3.
If you want to drop shadow for the frame you select the Effects icon, then select the type of shadow in the Presets.
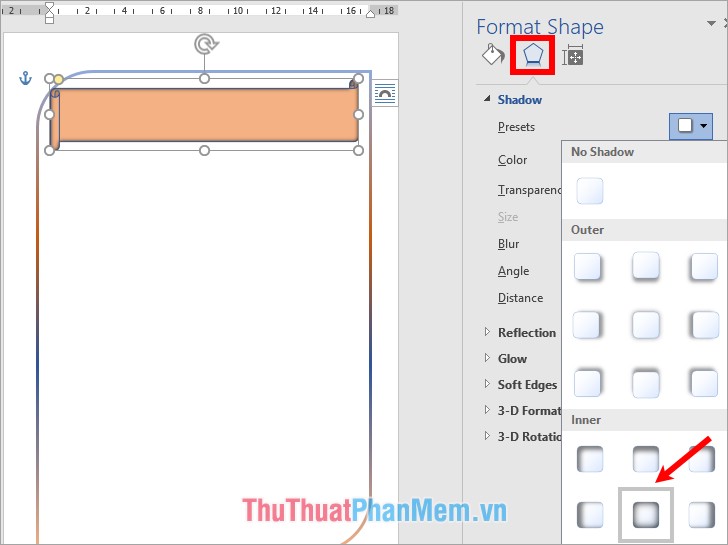
Step 5: Add a title to the leaflet by right-clicking on the puzzle and selecting Add text.
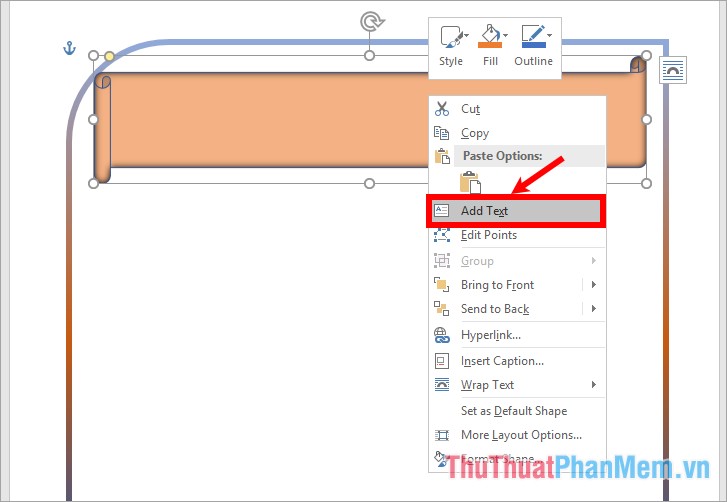
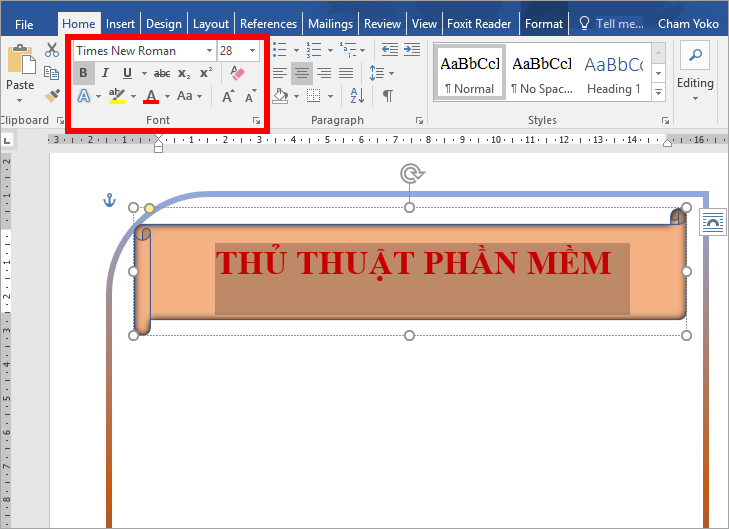
Enter the title for your flyer, your ad then you edit the font, font size font color in the Font tab Home tab .
& 
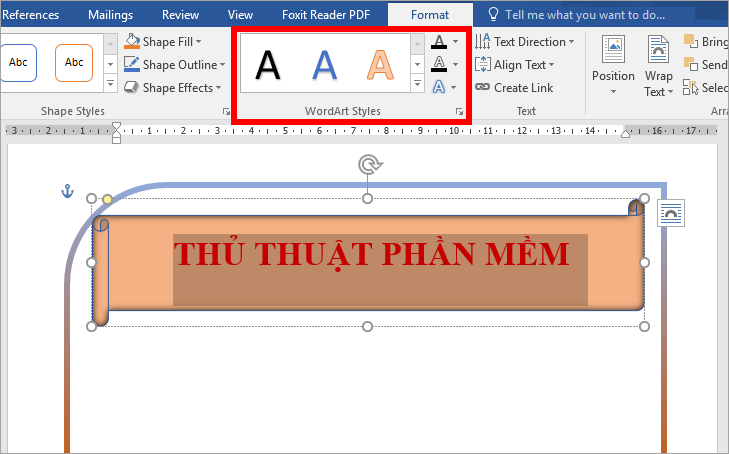
To write artistic words, choose Format -> WordArt Styles.
Also you can right-click on the shape and select Format Shape.
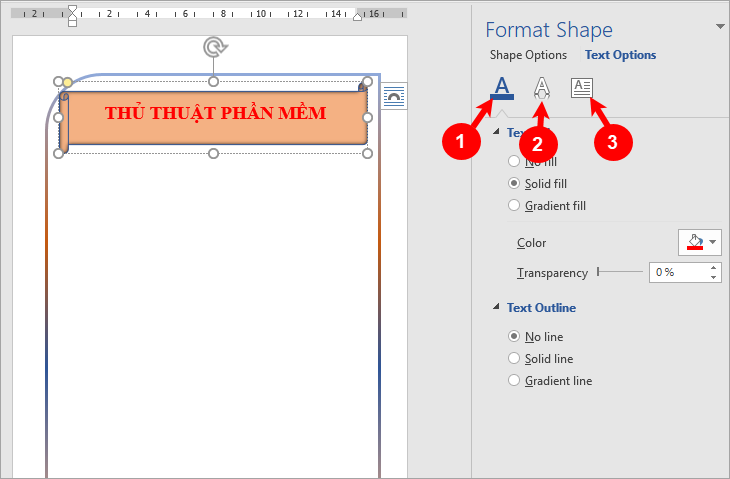
Format Shape appears on the right of you select Text Options , you can set the custom:
- (1) Text Fill & Outline : fill text and borders.
- (2) Text Effects : text effect.
- (3) Layout & Properties : word position.
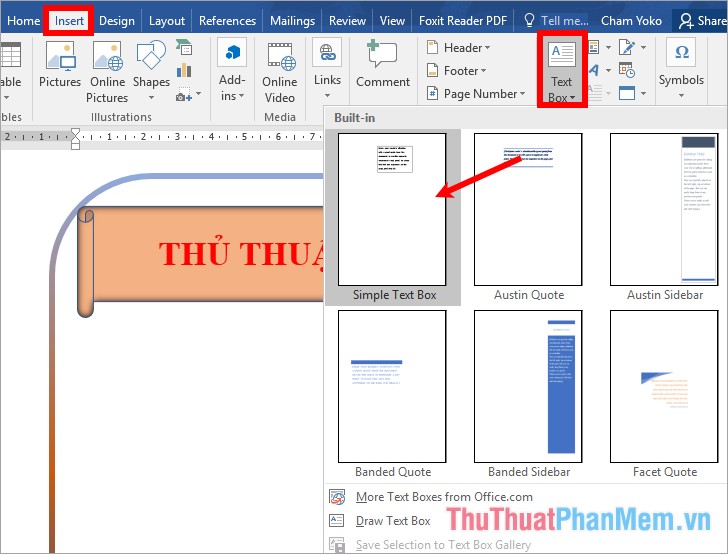
Step 6: You can design according to your imagination, next you can add a Text Box to add a description for the topic . Select Insert -> Text box -> Simple Text Box.
Appearing frame Text Box you can enter your description, highlight and edit the font, font style, font size, text color in the Font .
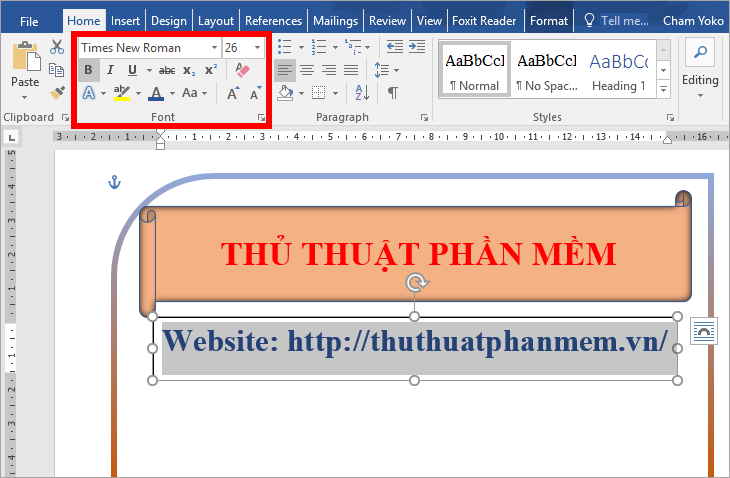
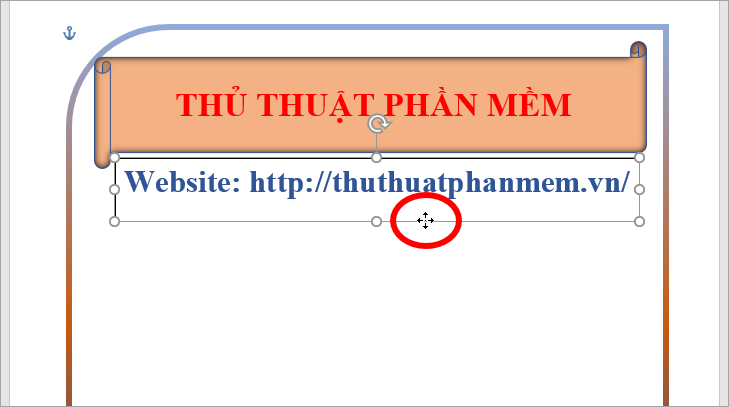
To move the Text Box, you place the cursor next to the Text Box , a 4-dimensional arrow icon appears, hold down the left mouse button and move to the position you want.
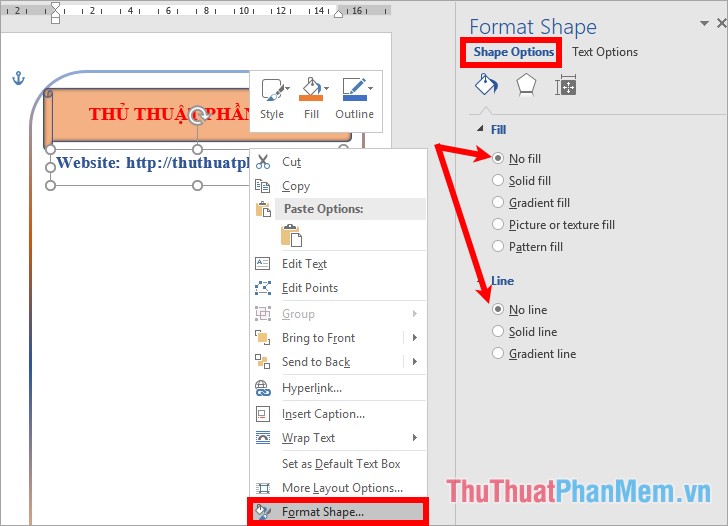
To remove the white background of the Text Box, right-click the Text Box and select Format Shape. Format Shape appears on the right, select No fill in the Fill section . If you want to remove the text box borders, then select No line in the Line section .
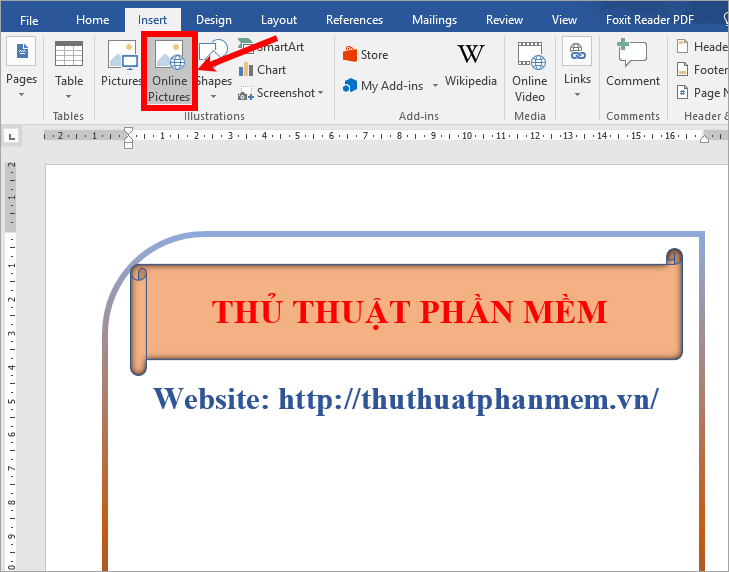
Step 7: To add pictures to leaflets, select Insert -> Pictures Online (online images) or you can choose Pictures if you want to get pictures from your computer.
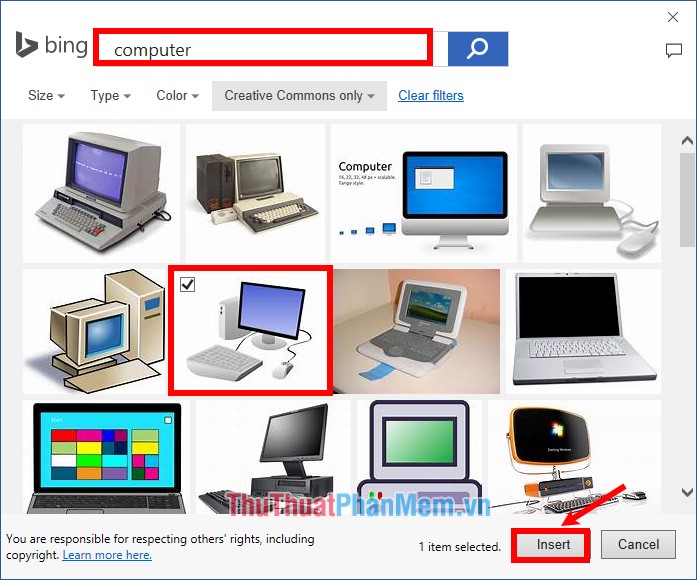
Enter a search keyword and select the image to add -> I nsert.
At this time the image will not display on the block of the leaflet you have created, right-click on the image and select Wraptext -> In font of Text.
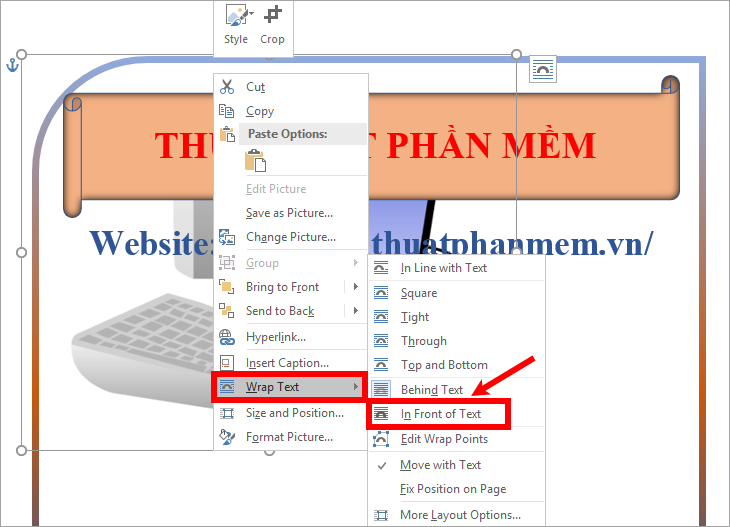
Click and hold on the image and drag it anywhere in the leaflet.
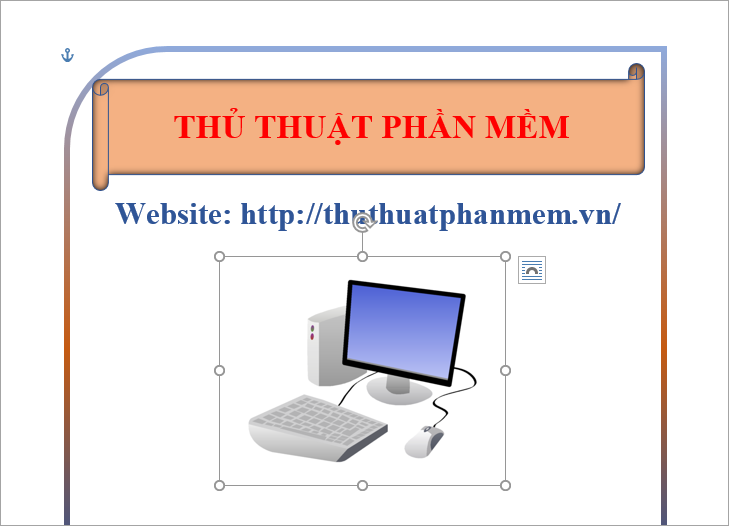
So you can add more images to your flyers as you like.
Step 8: You can add other content to the leaflet, and move the arrangement of logical data to complete your leaflet.
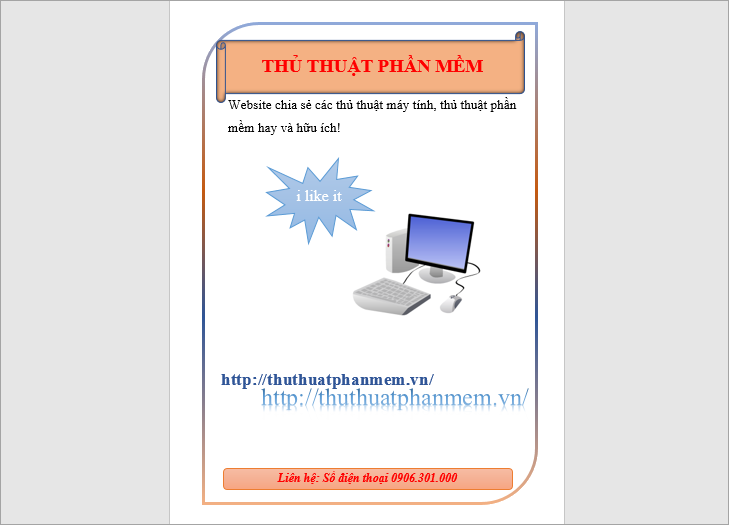
So you can design leaflets based on templates available in Word or you can use the tools in Word to design your own leaflets on your own. Hopefully with the instructions that the article will share you will get beautiful, unique and impressive flyers. Good luck!