How to Deauthorize iTunes
When you buy DRM-restricted music or Apps from the iTunes Store, you can only use the item on an authorized computer, iPod, iPhone or iPad. Apple limits you to 5 computers that can use an authorized item. This wikiHow teaches you how to....
Method 1 of 2:
Deauthorizing One Computer
-
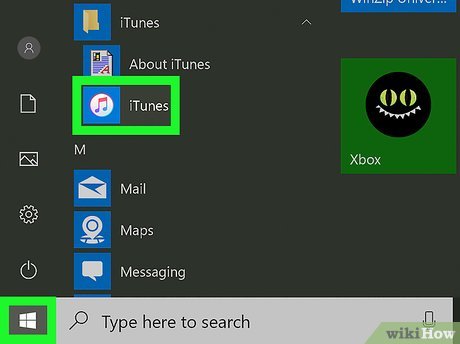
 Open iTunes, Apple Music, Apple TV, or Apple Books. If you're using the latest version of macOS, you'll need to deauthorize using Apple Music, Apple TV, or Apple Books. If you're using a PC or an earlier version of macOS, open iTunes.[1]
- If you no longer have access to the computer you want to deauthorize, you'll need to deauthorize all computers instead. See this method to learn how.
-
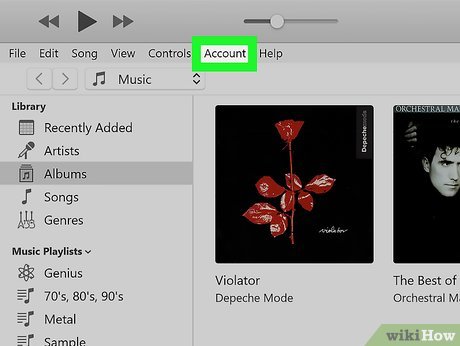
 Click the Account menu. It's in the menu bar that runs along the top of your Mac's screen, or at the top of the iTunes app on your PC.
 -
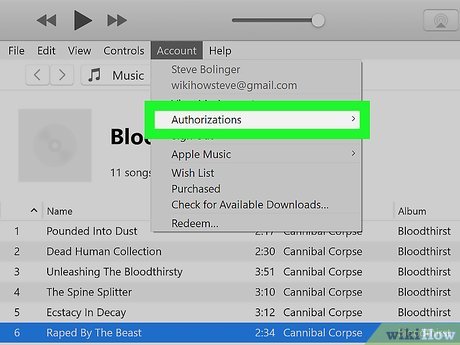 Select Authorizations on the menu. Another menu will expand.
 -
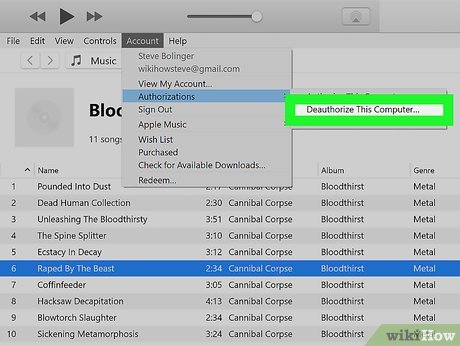 Click Deauthorize This Computer. It's the second option. A log-in window will appear.
 -
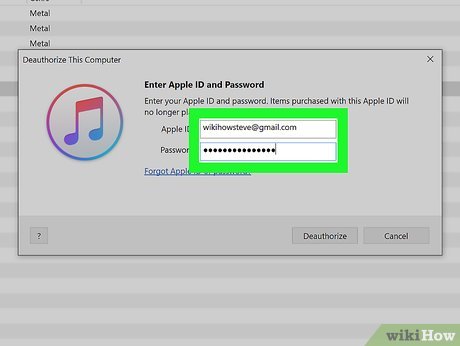 Enter your Apple ID and password to sign in. Once you're signed in, you'll see a confirmation window.
 -
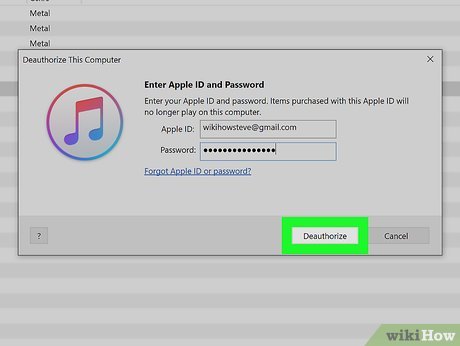 Click Deauthorize to confirm. This removes the current computer from your list of authorized computers.
Method 2 of 2:
Deauthorizing All Computers
-
 Open iTunes, Apple Music, Apple TV, or Apple Books. If you're using the latest version of macOS, you'll need to deauthorize using Apple Music, Apple TV, or Apple Books. If you're using a PC or an earlier version of macOS, open iTunes.
- This method is the only way to deauthorize computers that you no longer have access to.
- You can only perform this method once every 12 months.
-
 Click the Account menu. It's in the menu bar that runs along the top of your Mac's screen, or at the top of the iTunes app on your PC.
 -
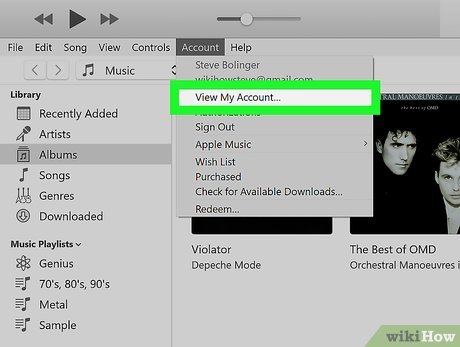
 Click View My Account on the menu. A login screen will appear.
 -
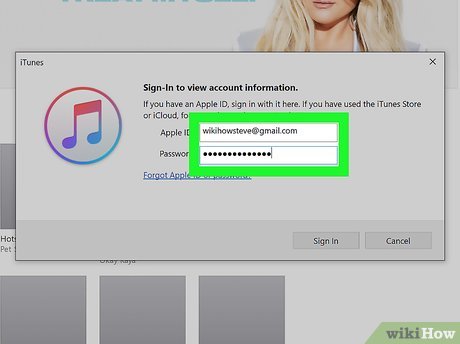 Verify your Apple ID password to continue. Once your password is accepted, you'll see the Account Information page.
 -
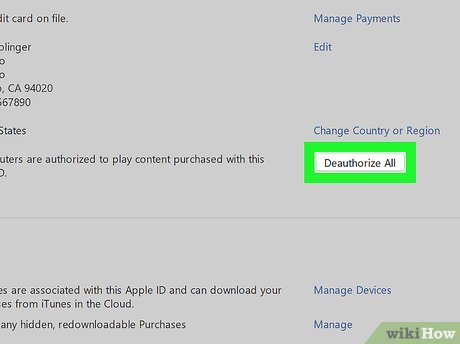 Click the Deauthorize All button. It's in the "Apple ID Summary" section, which is near the top of the page. You'll only see this button if you have authorized 2 or more computers.
 -
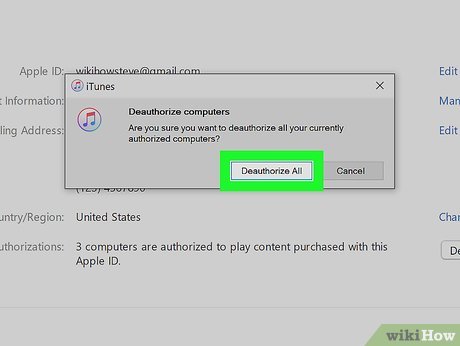 Follow the on-screen instructions to confirm. After deauthorizing all computers, you'll need to manually reauthorize the ones you still want to use to play protected songs, read protected books, or watch protected shows.