How to cut a circle image on Paint
Paint can cut images in different shapes, including circles.
Table of Contents
Crop images with different genres, crop photos by region, select or crop images in different shapes such as circles, heart shapes, etc. To crop photos you can use photo editing software such as crop photos in Photoshop, cut photos on PowerPoint, or simply use the Paint tool on a Windows computer to crop photos. Not only does it crop the image according to the selected area, but Paint also helps you crop the image in a circle. We can choose any shape or circle to crop the image according to the pre-patterned image, using the Shapes frames that Paint provides. The following article will guide you to read step by step the image cutting with the Paint tool on your computer.
- How to cut photos using Microsoft PowerPoint
- Photoshop CS: Cutting edges and creating photo frames (Part I)
- How to split photos with Photoshop
- How to combine photos in Photoshop from 2 different images
Video tutorial cut circular image on Paint
Instructions for cutting circular images on Paint
Step 1:
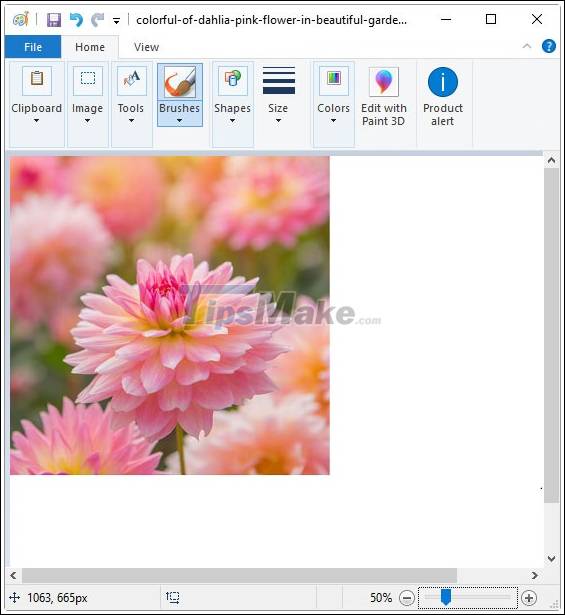
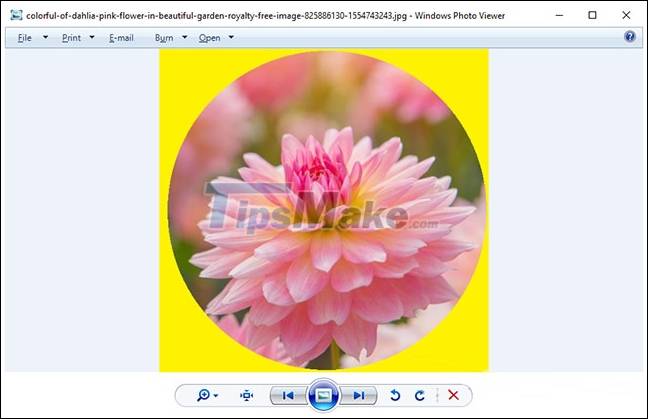
We open the image to be cut in Paint as usual.

Step 2:
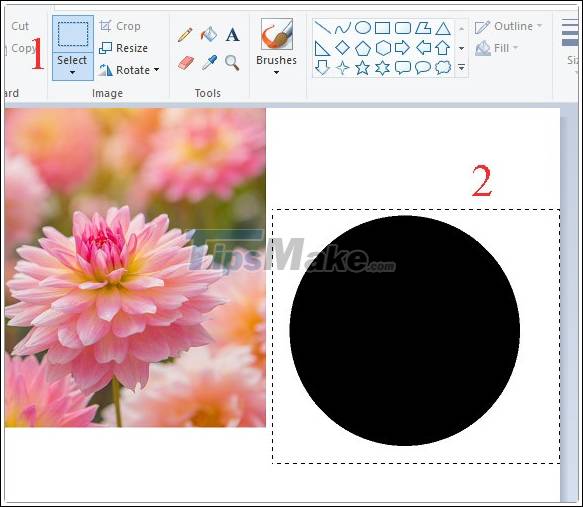
Then hover your mouse on the lower right corner of the image when a 2-way arrow appears and press and hold the mouse to drag to the right . Then the image area is expanded, the default is white. In case the large size image has no room to expand, click the minus sign in the lower right corner to minimize the image.
Step 3:
We then click on the Shapes section and select the oval in the displayed list. You can choose another picture according to your preference.
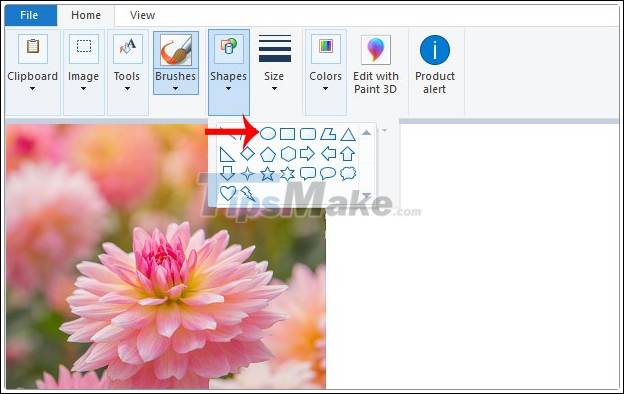
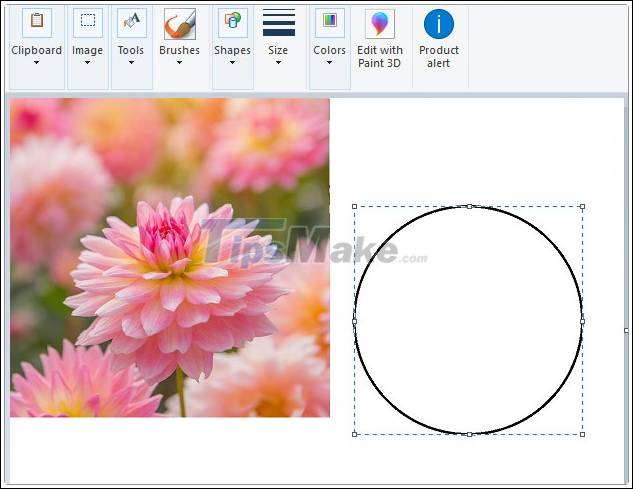
Next press and hold Shift and draw a circle on the white paper next to it. To press and hold the Shift key, the new ellipse becomes a circle. You have to release the mouse and release the Shift key.
Step 4:
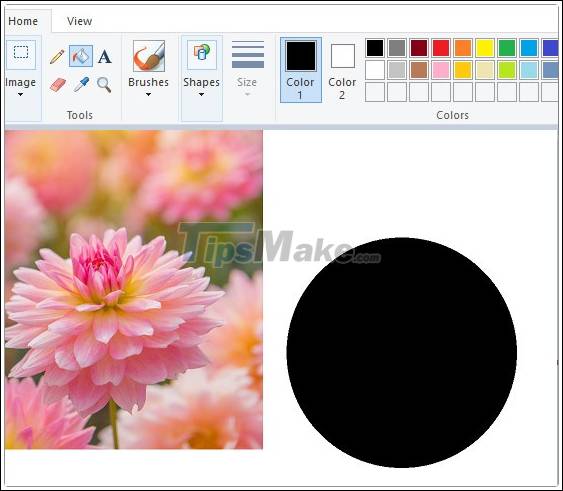
Users continue to click on the paint bucket icon and fill the color with the circle border, here is black to create a black circle as shown below.
Step 5:
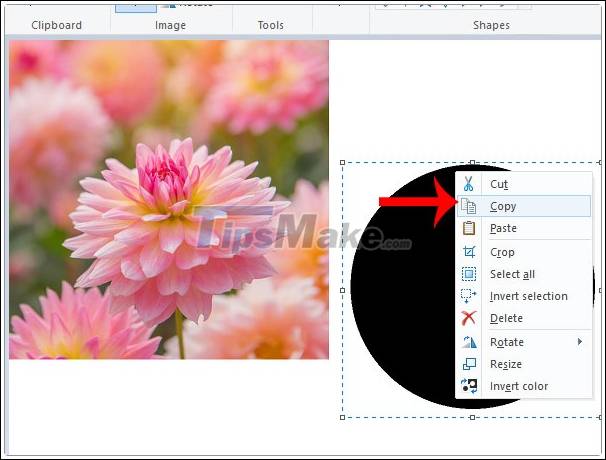
Continue clicking the Select icon and then select the Transparent selection section to create a transparent background for the next selected image area.

We click on the Select item above and circle the black circle as shown below.
Step 6:
Click on the circle selection and right-click and choose Copy to copy the area.
Look at the Colors section and change the Color 2 color to black as shown.

Click the Paste button in the toolbar above or press Ctrl + V to paste the circle anywhere.
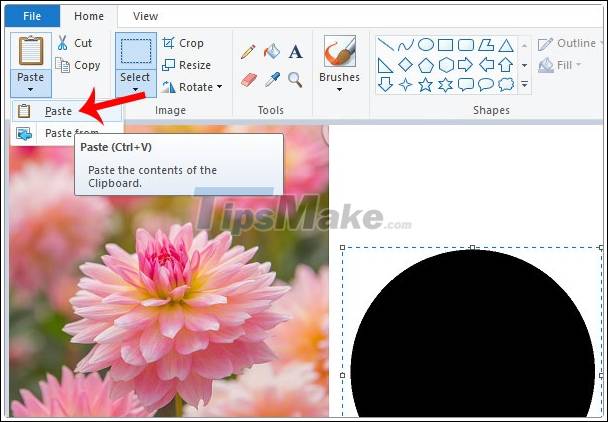
Then the circle frame is displayed in the image as below. You can move this frame to whatever position you want.

Step 7:
Click again on the Select item and then select the image to be cut , then click on the crop icon above.

The image display results have been narrowed according to the round frame as shown below.

Step 8:
So we cut the image in a circle. If the user wants to add color to the border of the image, select Color 1 to change the color and then click the paint bucket icon and fill the image.
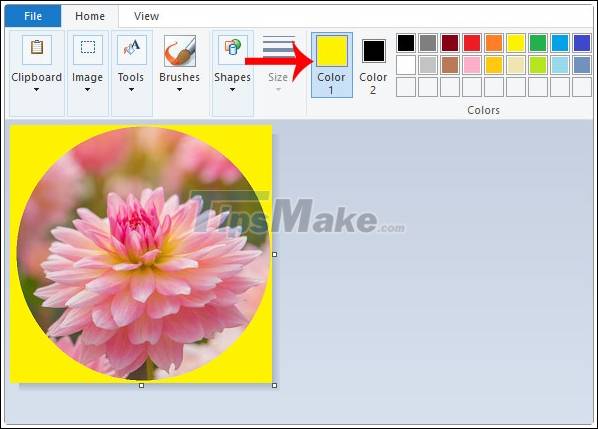
Then the image will have the color border as shown below. We can apply the fill color to the image when you crop the image with different frame styles.
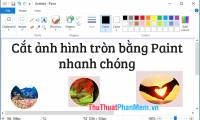
So you have finished cutting the image into a circle on Paint. We can change the circle frame to any other frame or add color to the canvas if you want.
I wish you all success!
Was this article helpful?
Your feedback helps us improve.
Related Articles
 Cut circle images with Paint simple and fast3 minutes read
 How to crop an image into a circle on Paint 3D3 minutes read
 How to Draw a Perfect Circle on Microsoft Paint2 minutes read
How to blur photos on Paint 3D2 minutes read
How to Draw a Perfect Circle on Microsoft Paint2 minutes read
How to blur photos on Paint 3D2 minutes read
 How to rotate an image in Paint2 minutes read
 How to crop an image into a circle in Photoshop3 minutes read
Reader Comments 0
Sign in with email or Google to join the discussion.